
It's hard to build data-intensive front-end applications such as dashboards and admin panels from the ground up without feature-rich and niche frameworks such as Refine and NextUI.
With Refine, you can bootstrap a project instantly using the refine.dev web platform or the command line tool and customize the template to meet the requirements of your project.
Any Refine project has built-in features for state management, routing, networking, authentication, and internationalization.
NextUI is a React library for building accessible UIs. You can use NextUI in a vanilla React project or React-based frameworks like Refine and Next.js. In this article, you will learn to build a React admin panel using Refine and NextUI components library.
 NextUI admin panel preview

What is Refine
As highlighted above, Refine is a React-based framework for building data-intensive front-end applications such as dashboards and admin panels. It is a feature-rich library with built-in support for routing, networking, authentication, state management, and internationalization.
Similarly, Refine has built-in support for integrating some of the commonest UI and design systems like Material UI, Ant design, Chakra UI, and Mantine.
All these built-in Refine features accelerate development speed, improve developer experience, and significantly reduce time to production. Check out the Refine documentation for more on what else it can do.
How to create a Refine application
You can create a Refine application either using the CLI or the Browser-based Scaffolder.
The Browser-based Scaffolder is an efficient tool that allows you to create Refine app seamlessly in your browser.
You can choose the libraries and frameworks you want to work with, and the tool will generate a boilerplate code for you.
For this tutorial, we'll be select the following options:
React Platform: Vite UI Framework: Headless Backend: REST API Authentication Provider: No Auth
 Create Refine project prompt
Once you've completed the steps, you'll have the ability to download your project
After creating the project, you can download it to your local machine. You may need to sign into the refine.new platform with your GitHub or Google account to build and download the project.
Then use the command below to install dependencies.
npm install
After installing dependencies, use the command below to launch the development server on localhost. You can then view the project in a web browser.
npm run dev
Once your project is successfully run, you will see the following page:
 Fresh Refine project structure
Tidy things up
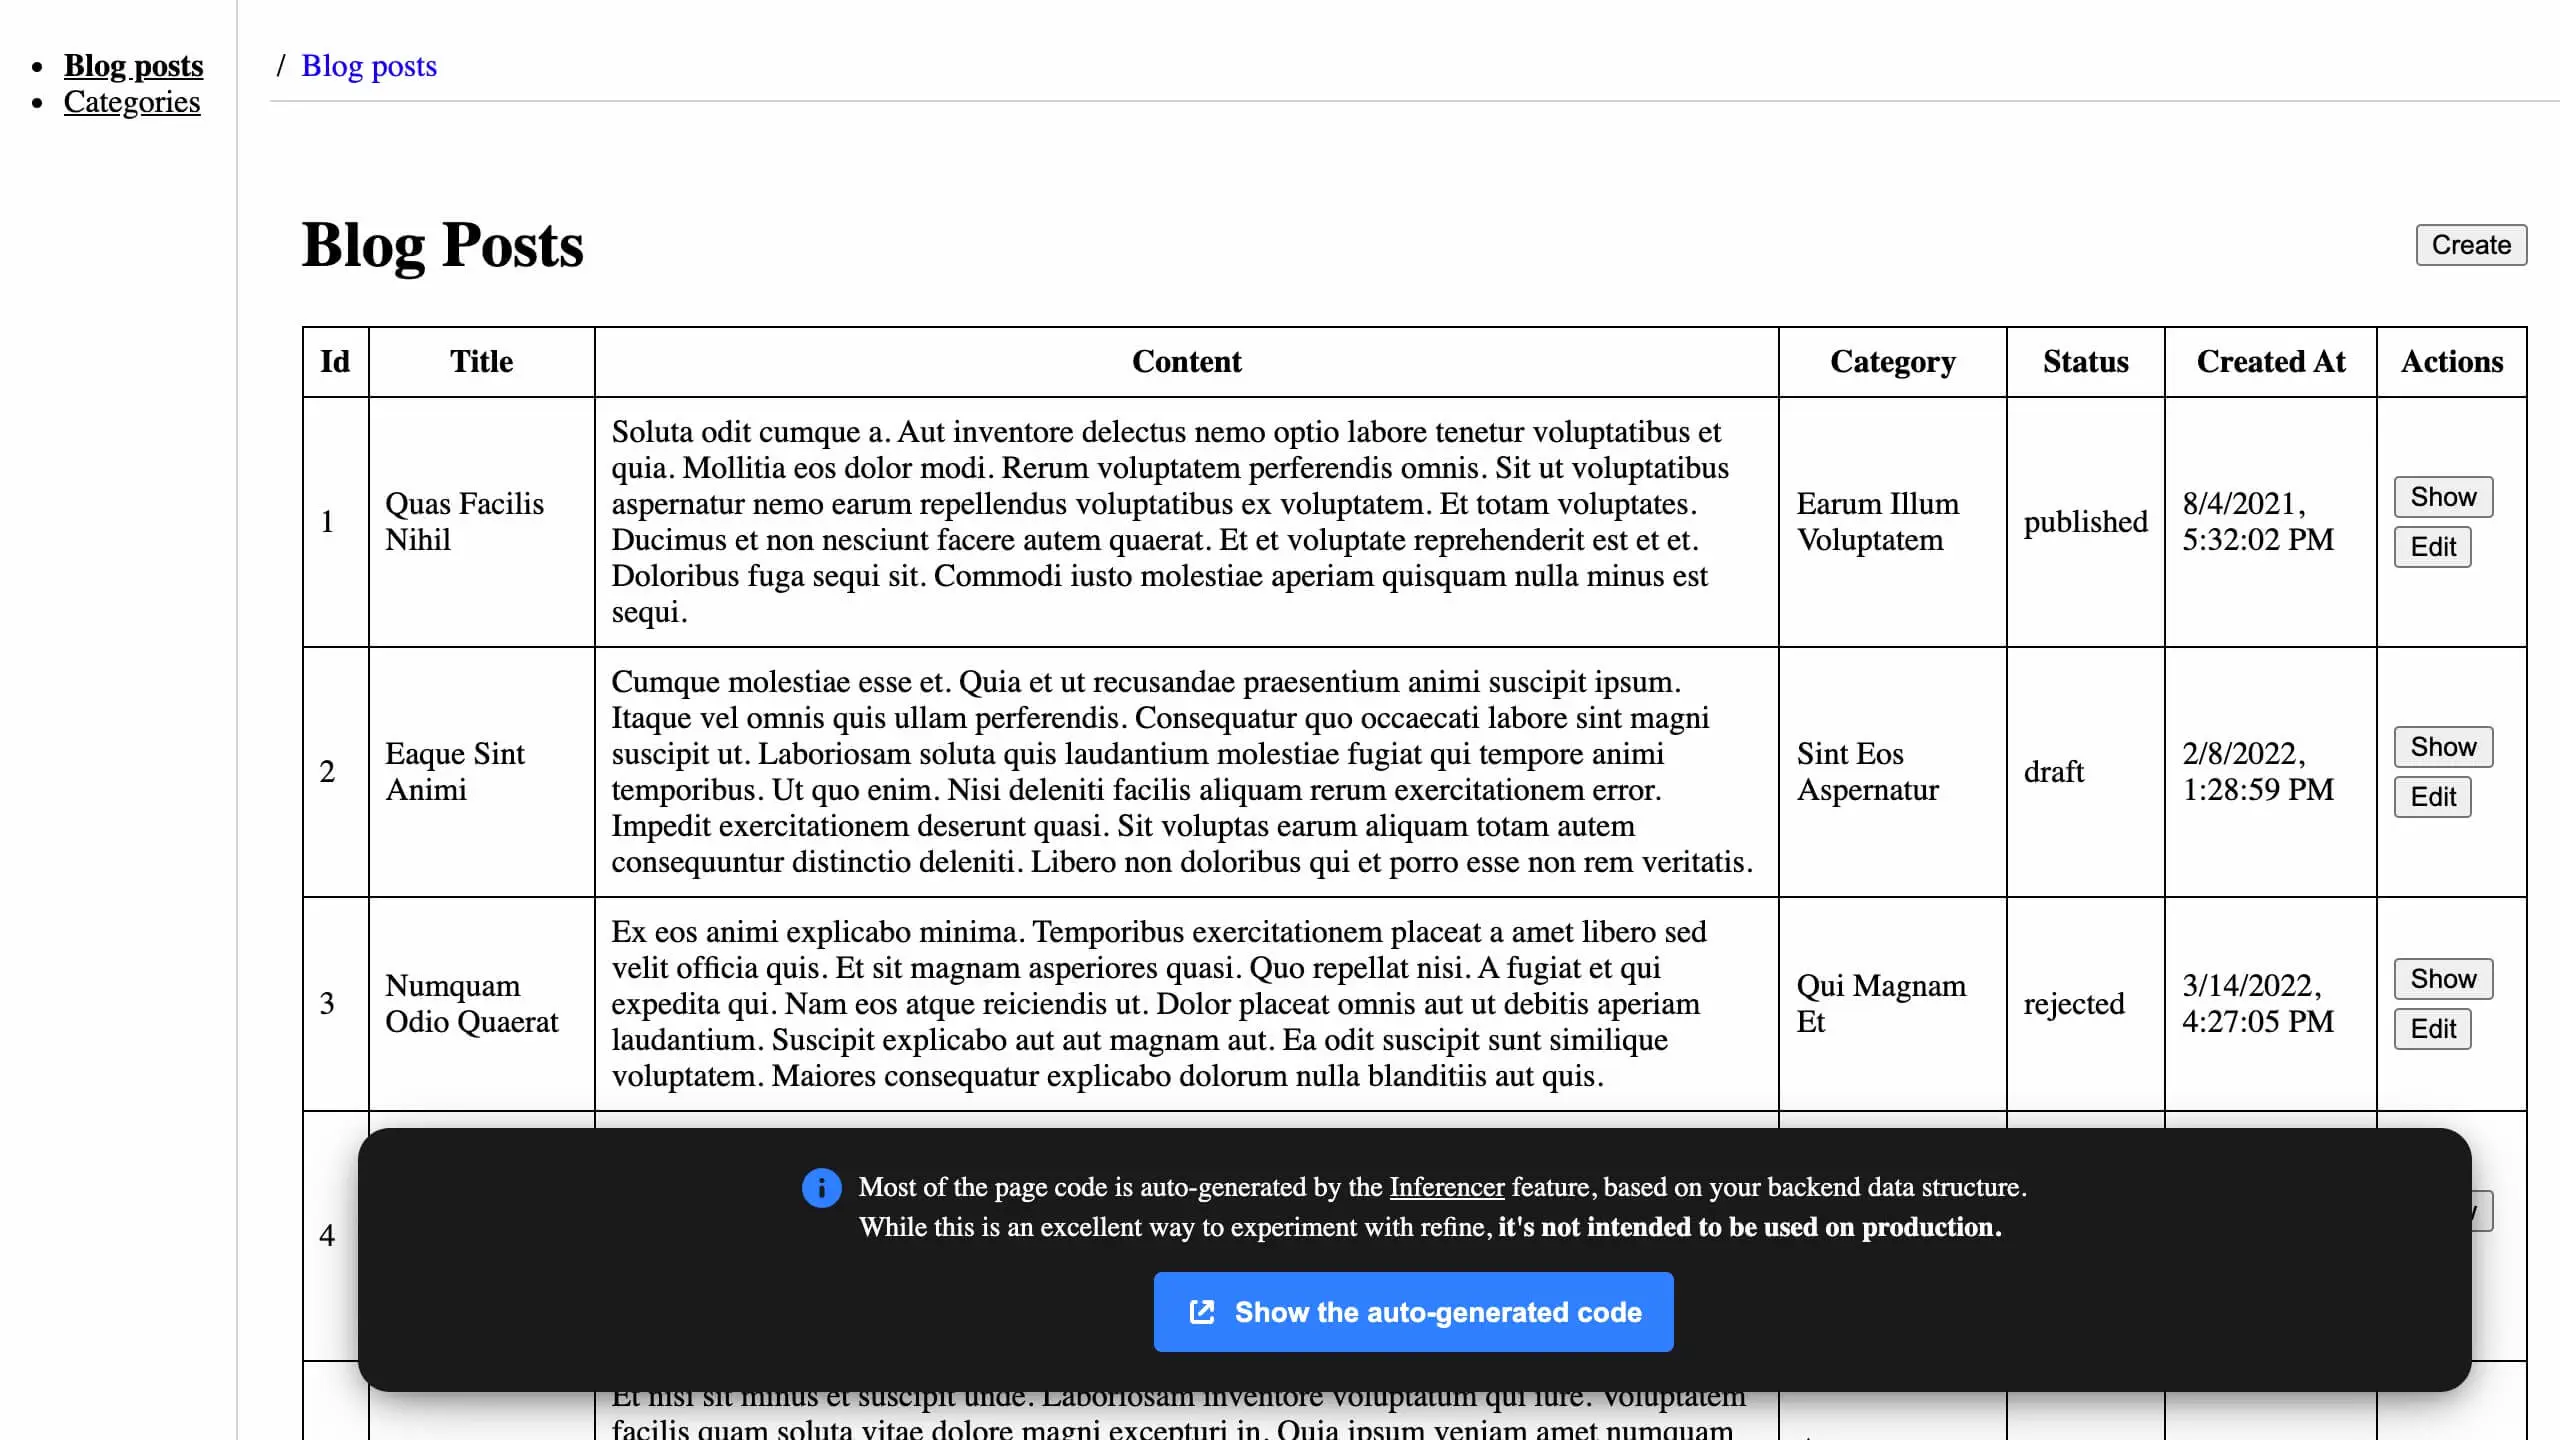
The Refine project we created above has a set of default styles in the src/App.css file, which will interfere with the NextUI styles. Therefore, you can delete the src/App.css file.
Similarly, we won't use the generated blog-posts pages. Therefore, you can delete the src/pages/blog-posts directory.
Finally, copy and paste the code below into the src/App.tsx file.
src/App.tsx
import { ErrorComponent, GitHubBanner, Refine } from "@refinedev/core";
import { RefineKbar, RefineKbarProvider } from "@refinedev/kbar";

import routerProvider, {
  DocumentTitleHandler,
  NavigateToResource,
  UnsavedChangesNotifier,
} from "@refinedev/react-router";
import dataProvider from "@refinedev/simple-rest";
import { useTranslation } from "react-i18next";
import { BrowserRouter, Outlet, Route, Routes } from "react-router-dom";
import { Layout } from "./components/layout";

import {
  CategoryCreate,
  CategoryEdit,
  CategoryList,
  CategoryShow,
} from "./pages/categories";

function App() {
  const { t, i18n } = useTranslation();

  const i18nProvider = {
    translate: (key: string, params: object) => t(key, params),
    changeLocale: (lang: string) => i18n.changeLanguage(lang),
    getLocale: () => i18n.language,
  };

  return (
    <BrowserRouter>
      <GitHubBanner />
      <RefineKbarProvider>
        <Refine
          dataProvider={dataProvider("https://api.finefoods.refine.dev")}
          i18nProvider={i18nProvider}
          routerProvider={routerProvider}
          resources={[
            {
              name: "categories",
              list: "/categories",
              create: "/categories/create",
              edit: "/categories/edit/:id",
              show: "/categories/show/:id",
              meta: {
                canDelete: true,
              },
            },
          ]}
          options={{
            syncWithLocation: true,
            warnWhenUnsavedChanges: true,
          }}
        >
          <Routes>
            <Route
              element={
                <Layout>
                  <Outlet />
                </Layout>
              }
            >
              <Route path="/categories">
                <Route index element={<CategoryList />} />
                <Route path="create" element={<CategoryCreate />} />
                <Route path="edit/:id" element={<CategoryEdit />} />
                <Route path="show/:id" element={<CategoryShow />} />
              </Route>
              <Route path="*" element={<ErrorComponent />} />
            </Route>
          </Routes>

          <RefineKbar />
          <UnsavedChangesNotifier />
          <DocumentTitleHandler />
        </Refine>
      </RefineKbarProvider>
    </BrowserRouter>
  );
}

export default App;
What is NextUI
.jpeg?fm=webp&auto=format) NextUI admin panel layout
NextUI admin panel layoutNextUI is a fully-featured React UI library for building accessible UI in React. It is built on top of React Aria and Tailwind CSS. It uses Framer motion internally for animating some of the built-in components.
You can use NextUI in a vanilla React project or React frameworks like Next.js and refine.
How to set up NextUI in a Refine application
Install NextUI and its dependencies
Install NextUI and its dependencies from the NPM package registry to start using it in a Refine application. Internally, NextUI uses Tailwind CSS and framer-motion for animation.
npm i @nextui-org/react framer-motion && npm install -D tailwindcss postcss autoprefixer
The command above will install NextUI, framer-motion, and Tailwind CSS and its peer dependencies.
We will also use heroicons in this article. Install it using the command below.
npm install @heroicons/react
Add Tailwind CSS configuration file
After successfully installing Tailwind CSS, use the command below to create a tailwind.config.js file at the root of your project directory.
npx tailwindcss init -p
Copy and paste the code below into the tailwind.config.js file you have just created.
const { nextui } = require("@nextui-org/react");

/** @type {import('tailwindcss').Config} */
export default {
  content: [
    "./index.html",
    "./src/**/*.{js,ts,jsx,tsx}",
    "./node_modules/@nextui-org/theme/dist/**/*.{js,ts,jsx,tsx}",
  ],
  theme: {
    extend: {},
  },
  darkMode: "class",
  plugins: [nextui()],
};
Add Tailwind CSS directives
Create the src/index.css file and add the following Tailwind CSS directives.
@tailwind base;
@tailwind components;
@tailwind utilities;
Be sure to import the file you created above into the src/index.tsx file, like in the example below.
import React from "react";
import { createRoot } from "react-dom/client";

import App from "./App";
import "./i18n";
import "./index.css";

const container = document.getElementById("root") as HTMLElement;
const root = createRoot(container);

root.render(
  <React.StrictMode>
    <React.Suspense fallback="loading">
      <App />
    </React.Suspense>
  </React.StrictMode>,
);
Set up NextUI provider
After installing and configuring NextUI and its dependencies, set up NextUIProvider at the root of your Refine project. Apply the following changes to the src/index.tsx file.
import React from "react";
import { createRoot } from "react-dom/client";

import App from "./App";
import "./i18n";
import "./index.css";
import { NextUIProvider } from "@nextui-org/react";

const container = document.getElementById("root") as HTMLElement;
const root = createRoot(container);

root.render(
  <React.StrictMode>
    <NextUIProvider>
      <React.Suspense fallback="loading">
        <App />
      </React.Suspense>
    </NextUIProvider>
  </React.StrictMode>,
);
That is everything you need to start using NextUI in your Refine application. You may need to restart the development server after making the above changes.
How to build React admin dashboard with NextUI and Refine
In this section, we will use the Refine app we created above as a template to build a simple React admin dashboard with NextUI and refine. This section assumes you have installed NextUI and its dependencies. We will install additional packages as we build this project.
The Refine team has put together several APIs that you can experiment with when you're learning refine. In this article, we will create an admin panel using the Fine foods API. You can click the link to explore the API resources and endpoints available.
The dashboard we want to create will track the key performance indicators for a restaurant business against set targets. The key performance indicators comprise the restaurant's weekly revenue, weekly customers, and weekly orders.
Before we start building the dashboard, let's declare the interfaces that we will use throughout this application. They define the shape of our data. Create the src/interfaces/index.d.ts file.
Copy and paste the code below into it.
src/interfaces/index.d.ts
export interface IOrder {
  id: number;
  user: IUser;
  createdAt: string;
  status: IOrderStatus;
  address: IAddress;
  amount: number;
}

export interface IUser {
  id: number;
  fullName: string;
  gender: string;
  gsm: string;
  createdAt: string;
  addresses: IAddress[];
}

export interface IOrderStatus {
  id: number;
  text: "Pending" | "Ready" | "On The Way" | "Delivered" | "Cancelled";
}

export interface IAddress {
  text: string;
  coordinate: [string, string];
}

export interface IChartDatum {
  date: string;
  value: string;
}

export interface IChart {
  data: IChartDatum[];
  total: number;
  trend: number;
}

export interface IProduct {
  id: number;
  name: string;
  isActive: boolean;
  description: string;
  createdAt: string;
  price: number;
  category: ICategory;
  stock: number;
  images: IImage[];
}

export interface IImage {
  url: string;
}

export interface ICategory {
  id: number;
  title: string;
  isActive: boolean;
  cover: string;
}

export interface IProductCategory {
  value: number;
  label: string;
}

export interface IDeleteModalProps {
  isOpen: boolean;
  warningMessage: string;
  onOpenChange: () => void;
  onDelete: () => void;
}

interface IDisplayAreaGraphProps {
  data: IChartDatum[];
  stroke: string;
  fill: string;
}

interface IDisplayBarChartProps {
  data: IChartDatum[];
  fill: string;
}
Create key performance indicator card
In this section, we will represent the key performance indicators(KPIs) we are tracking on a card. We will have three cards for the weekly revenue, weekly customers, and weekly orders.
We need to create a KpiCard component and reuse it for all three performance indicators. Create the src/components/kpiCard/index.tsx file. Copy and paste the code below into it. Be aware that the kpiCard directory doesn't exist yet. You need to create it yourself.
src/components/kpiCard/index.tsx
import { Progress, Card, Chip, Spinner } from "@nextui-org/react";
import { ArrowUpIcon, ArrowDownIcon } from "@heroicons/react/20/solid";
type DeltaType =
  | "warning"
  | "default"
  | "primary"
  | "secondary"
  | "success"
  | "danger";

const getColor = (num: number): DeltaType => {
  if (num < 20) return "danger";
  if (num < 50) return "warning";
  if (num === 50) return "default";
  if (num < 75) return "primary";
  if (num < 90) return "secondary";
  return "success";
};

const calcPercent = (num: number, den: number): number => {
  return Math.round((num / den) * 100);
};

export const KpiCard = ({
  title,
  total,
  target,
  trend,
  formattedTotal,
  formattedTarget,
}: {
  title: string;
  total: number;
  target: number;
  trend: number;
  formattedTotal: string;
  formattedTarget: string;
}) => {
  const percent = calcPercent(trend, total);
  const color = getColor(percent);
  return (
    <Card className="p-5">
      <div>
        <div className="mb-10 flex justify-between">
          <div>
            <p>{title}</p>
            <h1 className="text-lg font-bold">{formattedTotal}</h1>
          </div>
          {Number.isNaN(percent) ? (
            <Spinner />
          ) : (
            <Chip
              color={color}
              startContent={
                percent < 0 ? (
                  <ArrowDownIcon width={12} />
                ) : (
                  <ArrowUpIcon width={12} />
                )
              }
            >
              {`${percent}%`}
            </Chip>
          )}
        </div>
        <Progress
          label={`${formattedTotal} (Target: ${formattedTarget})`}
          size="sm"
          value={total}
          maxValue={target}
          color={color}
          showValueLabel={true}
          className="max-w-md"
        />
      </div>
    </Card>
  );
};
In the code above, we imported the built-in NextUI components and applied Tailwind CSS classes. For more about the components we used in the code above, check the NextUI documentation.
The above component will look like the image below after rendering.
 NextUI KPI card component
We will use dayjs to query the data for the last one week from the fake REST API. Therefore, install dayjs from the NPM package registry like so:
npm install dayjs
We need to fetch the data for the key performance indicators from the database and pass them as props to the KpiCard component we created above.
Create the src/pages/dashboard/DashboardPage.tsx file. Copy and paste the code below into it. Be aware that the dashboard directory doesn't exist. You need to create it yourself.
src/pages/dashboard/DashboardPage.tsx
import React from "react";
import { Tabs, Tab, Card, CardBody } from "@nextui-org/react";
import { useApiUrl, useCustom } from "@refinedev/core";
import { IChart } from "../../interfaces";

import { KpiCard } from "../../components/kpiCard";
import dayjs from "dayjs";

const query = {
  start: dayjs().subtract(7, "days").startOf("day"),
  end: dayjs().startOf("day"),
};

const currencyFormatter = Intl.NumberFormat("en", {
  style: "currency",
  currency: "USD",
});
const numberFormatter = Intl.NumberFormat("en");

export const DashboardPage: React.FC = () => {
  const API_URL = useApiUrl();

  const { data: dailyRevenue } = useCustom<IChart>({
    url: `${API_URL}/dailyRevenue`,
    method: "get",
    config: {
      query,
    },
  });

  const { data: dailyOrders } = useCustom<IChart>({
    url: `${API_URL}/dailyOrders`,
    method: "get",
    config: {
      query,
    },
  });

  const { data: newCustomers } = useCustom<IChart>({
    url: `${API_URL}/newCustomers`,
    method: "get",
    config: {
      query,
    },
  });

  return (
    <main className="mt-5 flex w-full flex-col gap-3">
      <h1 className="font-bold">Dashboards</h1>
      <div className="grid grid-cols-2 justify-items-stretch gap-4 md:grid-cols-3">
        <KpiCard
          title="Weekly Revenue"
          total={dailyRevenue?.data.total ?? 0}
          trend={dailyRevenue?.data.trend ?? 0}
          target={10_500}
          formattedTotal={`${currencyFormatter.format(
            dailyRevenue?.data.total ?? 0,
          )}`}
          formattedTarget={`${currencyFormatter.format(10_500)}`}
        />
        <KpiCard
          title="Weekly Orders"
          total={dailyOrders?.data.total ?? 0}
          trend={dailyOrders?.data.trend ?? 0}
          target={500}
          formattedTotal={`${numberFormatter.format(
            dailyOrders?.data.total ?? 0,
          )}`}
          formattedTarget={`${numberFormatter.format(500)}`}
        />
        <KpiCard
          title="New Customers"
          total={newCustomers?.data.total ?? 0}
          trend={newCustomers?.data.trend ?? 0}
          target={200}
          formattedTotal={`${numberFormatter.format(
            newCustomers?.data.total ?? 0,
          )}`}
          formattedTarget={`${numberFormatter.format(200)}`}
        />
      </div>
    </main>
  );
};
You can now create the src/pages/dashboard/index.ts file and export the above component, like in the example below.
export { DashboardPage } from "./DashboardPage";
Finally, add the dashboard resource to the <Refine /> component. Add the highlighted changes to the src/App.tsx file.
src/App.tsx
...

import { DashboardPage } from "./pages/dashboard";
import {
  CategoryCreate,
  CategoryEdit,
  CategoryList,
  CategoryShow,
} from "./pages/categories";

function App() {

..


  return (
    <BrowserRouter>
      <RefineKbarProvider>
        <Refine
          dataProvider={dataProvider("https://api.finefoods.refine.dev")}
          routerProvider={routerProvider}
          resources={[
            {
              name: "dashboard",
              list: "/dashboard",
            },
            ...
          ]}
          options={{
            syncWithLocation: true,
            warnWhenUnsavedChanges: true,
          }}
        >
          <Routes>
            <Route
              element={
                <Layout>
                  <Outlet />
                </Layout>
              }
            >
              <Route
                index
                element={<NavigateToResource resource="dashboard" />}
              />
              <Route path="/dashboard">
                <Route index element={<DashboardPage />} />
              </Route>
              ...
            </Route>
          </Routes>

          <RefineKbar />
          <UnsavedChangesNotifier />
          <DocumentTitleHandler />
        </Refine>
      </RefineKbarProvider>
    </BrowserRouter>
  );
}

export default App;
The three KpiCard components we rendered in the above component will look like the image below.
 NextUI KPI cards row
Represent the key performance indicators using charts
Similar to the key performance indicator card we created above, we shall represent the data we fetched from the API using charts. We will use an area graph to represent the weekly sales and new customers and a bar chart to represent the weekly orders. You can use a different chart if you wish.
However, NextUI doesn't have a built-in charts component. We will use Recharts instead. Recharts is a third-party package. Therefore, we need to install it from the NPM package registry using the command below.
npm install recharts
After successfully installing Recharts, create the src/components/charts/DisplayBarChart.tsx file. Copy and paste the code below into it. The charts directory doesn't exist yet. You need to create it yourself.
import React from "react";
import {
  BarChart,
  Bar,
  XAxis,
  YAxis,
  CartesianGrid,
  Tooltip,
  ResponsiveContainer,
} from "recharts";

import { IDisplayBarChartProps } from "../../interfaces";

export const formatDate = new Intl.DateTimeFormat("en-US", {
  month: "short",
  year: "numeric",
  day: "numeric",
});

export const DisplayBarChart: React.FC<IDisplayBarChartProps> = ({
  data,
  fill,
}) => {
  const transformedData = data.map(({ date, value }) => ({
    date: formatDate.format(new Date(date)),
    value,
  }));

  return (
    <ResponsiveContainer aspect={3.5}>
      <BarChart data={transformedData}>
        <CartesianGrid strokeDasharray="3 3" />
        <XAxis dataKey="date" />
        <YAxis dataKey="value" />
        <Tooltip />
        <Bar dataKey="value" fill={fill} />
      </BarChart>
    </ResponsiveContainer>
  );
};
Similarly, create the src/components/charts/DisplayAreaGraph.tsx file. Copy and paste the code below into it. The DisplayAreaGraph.tsx file contains the code for representing the revenue and customer data using area graphs.
import React from "react";
import {
  AreaChart,
  Area,
  XAxis,
  YAxis,
  CartesianGrid,
  Tooltip,
  ResponsiveContainer,
} from "recharts";

import { IDisplayAreaGraphProps } from "../../interfaces";
import { formatDate } from "./DisplayBarChart";

export const DisplayAreaGraph: React.FC<IDisplayAreaGraphProps> = ({
  data,
  stroke,
  fill,
}) => {
  const transformedData = data.map(({ date, value }) => ({
    date: formatDate.format(new Date(date)),
    value,
  }));

  return (
    <ResponsiveContainer aspect={3.5}>
      <AreaChart data={transformedData}>
        <CartesianGrid strokeDasharray="3 3" />
        <XAxis dataKey="date" />
        <YAxis dataKey="value" />
        <Tooltip label="Daily Revenue" />
        <Area type="monotone" dataKey="value" stroke={stroke} fill={fill} />
      </AreaChart>
    </ResponsiveContainer>
  );
};
Finally, create the src/components/charts/index.ts file. Copy and paste the exports below into it.
export { DisplayAreaGraph } from "./DisplayAreaGraph";
export { DisplayBarChart } from "./DisplayBarChart";
We need to import the above components and render them in the dashboard component. Add the following highlighted codes to the src/pages/dashboard/DashboardPage.tsx file.
src/pages/dashboard/DashboardPage.tsx
...
import { DisplayAreaGraph, DisplayBarChart } from "../../components/charts";
import dayjs from "dayjs";

const query = {
  start: dayjs().subtract(7, "days").startOf("day"),
  end: dayjs().startOf("day"),
};

const currencyFormatter = Intl.NumberFormat("en", {
  style: "currency",
  currency: "USD",
});
const numberFormatter = Intl.NumberFormat("en");

export const DashboardPage: React.FC = () => {
  const API_URL = useApiUrl();

  const { data: dailyRevenue } = useCustom<IChart>({
    url: `${API_URL}/dailyRevenue`,
    method: "get",
    config: {
      query,
    },
  });

  const { data: dailyOrders } = useCustom<IChart>({
    url: `${API_URL}/dailyOrders`,
    method: "get",
    config: {
      query,
    },
  });

  const { data: newCustomers } = useCustom<IChart>({
    url: `${API_URL}/newCustomers`,
    method: "get",
    config: {
      query,
    },
  });

  return (
    <main className="flex w-full flex-col mt-5 gap-3">
      <h1 className="font-bold">Dashboards</h1>
      <div className="grid grid-cols-2 md:grid-cols-3 gap-4 justify-items-stretch">
      ...
      </div>
      <Card className="p-5">
        <Tabs aria-label="Options" className="gap-0">
          <Tab key="revenue" title="Revenue">
            <Card shadow="none" radius="none">
              <CardBody>
                <DisplayAreaGraph data={dailyRevenue?.data?.data ?? []} stroke="#8884d8" fill="#cfeafc" />
              </CardBody>
            </Card>
          </Tab>
          <Tab key="orders" title="Orders">
            <Card shadow="none" radius="none">
              <CardBody>
                <DisplayBarChart data={dailyOrders?.data?.data ?? []} fill="#ffce90" />{" "}
              </CardBody>
            </Card>
          </Tab>
          <Tab key="customers" title="Customers">
            <Card shadow="none" radius="none">
              <CardBody>
                <DisplayAreaGraph data={newCustomers?.data?.data ?? []} stroke="#00bd56" fill="#ccf3f3" />{" "}
              </CardBody>
            </Card>
          </Tab>
        </Tabs>
      </Card>
    </main>
  );
};
The Revenue chart will look like the image below after rendering.
 Revenue area chart
The Orders bar chart will look like the image below after rendering.
 Orders bar chart
Similarly, the Customer chart will look like the image below after rendering.
 New customers area chart
Represent the recent sales in a table
Similar to the previous section, let's represent the recent sales of the restaurant business in a table. A user can search the table using keywords and filter it in ascending or descending order.
Create the src/components/table/RecentSalesTable.tsx file. Copy and paste the code below into it. The table directory doesn't exist yet. You need to first create it.
src/components/table/RecentSalesTable.tsx
import {
  Table,
  TableHeader,
  TableColumn,
  TableBody,
  TableRow,
  TableCell,
  Input,
  Button,
  Chip,
  Pagination,
  SortDescriptor,
  Dropdown,
  DropdownTrigger,
  DropdownMenu,
  DropdownItem,
} from "@nextui-org/react";

import { useTable, getDefaultFilter, CrudSort } from "@refinedev/core";
import { IOrder } from "../../interfaces";
import { useCallback, useState } from "react";
import { MagnifyingGlassIcon } from "@heroicons/react/24/outline";

const columns = [
  { header: "Id", key: "id", sortable: true },
  { header: "Amount", key: "amount", sortable: true },
  { header: "Ordered By", key: "user", sortable: true },
  { header: "Gender", key: "gender", sortable: true },
  { header: "Tel", key: "gsm", sortable: false },
  { header: "Delivery Address", key: "address", sortable: true },
  { header: "Delivery Status", key: "status", sortable: true },
  { header: "Created At", key: "createdAt", sortable: false },
];

export const formatCurrency = (value: number) => {
  return value.toLocaleString("en-US", {
    style: "currency",
    currency: "USD",
  });
};

const formatDateTime = (value: string) => {
  return new Date(value).toLocaleString("en-US", {
    month: "short",
    year: "numeric",
    day: "numeric",
  });
};

const getChipColor = (status: number) => {
  // Order is Pending
  if (status === 1) return "default";
  // Order is Ready
  if (status === 2) return "secondary";
  // Order is on its way
  if (status === 3) return "primary";
  // Order has been delivered
  if (status === 4) return "success";
  // Order has been cancelled
  if (status === 5) return "danger";
  // Status is unknown
  return "warning";
};

export const RecentSalesTable = () => {
  const {
    result,
    pageCount,
    currentPage,
    pageSize,
    sorters,
    filters,
    setCurrentPage,
    setPageSize,
    setSorters,
    setFilters,
  } = useTable<IOrder>({
    resource: "orders",
    pagination: {
      pageSize: 5,
    },
  });

  const [sortDescriptor, setSortDescriptor] = useState<SortDescriptor>({
    column: "id",
    direction: "ascending",
  });

  const orders = result?.data ?? [];

  const getCellContents = useCallback((columnKey: string, item: IOrder) => {
    if (columnKey === "id") return item.id;
    if (columnKey === "amount") return formatCurrency(item.amount);
    if (columnKey === "user") return item.user.fullName;
    if (columnKey === "gender") return item.user.gender;
    if (columnKey === "gsm") return item.user.gsm;
    if (columnKey === "address") return item.address.text;
    if (columnKey === "createdAt") return formatDateTime(item.createdAt);
    if (columnKey === "status")
      return (
        <Chip color={getChipColor(item.status.id)}>{item.status.text}</Chip>
      );
    return "";
  }, []);

  return (
    <Table
      isStriped
      aria-label="Oders table"
      sortDescriptor={sortDescriptor}
      onSortChange={(e) => {
        const sorter: CrudSort = {
          order: e.direction === "ascending" ? "asc" : "desc",
          field: `${e.column}`,
        };

        switch (e.column) {
          case "user":
            sorter.field = "user.fullName";
            break;
          case "gender":
            sorter.field = "user.gender";
            break;
          case "gsm":
            sorter.field = "user.gsm";
            break;
          case "address":
            sorter.field = "address.text";
            break;
          case "status":
            sorter.field = "status.text";
            break;
          default:
            break;
        }
        setSorters([sorter]);
        setSortDescriptor(e);
      }}
      topContent={
        <div className="flex justify-between gap-3">
          <h2 className="whitespace-nowrap font-bold">Recent sales</h2>
          <Input
            isClearable
            className="w-full sm:max-w-[20%]"
            placeholder="Search"
            startContent={<MagnifyingGlassIcon width={12} />}
            value={getDefaultFilter("q", filters)}
            onClear={() => {
              setCurrentPage(1);
              setFilters([], "replace");
            }}
            onValueChange={(value) => {
              if (!value.trim()) {
                setCurrentPage(1);
                setFilters([], "replace");
                return;
              }

              setCurrentPage(1);
              setFilters([
                {
                  field: "q",
                  value: value,
                  operator: "contains",
                },
              ]);
            }}
          />
        </div>
      }
      bottomContent={
        <div className="flex w-full justify-center gap-2">
          <Pagination
            isCompact
            showControls
            showShadow
            color="primary"
            page={currentPage}
            total={pageCount}
            onChange={(page) => setCurrentPage(page)}
          />
          <Dropdown>
            <DropdownTrigger>
              <Button variant="bordered" className="capitalize">
                Rows per page
              </Button>
            </DropdownTrigger>
            <DropdownMenu
              aria-label="Select number of rows per page"
              variant="flat"
              color="primary"
              disallowEmptySelection
              selectionMode="single"
              selectedKeys={[`${pageSize}`]}
              onSelectionChange={(rows) => {
                setPageSize(+(rows as Set<string>).values().next().value);
              }}
            >
              {[5, 10, 25, 50].map((rowsPerPage) => {
                return (
                  <DropdownItem
                    key={`${rowsPerPage}`}
                  >{`${rowsPerPage}`}</DropdownItem>
                );
              })}
            </DropdownMenu>
          </Dropdown>
        </div>
      }
    >
      <TableHeader columns={columns}>
        {(column) => (
          <TableColumn allowsSorting={column.sortable} key={column.key}>
            {column.header}
          </TableColumn>
        )}
      </TableHeader>
      {orders.length ? (
        <TableBody items={orders}>
          {(item) => {
            return (
              <TableRow key={item.id}>
                {(columnKey) => {
                  return (
                    <TableCell>
                      {getCellContents(columnKey as string, item)}
                    </TableCell>
                  );
                }}
              </TableRow>
            );
          }}
        </TableBody>
      ) : (
        <TableBody emptyContent={"Loading..."}>{[]}</TableBody>
      )}
    </Table>
  );
};
The above component uses the built-in Table component to display the recent sales. The built-in NextUI Table has out-of-the-box support for pagination, sorting, filtering, and selection.
Similarly, create the src/components/table/index.ts file. You can export the component created above from it.
export { RecentSalesTable } from "./RecentSalesTable";
Import the RecentSalesTable component we created above into the src/pages/dashboard/DashboardPage.tsx file and render it like so:
...

import { RecentSalesTable } from "../../components/table";
...

export const DashboardPage: React.FC = () => {
  ...

  return (
    <main className="flex w-full flex-col mt-5 gap-3">
      <h1 className="font-bold">Dashboards</h1>
      ...
      <RecentSalesTable />
    </main>
  );
};
The <RecentSalesTable /> component we created above will look like the image below after rendering.
 NextUI recent sales table
How to build product CRUD pages with NextUI and Refine
In the project template we created using refine.dev, there are CRUD pages for categories in the database. In this section, we will create similar CRUD pages for products using NextUI. Let's start by creating the list page.
Products list page
The restaurant API we are sourcing data from has a list of products that we will fetch and display in a table. The table will have features for pagination, searching, and sorting products in ascending, descending, or alphabetical order. Users can create, view, delete, or modify an existing product from the same page.
We will render a modal if a user wants to delete a record from our products table. Let's extract the logic for our modal into a separate reusable component. We will use NextUI's built-in Modal component.
Create the src/components/modal/index.tsx file. Copy and paste the code below into it. The modal component doesn't exist yet. Therefore, you need to first create it.
import React from "react";
import {
  Modal,
  ModalContent,
  ModalHeader,
  ModalBody,
  ModalFooter,
  Button,
} from "@nextui-org/react";

import { IDeleteModalProps } from "../../interfaces";

export const DeleteModal: React.FC<IDeleteModalProps> = ({
  isOpen,
  onOpenChange,
  onDelete,
  warningMessage,
}) => {
  return (
    <Modal isOpen={isOpen} backdrop="opaque" onOpenChange={onOpenChange}>
      <ModalContent>
        {(onClose) => (
          <>
            <ModalHeader className="flex flex-col gap-1">
              Product deletion
            </ModalHeader>
            <ModalBody>
              <p>{warningMessage}</p>
            </ModalBody>
            <ModalFooter>
              <Button color="primary" variant="light" onPress={onClose}>
                Close
              </Button>
              <Button
                color="danger"
                onPress={() => {
                  onClose();
                  onDelete();
                }}
              >
                Delete
              </Button>
            </ModalFooter>
          </>
        )}
      </ModalContent>
    </Modal>
  );
};
Create the src/pages/products/list.tsx file. Copy and paste the code below into it. Be aware that the products directory doesn't exist yet. You need to first create it.
src/pages/products/list.tsx
import {
  useTable,
  getDefaultFilter,
  useNavigation,
  useDelete,
  useMany,
  CrudSort,
} from "@refinedev/core";
import {
  Table,
  TableHeader,
  TableColumn,
  TableBody,
  TableRow,
  TableCell,
  Pagination,
  Input,
  Button,
  useDisclosure,
  SortDescriptor,
  Dropdown,
  DropdownTrigger,
  DropdownMenu,
  DropdownItem,
} from "@nextui-org/react";

import {
  TrashIcon,
  EyeIcon,
  PencilIcon,
  MagnifyingGlassIcon,
  PlusIcon,
} from "@heroicons/react/24/outline";

import { ICategory, IProduct } from "../../interfaces";

import { DeleteModal } from "../../components/modal";
import { useState, useCallback } from "react";
import { formatCurrency } from "../../components/table/RecentSalesTable";

const columns = [
  { header: "Id", key: "id", sortable: true },
  { header: "Name", key: "name", sortable: true },
  { header: "Price", key: "price", sortable: true },
  { header: "Category", key: "category", sortable: true },
  { header: "Description", key: "description", sortable: true },
  { header: "Actions", key: "actions", sortable: false },
];

export const ProductList = () => {
  const {
    result,
    pageCount,
    currentPage,
    pageSize,
    filters,
    setCurrentPage,
    setPageSize,
    setSorters,
    setFilters,
  } = useTable();
  const { edit, show, create } = useNavigation();
  const { mutate: deleteProduct } = useDelete();
  const { isOpen, onOpen, onOpenChange } = useDisclosure();
  const [deleteItemId, setDeleteItemId] = useState<null | number>(null);
  const [sortDescriptor, setSortDescriptor] = useState<SortDescriptor>({
    column: "id",
    direction: "ascending",
  });

  const products = result?.data ?? [];

  const { result: categoryData } = useMany<ICategory>({
    resource: "categories",
    ids: products?.map((item) => item?.category?.id) ?? [],
    queryOptions: {
      enabled: !!products,
    },
  });

  const renderCell = useCallback(
    (columnKey: string, item: IProduct) => {
      if (columnKey === "category") {
        const category = categoryData?.data?.find((categoryObj) => {
          return categoryObj.id === item.category.id;
        });
        return <TableCell>{category?.title ?? "Unknown"}</TableCell>;
      }

      if (columnKey === "price") {
        return <TableCell>{formatCurrency(item.price)}</TableCell>;
      }

      if (columnKey === "actions") {
        return (
          <TableCell>
            <div className="flex items-center justify-end gap-4">
              <Button
                isIconOnly
                size="sm"
                variant="light"
                color="default"
                aria-label="Edit"
                className="rounded-full"
                onPress={() => {
                  edit("products", item.id);
                }}
              >
                <PencilIcon className="h-4 w-4" />
              </Button>
              <Button
                isIconOnly
                variant="light"
                color="default"
                size="sm"
                aria-label="View"
                className="rounded-full"
                onPress={() => {
                  show("products", item.id);
                }}
              >
                <EyeIcon className="h-4 w-4" />
              </Button>
              <Button
                isIconOnly
                variant="light"
                color="danger"
                size="md"
                aria-label="Delete"
                className="rounded-full"
                onPress={() => {
                  setDeleteItemId(item.id);
                  onOpen();
                }}
              >
                <TrashIcon className="h-4 w-4" />
              </Button>
            </div>
          </TableCell>
        );
      }

      return <TableCell>{(item as any)[columnKey]}</TableCell>;
    },
    [products, categoryData],
  );

  return (
    <>
      <Table
        isStriped
        aria-label="Products table"
        sortDescriptor={sortDescriptor}
        onSortChange={(e) => {
          const sorter: CrudSort = {
            order: e.direction === "ascending" ? "asc" : "desc",
            field: e.column as string,
          };

          if (e.column === "category") {
            sorter.field = "category.title";
          }

          setSorters([sorter]);
          setSortDescriptor(e);
        }}
        topContent={
          <div className="flex flex-col gap-4">
            <div className="flex justify-between gap-3">
              <h1 className="font-bold">Products</h1>
              <Button
                color="primary"
                variant="bordered"
                startContent={<PlusIcon className="h-4 w-4" />}
                onPress={() => {
                  create("products");
                }}
              >
                Create Product
              </Button>
            </div>
            <div className="flex justify-end">
              <Input
                isClearable
                className="w-full sm:max-w-[20%]"
                placeholder="Search"
                startContent={<MagnifyingGlassIcon width={12} />}
                value={getDefaultFilter("q", filters)}
                onClear={() => {
                  setCurrentPage(1);
                  setFilters([], "replace");
                }}
                onValueChange={(value) => {
                  if (!value.trim()) {
                    setCurrentPage(1);
                    setFilters([], "replace");
                    return;
                  }

                  setCurrentPage(1);
                  setFilters([
                    {
                      field: "q",
                      value: value,
                      operator: "contains",
                    },
                  ]);
                }}
              />
            </div>
          </div>
        }
        bottomContent={
          <div className="flex w-full justify-center gap-2">
            <Pagination
              isCompact
              showControls
              showShadow
              color="primary"
              page={currentPage}
              total={pageCount}
              onChange={(page) => setCurrentPage(page)}
            />
            <Dropdown>
              <DropdownTrigger>
                <Button variant="bordered" className="capitalize">
                  Rows per page
                </Button>
              </DropdownTrigger>
              <DropdownMenu
                aria-label="Select number of rows per page"
                variant="flat"
                color="primary"
                disallowEmptySelection
                selectionMode="single"
                selectedKeys={[`${pageSize}`]}
                onSelectionChange={(rows) => {
                  setPageSize(+(rows as Set<string>).values().next().value);
                }}
              >
                {[5, 10, 25, 50].map((rowsPerPage) => {
                  return (
                    <DropdownItem
                      key={`${rowsPerPage}`}
                    >{`${rowsPerPage}`}</DropdownItem>
                  );
                })}
              </DropdownMenu>
            </Dropdown>
          </div>
        }
      >
        <TableHeader columns={columns}>
          {(column) => {
            if (column.key === "actions") {
              return (
                <TableColumn
                  allowsSorting={column.sortable}
                  key={column.key}
                  className="pr-16 text-end"
                >
                  {column.header}
                </TableColumn>
              );
            }
            return (
              <TableColumn allowsSorting={column.sortable} key={column.key}>
                {column.header}
              </TableColumn>
            );
          }}
        </TableHeader>
        {products.length ? (
          <TableBody items={products}>
            {(item) => {
              return (
                <TableRow key={item.id}>
                  {(columnKey) => {
                    return renderCell(columnKey as string, item as IProduct);
                  }}
                </TableRow>
              );
            }}
          </TableBody>
        ) : (
          <TableBody emptyContent={"No rows to display."}>{[]}</TableBody>
        )}
      </Table>
      {isOpen ? (
        <DeleteModal
          isOpen={isOpen}
          onDelete={() =>
            deleteProduct({ resource: "products", id: deleteItemId as number })
          }
          onOpenChange={onOpenChange}
          warningMessage={`You are about to delete product with id ${deleteItemId} from the database. This action is irreversible.`}
        />
      ) : null}
    </>
  );
};
The above component uses Refine's built-in useTable hook to query the data. It returns the data in a form that can be displayed in a table.
We used NextUI's built-in Table component that supports sorting, selection, and pagination out of the box. Check the NextUI documentation to learn more about the Table component.
Create the src/pages/products/index.ts file and export the above component, as in the example below.
export { ProductList } from "./list";
We need to add the products resource to the <Refine /> component. Therefore, add the following changes to the src/App.tsx file.
src/App.tsx
import { ErrorComponent, GitHubBanner, Refine } from "@refinedev/core";
import { RefineKbar, RefineKbarProvider } from "@refinedev/kbar";

import routerProvider, {
  DocumentTitleHandler,
  NavigateToResource,
  UnsavedChangesNotifier,
} from "@refinedev/react-router";
import dataProvider from "@refinedev/simple-rest";
import { useTranslation } from "react-i18next";
import { BrowserRouter, Outlet, Route, Routes } from "react-router-dom";
import { Layout } from "./components/layout";
import { DashboardPage } from "./pages/dashboard";
import { ProductList } from "./pages/products";
import {
  CategoryCreate,
  CategoryEdit,
  CategoryList,
  CategoryShow,
} from "./pages/categories";

function App() {
  const { t, i18n } = useTranslation();

  const i18nProvider = {
    translate: (key: string, params: object) => t(key, params),
    changeLocale: (lang: string) => i18n.changeLanguage(lang),
    getLocale: () => i18n.language,
  };

  return (
    <BrowserRouter>
      <GitHubBanner />
      <RefineKbarProvider>
        <Refine
          dataProvider={dataProvider("https://api.finefoods.refine.dev")}
          i18nProvider={i18nProvider}
          routerProvider={routerProvider}
          resources={[
            {
              name: "dashboard",
              list: "/dashboard",
            },
            {
              name: "products",
              list: "/products",
              create: "/products/create",
              edit: "/products/edit/:id",
              show: "/products/show/:id",
              meta: {
                canDelete: true,
              },
            },
            {
              name: "categories",
              list: "/categories",
              create: "/categories/create",
              edit: "/categories/edit/:id",
              show: "/categories/show/:id",
              meta: {
                canDelete: true,
              },
            },
          ]}
          options={{
            syncWithLocation: true,
            warnWhenUnsavedChanges: true,
          }}
        >
          <Routes>
            <Route
              element={
                <Layout>
                  <Outlet />
                </Layout>
              }
            >
              <Route
                index
                element={<NavigateToResource resource="dashboard" />}
              />
              <Route path="/dashboard">
                <Route index element={<DashboardPage />} />
              </Route>
              <Route path="/products">
                <Route index element={<ProductList />} />
              </Route>
              <Route path="/categories">
                <Route index element={<CategoryList />} />
                <Route path="create" element={<CategoryCreate />} />
                <Route path="edit/:id" element={<CategoryEdit />} />
                <Route path="show/:id" element={<CategoryShow />} />
              </Route>
              <Route path="*" element={<ErrorComponent />} />
            </Route>
          </Routes>

          <RefineKbar />
          <UnsavedChangesNotifier />
          <DocumentTitleHandler />
        </Refine>
      </RefineKbarProvider>
    </BrowserRouter>
  );
}

export default App;
The products list page should now look like the image below after rendering.
 NextUI products list page
Products create page
The list page we created in the previous sub-section has a button for creating a new product. Clicking it will navigate you to a blank page at the moment.
Let's create a component that will render when a user wants to create a new product. The component will render a form that a user can fill and submit to create a new product. To easily manage the forms, we will use react-hook-forms.
The headless Refine project template we created using the refine.new platform integrates the @refinedev/react-hook-form adapter out of the box. However, we need to install react-hook-form to use some of the features the @refinedev/react-hook-form adapter doesn't export.
Use the command below to install react-hook-form.
npm install react-hook-form
After successfully installing react-hook-form, create the src/pages/products/create.tsx file. Copy and paste the code below into it.
src/pages/products/create.tsx
import { HttpError, useBack, useSelect } from "@refinedev/core";
import { useForm } from "@refinedev/react-hook-form";
import { Controller } from "react-hook-form";

import {
  Button,
  Card,
  Input,
  Dropdown,
  DropdownTrigger,
  DropdownMenu,
  DropdownItem,
  Textarea,
} from "@nextui-org/react";

import { ArrowLongLeftIcon } from "@heroicons/react/24/outline";

import { IProduct, IProductCategory } from "../../interfaces";

export const ProductCreate = () => {
  const goBack = useBack();

  const {
    refineCore: { onFinish, formLoading },
    handleSubmit,
    control,
    formState: { errors },
  } = useForm<IProduct, HttpError, IProduct>({
    defaultValues: {
      name: "",
      description: "",
    },
  });

  const { options: categoryOptions } = useSelect<IProductCategory>({
    resource: "categories",
  });

  return (
    <div>
      <Card className="shadow-1 p-5">
        <div className="flex items-center">
          <Button
            onClick={goBack}
            className="m-1"
            color="primary"
            variant="light"
            isIconOnly
            aria-label="Go to products page"
          >
            <ArrowLongLeftIcon width={16} />
          </Button>
          <h1 className="font-bold">Create Product</h1>
        </div>
        <form onSubmit={handleSubmit(onFinish)}>
          <div className="p-fluid">
            <Controller
              name="name"
              control={control}
              rules={{ required: "Name is required." }}
              render={({ field, fieldState }) => {
                return (
                  <Input
                    label="Name"
                    variant="bordered"
                    labelPlacement="outside"
                    placeholder="Enter product name"
                    value={field.value ?? ""}
                    errorMessage={errors[field.name]?.message ?? ""}
                    type="text"
                    onChange={(ev) => field.onChange(ev.target.value)}
                  />
                );
              }}
            />
            <Controller
              name="price"
              control={control}
              rules={{
                required: "Price is required.",
              }}
              render={({ field, fieldState }) => {
                return (
                  <Input
                    label="Price"
                    variant="bordered"
                    labelPlacement="outside"
                    placeholder="Enter price"
                    errorMessage={errors[field.name]?.message ?? ""}
                    type="number"
                    min="0"
                    value={`${field.value ?? ""}`}
                    onChange={(ev) => field.onChange(ev.target.value)}
                    className="mt-5"
                  />
                );
              }}
            />
            <Controller
              name="category.id"
              control={control}
              rules={{ required: "Category is required." }}
              render={({ field, fieldState }) => {
                return (
                  <Dropdown id="options-categories">
                    <DropdownTrigger>
                      <Button className="mt-5" variant="bordered">
                        Select product category
                      </Button>
                    </DropdownTrigger>
                    <DropdownMenu
                      aria-label="Select category"
                      selectionMode="single"
                      selectedKeys={[
                        field.value ?? categoryOptions[0]?.label ?? "",
                      ]}
                      onSelectionChange={(selectedItem) => {
                        field.onChange(
                          (selectedItem as Set<string>).values().next().value,
                        );
                      }}
                    >
                      {categoryOptions.map((categoryOption) => {
                        return (
                          <DropdownItem key={`${categoryOption.label}`}>
                            {categoryOption.label}
                          </DropdownItem>
                        );
                      })}
                    </DropdownMenu>
                  </Dropdown>
                );
              }}
            />
            <Controller
              name="description"
              control={control}
              rules={{ required: "Description is required." }}
              render={({ field, fieldState }) => {
                return (
                  <Textarea
                    label="Description"
                    placeholder="Enter product description here"
                    variant="bordered"
                    labelPlacement="outside"
                    errorMessage={errors[field.name]?.message ?? ""}
                    value={field.value ?? ""}
                    onChange={(ev) => field.onChange(ev.target.value)}
                    className="mt-5"
                  />
                );
              }}
            />
          </div>
          <div className="justify-content-end flex">
            <Button
              type="submit"
              isLoading={formLoading}
              color="primary"
              className="mt-5"
            >
              Save Product
            </Button>
          </div>
        </form>
      </Card>
    </div>
  );
};
Export the above component from the src/pages/products/index.ts file.
export { ProductList } from "./list";
export { ProductCreate } from "./create";
Finally, render the above component in the src/App.tsx file when a user navigates to the /create route. Add the highlighted changes to the src/App.tsx file.
...
import { ProductList, ProductCreate } from "./pages/products";
...

  return (
        <Refine
         ...
        >
          <Routes>
          ...
              <Route path="/products">
                <Route index element={<ProductList />} />
                <Route path="create" element={<ProductCreate />} />
              </Route>
               ...
              <Route path="*" element={<ErrorComponent />} />
            </Route>
          </Routes>
  );
}

export default App;
The above component will look like the image below after rendering.
 NextUI create product form
Products edit page
The products table we created above has an actions column that you can use to edit, show, and delete a record. Clicking the edit button takes you to a blank page at the moment.
Let's create a component for editing an existing record in the products table. Create the src/pages/products/edit.tsx file. Copy and paste the code below into it.
src/pages/products/edit.tsx
import { HttpError, useBack, useSelect } from "@refinedev/core";
import { useForm } from "@refinedev/react-hook-form";
import { Controller } from "react-hook-form";

import {
  Button,
  Card,
  Input,
  Dropdown,
  DropdownTrigger,
  DropdownMenu,
  DropdownItem,
  Textarea,
} from "@nextui-org/react";

import { ArrowLongLeftIcon } from "@heroicons/react/24/outline";

import { IProduct, IProductCategory } from "../../interfaces";

export const ProductEdit = () => {
  const goBack = useBack();

  const {
    refineCore: { onFinish, formLoading },
    handleSubmit,
    control,
    formState: { errors },
  } = useForm<IProduct, HttpError, IProduct>({
    defaultValues: {
      name: "",
      description: "",
    },
  });

  const { options: categoryOptions } = useSelect<IProductCategory>({
    resource: "categories",
  });

  return (
    <div>
      <Card className="shadow-1 p-5">
        <div className="flex items-center">
          <Button
            onClick={goBack}
            className="m-1"
            color="primary"
            variant="light"
            isIconOnly
            aria-label="Go to products page"
          >
            <ArrowLongLeftIcon width={16} />
          </Button>
          <h1 className="text-lg font-bold">Edit Product</h1>
        </div>
        <form onSubmit={handleSubmit(onFinish)}>
          <div className="p-fluid">
            <Controller
              name="name"
              control={control}
              rules={{ required: "Name is required." }}
              render={({ field, fieldState }) => {
                return (
                  <Input
                    label="Name"
                    variant="bordered"
                    labelPlacement="outside"
                    placeholder="Enter product name"
                    value={field.value ?? ""}
                    errorMessage={errors[field.name]?.message ?? ""}
                    type="text"
                    onChange={(ev) => field.onChange(ev.target.value)}
                  />
                );
              }}
            />
            <Controller
              name="price"
              control={control}
              rules={{
                required: "Price is required.",
              }}
              render={({ field, fieldState }) => {
                return (
                  <Input
                    label="Price"
                    variant="bordered"
                    labelPlacement="outside"
                    placeholder="Enter price"
                    errorMessage={errors[field.name]?.message ?? ""}
                    type="number"
                    min="0"
                    value={`${field.value ?? ""}`}
                    onChange={(ev) => field.onChange(+ev.target.value)}
                    className="mt-5"
                  />
                );
              }}
            />
            <Controller
              name="category.id"
              control={control}
              rules={{ required: "Category is required." }}
              render={({ field, fieldState }) => {
                return (
                  <Dropdown id="options-categories">
                    <DropdownTrigger>
                      <Button className="mt-5" variant="bordered">
                        Select product category
                      </Button>
                    </DropdownTrigger>
                    <DropdownMenu
                      aria-label="Select category"
                      selectionMode="single"
                      selectedKeys={[`${field.value}`]}
                      onSelectionChange={(selectedItem) => {
                        field.onChange(
                          +(selectedItem as Set<string>).values().next().value,
                        );
                      }}
                    >
                      {categoryOptions.map((categoryOption) => {
                        return (
                          <DropdownItem key={categoryOption.value}>
                            {categoryOption.label}
                          </DropdownItem>
                        );
                      })}
                    </DropdownMenu>
                  </Dropdown>
                );
              }}
            />
            <Controller
              name="description"
              control={control}
              rules={{ required: "Description is required." }}
              render={({ field, fieldState }) => {
                return (
                  <Textarea
                    label="Description"
                    placeholder="Enter product description here"
                    variant="bordered"
                    labelPlacement="outside"
                    errorMessage={errors[field.name]?.message ?? ""}
                    value={field.value ?? ""}
                    onChange={(ev) => field.onChange(ev.target.value)}
                    className="mt-5"
                  />
                );
              }}
            />
          </div>
          <div className="justify-content-end flex">
            <Button
              type="submit"
              isLoading={formLoading}
              color="primary"
              className="mt-5"
            >
              Save Product
            </Button>
          </div>
        </form>
      </Card>
    </div>
  );
};
Export the above component from the src/pages/products/index.ts file.
export { ProductList } from "./list";
export { ProductCreate } from "./create";
export { ProductEdit } from "./edit";
You can import the <ProductEdit /> component into the src/App.tsx file and render it on the edit route. Add the following highlighted changes to the src/App.tsx file.
...
import { ProductList, ProductCreate, ProductEdit } from "./pages/products";

function App() {

  ...

  return (
        <Refine
          ...
        >
          <Routes>
              ...
              <Route path="/products">
                <Route index element={<ProductList />} />
                <Route path="create" element={<ProductCreate />} />
                <Route path="edit/:id" element={<ProductEdit />} />
              </Route>
               ...
              <Route path="*" element={<ErrorComponent />} />
            </Route>
          </Routes>
          ...
        </Refine>
  );
}

export default App;
The above component should now look like the image below after rendering. You can edit any record in the products table by clicking the edit button under the actions column. You can also do so by pointing the browser to the /products/edit route.
 NextUI edit product form
Products show page
Similar to editing an existing record in the products table, we can also show the details of a record. Clicking the show button under the actions column displays a blank page at the moment.
Let's create a component that shows the details of a specific product. Create the src/pages/products/show.tsx file. Copy and paste the code below into it.
src/pages/products/show.tsx
import { useBack, useOne, useShow } from "@refinedev/core";
import { ICategory, IProduct } from "../../interfaces";
import { Button, Card, CardHeader, CardBody, Image } from "@nextui-org/react";

import { ArrowLongLeftIcon } from "@heroicons/react/24/outline";

const currencyFormatter = Intl.NumberFormat("en-US", {
  style: "currency",
  currency: "USD",
});

export const ProductShow = () => {
  const goBack = useBack();

  const { result: product } = useShow<IProduct>();

  const { data: categoryData } = useOne<ICategory>({
    resource: "categories",
    id: product?.category.id,
    queryOptions: {
      enabled: !!product?.category.id,
    },
  });

  return (
    <div className="my-3">
      <Card className="rounded-none">
        <div className="flex items-center px-5">
          <Button
            onClick={goBack}
            className="m-1"
            color="primary"
            variant="light"
            isIconOnly
            aria-label="Go to products page"
          >
            <ArrowLongLeftIcon width={16} />
          </Button>

          <h1 className="text-lg font-bold">Show product</h1>
        </div>
        <CardBody>
          <CardHeader className="p-5 text-lg font-bold">
            <h2>Product details</h2>
          </CardHeader>
          <CardBody>
            {product?.images?.length ? (
              <Image
                src={product.images[0].url}
                width={300}
                alt={product.name}
              />
            ) : null}
            <h2 className="mt-3 text-base font-medium">Name</h2>
            <p>{product?.name}</p>
            <h2 className="mt-3 text-base font-medium">Price</h2>
            <p>{currencyFormatter.format(product?.price ?? 0)}</p>
            <h2 className="mt-3 text-base font-medium">Category</h2>
            <p>{categoryData?.data.title}</p>
            <h2 className="mt-3 text-base font-medium">Description</h2>
            <p>{product?.description}</p>
          </CardBody>
        </CardBody>
      </Card>
    </div>
  );
};
Export the component we have created above from the src/pages/products/show.tsx file.
export { ProductList } from "./list";
export { ProductCreate } from "./create";
export { ProductEdit } from "./edit";
export { ProductShow } from "./show";
Finally, add the following highligthed changes to the src/App.tsx file.
src/App.tsx
...
import {
  ProductList,
  ProductCreate,
  ProductEdit,
  ProductShow,
} from "./pages/products";
...

function App() {
  ...

  return (

        <Refine
         ...
        >
          <Routes>
               ...
              <Route path="/products">
                <Route index element={<ProductList />} />
                <Route path="create" element={<ProductCreate />} />
                <Route path="edit/:id" element={<ProductEdit />} />
                <Route path="show/:id" element={<ProductShow />} />
              </Route>
              ...
        </Refine>
  );
}

export default App;
The above component will look like the image below after rendering.
 NextUI product details page
How to build categories CRUD pages with NextUI and Refine
Like the product CRUD pages we created above, let's create CRUD pages for the categories in the database. The categories are sourced from the categories endpoint of the fake REST API. You can follow the link to explore the available resources.
Categories list page
This page will display the categories in tabular form. The table will have features for sorting and searching. We will also include features for updating and deleting items from the table.
Copy and paste the code below into the src/pages/categories/list.tsx file.
src/pages/categories/list.tsx
import {
  useTable,
  getDefaultFilter,
  useNavigation,
  useDelete,
  CrudSort,
} from "@refinedev/core";
import {
  Table,
  TableHeader,
  TableColumn,
  TableBody,
  TableRow,
  TableCell,
  Pagination,
  Input,
  Button,
  useDisclosure,
  SortDescriptor,
  Dropdown,
  DropdownTrigger,
  DropdownMenu,
  DropdownItem,
} from "@nextui-org/react";

import {
  TrashIcon,
  EyeIcon,
  PencilIcon,
  MagnifyingGlassIcon,
  PlusIcon,
} from "@heroicons/react/24/outline";

import { IProduct } from "../../interfaces";

import { DeleteModal } from "../../components/modal";
import { useState, useCallback } from "react";

const columns = [
  { header: "Id", key: "id", sortable: true },
  { header: "Name", key: "title", sortable: true },
  { header: "Actions", key: "actions", sortable: false },
];

export const CategoryList = () => {
  const {
    result,
    pageCount,
    currentPage,
    pageSize,
    filters,
    setCurrentPage,
    setPageSize,
    setSorters,
    setFilters,
  } = useTable({
    pagination: {
      pageSize: 5,
    },
  });
  const { edit, show, create } = useNavigation();
  const { mutate: deleteCategory } = useDelete();
  const { isOpen, onOpen, onOpenChange } = useDisclosure();
  const [deleteItemId, setDeleteItemId] = useState<null | number>(null);
  const [sortDescriptor, setSortDescriptor] = useState<SortDescriptor>({
    column: "id",
    direction: "ascending",
  });

  const categories = result?.data ?? [];

  const renderCell = useCallback((columnKey: string, item: IProduct) => {
    if (columnKey === "actions") {
      return (
        <TableCell>
          <div className="flex items-center justify-end gap-4">
            <Button
              isIconOnly
              size="sm"
              variant="light"
              color="default"
              aria-label="Edit"
              className="rounded-full"
              onPress={() => {
                edit("categories", item.id);
              }}
            >
              <PencilIcon className="h-4 w-4" />
            </Button>
            <Button
              isIconOnly
              variant="light"
              color="default"
              size="sm"
              aria-label="View"
              className="rounded-full"
              onPress={() => {
                show("categories", item.id);
              }}
            >
              <EyeIcon className="h-4 w-4" />
            </Button>
            <Button
              isIconOnly
              variant="light"
              color="danger"
              size="md"
              aria-label="Delete"
              className="rounded-full"
              onPress={() => {
                setDeleteItemId(item.id);
                onOpen();
              }}
            >
              <TrashIcon className="h-4 w-4" />
            </Button>
          </div>
        </TableCell>
      );
    }

    return <TableCell>{(item as any)[columnKey]}</TableCell>;
  }, []);

  return (
    <>
      <Table
        isStriped
        aria-label="Products table"
        sortDescriptor={sortDescriptor}
        onSortChange={(e) => {
          const sorter: CrudSort = {
            order: e.direction === "ascending" ? "asc" : "desc",
            field: e.column as string,
          };

          setSorters([sorter]);
          setSortDescriptor(e);
        }}
        topContent={
          <div className="flex flex-col gap-4">
            <div className="flex justify-between gap-3">
              <h1 className="font-bold">Categories</h1>
              <Button
                color="primary"
                variant="bordered"
                startContent={<PlusIcon className="h-4 w-4" />}
                onPress={() => {
                  create("categories");
                }}
              >
                Create Category
              </Button>
            </div>
            <div className="flex items-center justify-end">
              <Input
                isClearable
                className="w-full sm:max-w-[20%]"
                placeholder="Search"
                startContent={<MagnifyingGlassIcon width={12} />}
                value={getDefaultFilter("q", filters)}
                onClear={() => {
                  setCurrentPage(1);
                  setFilters([], "replace");
                }}
                onValueChange={(value) => {
                  if (!value.trim()) {
                    setCurrentPage(1);
                    setFilters([], "replace");
                    return;
                  }

                  setCurrentPage(1);
                  setFilters([
                    {
                      field: "q",
                      value: value,
                      operator: "contains",
                    },
                  ]);
                }}
              />
            </div>
          </div>
        }
        bottomContent={
          <div className="flex w-full justify-center gap-2">
            <Pagination
              isCompact
              showControls
              showShadow
              color="primary"
              page={currentPage}
              total={pageCount}
              onChange={(page) => setCurrentPage(page)}
            />
            <Dropdown>
              <DropdownTrigger>
                <Button variant="bordered" className="capitalize">
                  Rows per page
                </Button>
              </DropdownTrigger>
              <DropdownMenu
                aria-label="Select number of rows per page"
                variant="flat"
                color="primary"
                disallowEmptySelection
                selectionMode="single"
                selectedKeys={[`${pageSize}`]}
                onSelectionChange={(rows) => {
                  setPageSize(+(rows as Set<string>).values().next().value);
                }}
              >
                {[5, 10].map((rowsPerPage) => {
                  return (
                    <DropdownItem
                      key={`${rowsPerPage}`}
                    >{`${rowsPerPage}`}</DropdownItem>
                  );
                })}
              </DropdownMenu>
            </Dropdown>
          </div>
        }
      >
        <TableHeader columns={columns}>
          {(column) => {
            if (column.key === "actions") {
              return (
                <TableColumn
                  allowsSorting={column.sortable}
                  key={column.key}
                  className="pr-16 text-end"
                >
                  {column.header}
                </TableColumn>
              );
            }
            return (
              <TableColumn allowsSorting={column.sortable} key={column.key}>
                {column.header}
              </TableColumn>
            );
          }}
        </TableHeader>
        {categories.length ? (
          <TableBody items={categories}>
            {(item) => {
              return (
                <TableRow key={item.id}>
                  {(columnKey) => {
                    return renderCell(columnKey as string, item as IProduct);
                  }}
                </TableRow>
              );
            }}
          </TableBody>
        ) : (
          <TableBody emptyContent={"Loading...data"}>{[]}</TableBody>
        )}
      </Table>
      {isOpen ? (
        <DeleteModal
          isOpen={isOpen}
          onDelete={() =>
            deleteCategory({
              resource: "categories",
              id: deleteItemId as number,
            })
          }
          onOpenChange={onOpenChange}
          warningMessage={`You are about to delete category with id ${deleteItemId} from the database. This action is irreversible.`}
        />
      ) : null}
    </>
  );
};
The above component will look like the image below after rendering. You can search and sort the contents of the table.
 NextUI categories list page
Categories create page
You can use this page to create a new product. A user can navigate to it by clicking the "Create Category" button or pointing the browser to the /categories/create endpoint in the browser's address bar.
Copy and paste the code below into the src/pages/categories/create.tsx file.
Show CategoryCreate code
import { HttpError, useBack } from "@refinedev/core";
import { useForm } from "@refinedev/react-hook-form";
import { Controller } from "react-hook-form";

import { Button, Card, Input } from "@nextui-org/react";

import { ArrowLongLeftIcon } from "@heroicons/react/24/outline";

import { ICategory } from "../../interfaces";

export const CategoryCreate = () => {
  const goBack = useBack();

  const {
    refineCore: { onFinish, formLoading },
    handleSubmit,
    control,
    formState: { errors },
  } = useForm<ICategory, HttpError>({
    defaultValues: {
      title: "",
    },
  });

  return (
    <div>
      <Card className="shadow-1 p-5">
        <div className="flex items-center">
          <Button
            onClick={goBack}
            className="m-1"
            color="primary"
            variant="light"
            isIconOnly
            aria-label="Go to category page"
          >
            <ArrowLongLeftIcon width={16} />
          </Button>
          <h1 className="font-bold">Create Category</h1>
        </div>
        <form onSubmit={handleSubmit(onFinish)}>
          <div className="p-fluid">
            <Controller
              name="title"
              control={control}
              rules={{ required: "Name is required." }}
              render={({ field, fieldState }) => {
                return (
                  <Input
                    label="Name"
                    variant="bordered"
                    labelPlacement="outside"
                    placeholder="Enter new category name"
                    value={field.value ?? ""}
                    errorMessage={`${errors[field.name]?.message ?? ""}`}
                    type="text"
                    onChange={(ev) => field.onChange(ev.target.value)}
                  />
                );
              }}
            />
          </div>
          <div className="justify-content-end flex">
            <Button
              type="submit"
              isLoading={formLoading}
              color="primary"
              className="mt-5"
            >
              Save Category
            </Button>
          </div>
        </form>
      </Card>
    </div>
  );
};
The above component looks like the image below after rendering.
 NextUI create category form
The "Create Category" button on the list page should now work. Clicking or pointing the browser to /ctaegories/create will render the component above. You can use the form to create and submit a new category.
Categories edit page
Similar to creating a new category, you can also edit an existing category. Currently, when you click the edit button under the "Actions" column in the categories table, you will navigate to a page that is not styled. Let's create a new component to render when editing an existing category.
Copy and paste the code below into the pages/categories/edit.tsx file.
src/pages/categories/edit.tsx
import { HttpError, useBack } from "@refinedev/core";
import { useForm } from "@refinedev/react-hook-form";
import { Controller } from "react-hook-form";

import { Button, Card, Input } from "@nextui-org/react";

import { ArrowLongLeftIcon } from "@heroicons/react/24/outline";

import { ICategory } from "../../interfaces";

export const CategoryEdit = () => {
  const goBack = useBack();

  const {
    refineCore: { onFinish, formLoading },
    handleSubmit,
    control,
    formState: { errors },
  } = useForm<ICategory, HttpError>({
    defaultValues: {
      title: "",
    },
  });

  return (
    <div>
      <Card className="shadow-1 p-5">
        <div className="flex items-center">
          <Button
            onClick={goBack}
            className="m-1"
            color="primary"
            variant="light"
            isIconOnly
            aria-label="Go to products page"
          >
            <ArrowLongLeftIcon width={16} />
          </Button>
          <h1 className="text-lg font-bold">Edit Category</h1>
        </div>
        <form onSubmit={handleSubmit(onFinish)}>
          <div className="p-fluid">
            <Controller
              name="title"
              control={control}
              rules={{ required: "Name is required." }}
              render={({ field, fieldState }) => {
                return (
                  <Input
                    label="Name"
                    variant="bordered"
                    labelPlacement="outside"
                    placeholder="Enter category name"
                    value={field.value ?? ""}
                    errorMessage={`${errors[field.name]?.message ?? ""}`}
                    type="text"
                    onChange={(ev) => field.onChange(ev.target.value)}
                  />
                );
              }}
            />
          </div>
          <div className="justify-content-end flex">
            <Button
              type="submit"
              isLoading={formLoading}
              color="primary"
              className="mt-5"
            >
              Save Category
            </Button>
          </div>
        </form>
      </Card>
    </div>
  );
};
The above component looks like the image below after rendering. You can edit a category and save the changes using the "Save Category" button.
 NextUI edit category form
Categories show page
The categories show page displays a specific product category. At the moment when you click the show button under the actions column, you will navigate to a page that's not styled.
Let's create a component that displays the contents of a specific category. Copy and paste the code below into the src/pages/categories/show.tsx file.
src/pages/categories/show.tsx
import { useBack, useShow } from "@refinedev/core";
import { ICategory } from "../../interfaces";
import { Button, Card, CardHeader, CardBody, Image } from "@nextui-org/react";

import { ArrowLongLeftIcon } from "@heroicons/react/24/outline";

export const CategoryShow = () => {
  const goBack = useBack();

  const { result: category } = useShow<ICategory>();

  return (
    <div className="my-3">
      <Card className="rounded-none">
        <div className="flex items-center px-5">
          <Button
            onClick={goBack}
            className="m-1"
            color="primary"
            variant="light"
            isIconOnly
            aria-label="Go to categories page"
          >
            <ArrowLongLeftIcon width={16} />
          </Button>

          <h1 className="text-lg font-bold">Show Category</h1>
        </div>
        <CardBody>
          <CardHeader className="p-5 text-lg font-bold">
            <h2>Category details</h2>
          </CardHeader>
          <CardBody>
            {category?.cover ? (
              <Image src={category.cover} width={300} alt={category.title} />
            ) : null}
            <h2 className="mt-3 text-base font-medium">Id</h2>
            <p>{category?.id ?? 0}</p>
            <h2 className="mt-3 text-base font-medium">Title</h2>
            <p>{category?.title ?? ""}</p>
          </CardBody>
        </CardBody>
      </Card>
    </div>
  );
};
The above component looks like the image below after rendering.
 NextUI category details page
Update the layout
The <Layout /> component defines the layout of our app. Let's update it by applying some Tailwind CSS classes to it. Copy and paste the code below into the src/components/layout/index.tsx file.
import { PropsWithChildren } from "react";
import { Breadcrumb } from "../breadcrumb";
import { Menu } from "../menu";

export const Layout: React.FC<PropsWithChildren> = ({ children }) => {
  return (
    <div className="mx-2 mb-2">
      <Menu />
      <div>
        <Breadcrumb />
        <div>{children}</div>
      </div>
    </div>
  );
};
Update the navigation menu
After deleting the styles that came with our project template, the navigation menu is currently unusable. We need to create a new navigation menu with styling that matches the theme in our application.
Copy and paste the code below into the src/components/menu/index.tsx
file.
import { useMenu } from "@refinedev/core";
import { NavLink } from "react-router-dom";

export const Menu = () => {
  const { menuItems } = useMenu();
  return (
    <nav className="mb-4">
      <ul className="border-b-1 flex py-2">
        {menuItems.map((item) => (
          <li key={item.key} className="mr-4">
            <NavLink
              to={item.route ?? "/"}
              className={({ isActive, isPending }) => {
                if (isActive) {
                  return "block rounded p-2 text-center text-blue-500 hover:bg-gray-200";
                }
                return "block rounded border-blue-500 p-2 text-center hover:bg-gray-200";
              }}
            >
              {item.label}
            </NavLink>
          </li>
        ))}
      </ul>
    </nav>
  );
};
Update the breadcrumb
Like the navigation menu above, let's update the breadcrumb so that its styling matches the default NextUI theme. Copy and paste the code below into the src/components/breadcrumb/index.tsx file.
import { useBreadcrumb } from "@refinedev/core";
import { Link } from "react-router-dom";
import { ChevronRightIcon } from "@heroicons/react/20/solid";

export const Breadcrumb = () => {
  const { breadcrumbs } = useBreadcrumb();
  if (breadcrumbs.length === 1) return null;

  return (
    <nav>
      <ul className="breadcrumb my-5 flex gap-4">
        {breadcrumbs.map((breadcrumb) => {
          return (
            <li key={`breadcrumb-${breadcrumb.label}`}>
              {breadcrumb.href ? (
                <span className="flex text-blue-500 hover:text-blue-400">
                  {" "}
                  <ChevronRightIcon aria-hidden width={16} /> <Link to={breadcrumb.href}>{breadcrumb.label}</Link>
                </span>
              ) : (
                <span className="flex">
                  <ChevronRightIcon aria-hidden width={16} /> {breadcrumb.label}
                </span>
              )}
            </li>
          );
        })}
      </ul>
    </nav>
  );
};
Conclusion
As explained above, Refine and NextUI come in handy when building data-intensive front-end applications such as dashboards and admin panels.
Refine has the tools and packages to set up a modern front-end application within its ecosystem.
You can easily add design systems and UI libraries such as Chakra UI, Material UI, Ant design, NextUI, and Mantine into a Refine project. It also has a variety of packages for integrating modern cloud databases and live providers.
NextUI is a React library for building accessible UIs fast. Internally, it uses Tailwind CSS and framer-motion. To use NextUI in a Refine or any other React application, install and configure it as highlighted above.
Live CodeSandbox Example
npm create refine-app@latest -- --example blog-refine-nextui