


Introduction
Forms are crucial in how web administrators connect with their audience and how users interact with web applications. Hence, form validation is often the utmost priority for a developer when building web applications.
However, due to how complicated and frustrating form validation can get, developers often settle for third-party libraries that simplify the process.
In this guide, we’ll introduce React Hook Form, a form validation library for React, and demonstrate how to use it to validate forms in React applications.
Prerequisite
We'll be using Refine to set up an example project for this article, and since Refine is a TypeScript first library, you need to have a good understanding of TypeScript to follow along with this tutorial.
You'll also need the following:
- The LTS version of Node.js installed on your machine
- Fundamental knowledge of React and Refine
- Basic understanding of Material UI
What is React Hook Form?
React Hook Form is a lightweight library for validating forms in React. It provides a flexible and extensible approach to handling form functionalities such as validation, error handling, and submission with minimal code and zero re-renders.
The library allows you to isolate component re-renders by using uncontrolled inputs with the ref hook to control inputs, rather than using the conventional way of depending on a state, which may cause unnecessary re-renders.
React Hook Form uses its constraint-based validation API to validate forms by leveraging existing HTML markups, thus maintaining a good HTML standard.
The package is super light, it has a minified size of 24.6kb and a minified + gzipped size of 8.8kb. This is because the library doesn’t use any dependencies to handle any of its functionalities under the hood.
 React Hook Form package size chart
What is Refine?
Refine is a headless React-based framework for rapidly building CRUD applications like admin panels, dashboards, and internal tools. The framework uses a collection of helper hooks, components, and data providers that give you complete control over your application's user interface.
There are a lot of benefits to using Refine in your applications, to name a few:
- It is headless, meaning you can either use it as is or pair it up with third-party UI libraries.
- Easy learning curve
- Customization
- Backend agnostic, you can connect with any backend technologies
- Authentication, state management, data fetching routing, and more are prioritized.
Visit Refine's documentation to learn more about the framework.
Project setup
Before we get into the nitty-gritty of how React Hook Form works and how to use it to validate forms in your projects, let's set up an example project with Refine for reference purposes.
First things first, open your command line tool, cd to your folder of choice, and run the following command to bootstrap a Refine React template using the create refine-app tool:
npm create refine-app@latest tutorial
After running the command, you’ll be prompted to choose your preferences for the project. Select the following options to proceed:
✔ Downloaded remote source successfully.
✔ Choose a project template · Refine(Vite)
✔ What would you like to name your project?: · tutorial
✔ Choose your backend service to connect: · REST API
✔ Do you want to use a UI Framework?: · Material UI
✔ Do you want to add example pages?: · No
✔ Do you need any Authentication logic?: · none
✔ Do you need i18n (Internationalization) support?: · no
✔ Choose a package manager: · npm
Once the installation is done, run the commands below to cd into the project folder and start the development server:
npm run dev
The second command will start the development server for our project and automatically preview our app in the default browser. If it doesn't, open the browser manually and navigate to http://localhost:5173.
 Refine welcome dashboard
You should see a similar Refine welcome page rendered to your browser just like in the image above.
Next, we'll install the Refine React Hook Form package and set up Refine. To do that, go back to the command line and run the following command to install the @refinedev/react-hook-form package:
npm i @refinedev/react-hook-form react-hook-form
After installation, open the project folder in your IDE of choice, in our case, we'll be using VS code. The next step is to create a pages subfolder inside the src folder and add a create.tsx file.
Next, open the create.tsx file and add the following code:
src/pages/create.tsx
import React from "react";
import TextField from "@mui/material/TextField";
import FormControl from "@mui/material/FormControl";
import InputLabel from "@mui/material/InputLabel";
import MenuItem from "@mui/material/MenuItem";
import Select from "@mui/material/Select";
import Button from "@mui/material/Button";

const Create: React.FC = () => {
  return (
    <form style={{ display: "flex", flexDirection: "column" }}>
      <TextField
        fullWidth
        sx={{ maxWidth: 600 }}
        label="First Name"
        margin="dense"
      />
      <TextField
        fullWidth
        sx={{ maxWidth: 600 }}
        label="Last Name"
        margin="dense"
      />
      <TextField
        fullWidth
        sx={{ maxWidth: 600 }}
        label="Address"
        margin="dense"
      />
      <TextField
        fullWidth
        sx={{ maxWidth: 600 }}
        label="Number"
        margin="dense"
        type="number"
      />
      <FormControl sx={{ marginTop: 1, marginBottom: 0.7 }}>
        <InputLabel id="type-label">Work</InputLabel>
        <Select
          sx={{ maxWidth: 600 }}
          margin="dense"
          type="select"
          labelId="type-label"
          label="Work"
        >
          <MenuItem value="employed">Employed</MenuItem>
          <MenuItem value="unemployed">Unemployed</MenuItem>
        </Select>
      </FormControl>
      <TextField
        fullWidth
        sx={{ maxWidth: 600 }}
        label="Company"
        margin="dense"
      />
      <TextField fullWidth sx={{ maxWidth: 600 }} label="Role" margin="dense" />
      <Button
        type="submit"
        variant="contained"
        fullWidth
        sx={{
          maxWidth: "600px",
          padding: "10px",
          backgroundColor: "#67BE23",
          color: "white",
          marginTop: "5px",
        }}
      >
        Submit
      </Button>
    </form>
  );
};

export default Create;
Here, we created a regular HTML form using a form element and the Material UI TextField form control components.
Each <TextField /> will be used for getting the first name, last name, address, employment status, place of work, role, and phone number values. We also created an interface object of the form, we’ll be using this later in the article.
This file will serve as our resource page, which we're going to pass to the <Refine /> component inside the App.tsx file.
To do so, open the App.tsx file and import the create.tsx file, then add it as a <Route /> element. After that add "posts" as a resource.
App.tsx
import { Refine } from "@refinedev/core";
import { RefineKbar, RefineKbarProvider } from "@refinedev/kbar";

import {
  useNotificationProvider,
  RefineSnackbarProvider,
  ThemedLayout,
} from "@refinedev/mui";

import CssBaseline from "@mui/material/CssBaseline";
import GlobalStyles from "@mui/material/GlobalStyles";
import routerProvider, {
  DocumentTitleHandler,
  UnsavedChangesNotifier,
} from "@refinedev/react-router-v6";
import dataProvider from "@refinedev/simple-rest";
import { BrowserRouter, Outlet, Route, Routes } from "react-router-dom";
import { ColorModeContextProvider } from "./contexts/color-mode";
import Create from "./pages/create";

function App() {
  return (
    <BrowserRouter>
      <RefineKbarProvider>
        <ColorModeContextProvider>
          <CssBaseline />
          <GlobalStyles styles={{ html: { WebkitFontSmoothing: "auto" } }} />
          <RefineSnackbarProvider>
            <Refine
              dataProvider={dataProvider("https://api.fake-rest.refine.dev")}
              notificationProvider={useNotificationProvider}
              resources={[
                {
                  name: "posts",
                  list: "/",
                },
              ]}
              routerProvider={routerProvider}
              options={{
                syncWithLocation: true,
                warnWhenUnsavedChanges: true,
              }}
            >
              <Routes>
                <Route
                  element={
                    <ThemedLayout>
                      <Outlet />
                    </ThemedLayout>
                  }
                >
                  <Route index element={<Create />} />
                </Route>
              </Routes>
              <RefineKbar />
              <UnsavedChangesNotifier />
              <DocumentTitleHandler />
            </Refine>
          </RefineSnackbarProvider>
        </ColorModeContextProvider>
      </RefineKbarProvider>
    </BrowserRouter>
  );
}

export default App;
If you save your progress and open up the browser, you should see a form similar to the one below.
 Basic form layout
That's it for the project setup, next we'll integrate React Hook Forms into our form.
Integrating React Hook Forms
Refine is a framework built with many micro-frontend solutions in mind, and form validation isn't an exception. As a result, it offers a React Hook Form adapter that allows you to seamlessly integrate the React Hook Form library with Refine.
But before we start implementing React Hook Form in our app, we need to first understand its fundamentals.
The library provides a set of useful components and hooks, such as the controller component and the useForm hook, that let us register our form component into the hook, thus making its values available for both validation and submission.
The library performs most of these functionalities using the methods exposed by the useForm hook. Here are some of the available methods:
register: This method allows you to register an input for validationhandleSubmit: This function receives form data if validation is successful.formState: This object contains information about the form's state.control: This object contains methods for registering components into React Hook Form
Here's a basic usage of the useForm hook:
const {
  control,
  handleSubmit,
  watch,
  formState: { errors },
} = useForm({
  mode: "onChange",
  defaultValues,
});
The controller, on the other hand, is a wrapper component for registering controlled components from external UI libraries such as Material UI.
The component takes care of the registration process of components that don't expose input's ref but rely on a state. So it's a register method, but for controlled inputs.
The component accepts three major properties:
name: This prop accepts a unique string value of the input's name.control: This prop accepts the control object from theuseFormhook.render: This prop accepts a function that renders a component that will be controlled by React Hook Form.
Here's a basic usage of the controller component:
<Controller
  control={control}
  name="firstname"
  render={({ field }) => (
    <TextField
      {...field}
      fullWidth
      sx={{ maxWidth: 600 }}
      label="First Name"
      margin="dense"
      error={!!errors.firstname}
      helperText={errors.firstname && `${errors.firstname.message}`}
    />
  )}
/>
In the example above, we're passing the controller properties to the <TextField /> component via the field parameter and rendering it with the <Controller /> render property.
Since we're using Material UI for our project, our focus will be on the Controller hook.
Now to integrate React Hook Form into our application, we'll import the Controller component and the useForm hook inside the create.tsx file like so:
import { useForm } from "@refinedev/react-hook-form";
import { Controller } from "react-hook-form";
Next, we'll wrap the <TextField /> components with the Controller component:
src/resources/create.tsx
import React from "react";
import TextField from "@mui/material/TextField";
import FormControl from "@mui/material/FormControl";
import InputLabel from "@mui/material/InputLabel";
import MenuItem from "@mui/material/MenuItem";
import Select from "@mui/material/Select";
import Button from "@mui/material/Button";
import { Controller } from "react-hook-form";

const Create: React.FC = () => {
  return (
    <form style={{ display: "flex", flexDirection: "column" }}>
      <Controller
        control={control}
        name="firstname"
        render={({ field }) => (
          <TextField
            {...field}
            fullWidth
            sx={{ maxWidth: 600 }}
            label="First Name"
            margin="dense"
          />
        )}
      />
      <Controller
        control={control}
        name="lastname"
        render={({ field }) => (
          <TextField
            {...field}
            fullWidth
            sx={{ maxWidth: 600 }}
            label="Last Name"
            margin="dense"
          />
        )}
      />
      <Controller
        control={control}
        name="address"
        render={({ field }) => (
          <TextField
            {...field}
            fullWidth
            sx={{ maxWidth: 600 }}
            label="Address"
            margin="dense"
          />
        )}
      />
      <Controller
        control={control}
        name="number"
        render={({ field }) => (
          <TextField
            {...field}
            fullWidth
            sx={{ maxWidth: 600 }}
            label="Number"
            margin="dense"
            type="number"
          />
        )}
      />
      <FormControl sx={{ marginTop: 1, marginBottom: 0.7 }}>
        <InputLabel id="type-label">Work</InputLabel>
        <Controller
          control={control}
          name="work"
          render={({ field }) => (
            <Select
              sx={{ maxWidth: 600 }}
              margin="dense"
              {...field}
              type="select"
              labelId="type-label"
              label="Work"
            >
              <MenuItem value="employed">Employed</MenuItem>
              <MenuItem value="unemployed">Unemployed</MenuItem>
            </Select>
          )}
        />
      </FormControl>
      <Controller
        control={control}
        name="company"
        render={({ field }) => (
          <TextField
            {...field}
            fullWidth
            sx={{ maxWidth: 600 }}
            label="Company"
            margin="dense"
          />
        )}
      />
      <Controller
        control={control}
        name="role"
        render={({ field }) => (
          <TextField
            {...field}
            fullWidth
            sx={{ maxWidth: 600 }}
            label="Role"
            margin="dense"
          />
        )}
      />
      <Button
        type="submit"
        variant="contained"
        fullWidth
        sx={{
          maxWidth: "600px",
          padding: "10px",
          backgroundColor: "#67BE23",
          color: "white",
          marginTop: "5px",
        }}
      >
        Submit
      </Button>
    </form>
  );
};

export default Create;
Here, we are passing the name keys (firstname, lastname, number…), control method, and <TextField /> component to the name, control, and render properties of the <Controller /> component respectively.
We’re also using the field prop to integrate the controller’s data with our <TextField /> components, by dynamically spreading it on each component.
For the next step, destructure the control method from the useForm hook:
// ...

import { useForm } from "@refinedev/react-hook-form";
import { HttpError } from "@refinedev/core";

interface IFormValue {
  firstname: string;
  lastname: string;
  address: string;
  number: number;
  work: string;
  company: string;
  role: string;
}
const defaultValues = {
  firstname: "",
  lastname: "",
  address: "",
  number: 0,
  work: "unemployed",
  company: "",
  role: "",
};

const Create: React.FC = (props) => {
  const {
    control,
    handleSubmit,
    watch,
    formState: { errors },
  } = useForm<IFormValue, HttpError, IFormValue>({
    mode: "onChange",
    defaultValues,
  });

  const handleSubmission = (data: IFormValue) => console.log(data);

  return (
    <form
      style={{ display: "flex", flexDirection: "column" }}
      onSubmit={handleSubmit(handleSubmission)}
    >
      {/* ... */}
    </form>
  );
};

export default Create;
The defaultValue object properties will serve as the default value for our form's TextFields. The mode property specifies how React Hook Form should watch the TextField for errors.
That’s it, our form has been successfully integrated with React Hook Form. Next, we’ll look at how we can validate the form.
Validating forms with React Hook Forms
Now that we’ve integrated our form with React Hook Form, we can easily validate inputs by adding specific restrictions to our TextFields, like the minimum and maximum characters allowed for each TextFields.
We can do this by adding a minLength property to the <Controller /> component and specifying a number value for either one.
<Controller
  control={control}
  name="firstname"
  rules={{ required: true, minLength: 5 }}
  render={({ field }) => (
    <TextField
      {...field}
      fullWidth
      sx={{ maxWidth: 600 }}
      label="First Name"
      margin="dense"
    />
  )}
/>
This way, if we input characters beyond the specified amount in the maxLength props, we’ll get an error.
To display the error, we’d have to render a message based on the state of the errors object from the formState below each field:
<Controller
  control={control}
  name="firstname"
  rules={{ required: true, minLength: 5 }}
  render={({ field }) => (
    <TextField
      {...field}
      fullWidth
      sx={{ maxWidth: 600 }}
      label="First Name"
      margin="dense"
    />
  )}
/>;
{
  errors.firstname && (
    <span style={{ color: "red" }}>
      You need to enter at least 5 characters!
    </span>
  );
}
 Inline error message placement
As you can see, this is not the ideal approach to displaying errors on the form, the placement of the error message is off and it doesn’t go well with the input field’s theme.
What we’re going to do is use a schema validation library, yup to be specific, to validate our form inputs. This will let us integrate the error messages into the <TextField /> component.
Schema Validation
React Hook Form offers the option of using schema libraries such as yup and joi to validate forms input via the resolver property.
Schemas are object-based approaches for defining validation rules for form input fields. Schemas integrate seamlessly with React Hook Form, giving us complete control over validation and how error messages are displayed on a form.
The first step is to install the yup and the hook form resolver library with the following commands:
npm i @hookform/resolvers yup
The hook form resolver library is a resolver for yup. The library aids in integrating yup to the React Hook Form library.
Once the installation is done, import yup and yupResolver and create a schema object with the following keys and values:
// ...

import * as Yup from "yup";
import { yupResolver } from "@hookform/resolvers/yup";

const schema = Yup.object().shape({
  firstname: Yup.string().label("First Name").trim().required().min(3).max(64),
  lastname: Yup.string().label("Last Name").trim().required().min(3).max(64),
  address: Yup.string().label("Address").trim().required().min(3),
  number: Yup.number().label("Number").required(),
  work: Yup.string().label("Work").oneOf(["unemployed", "employed"]),
  company: Yup.string().when("work", ([work], schema) => {
    if (work === "employed") {
      return schema.required().min(3).max(64);
    }
    return schema.notRequired();
  }),
  role: Yup.string().when("work", ([work], schema) => {
    if (work === "employed") {
      return schema.required().min(3).max(64);
    }
    return schema.notRequired();
  }),
});

const Create: React.FC = (props) => {
  return {
    /* ... */
  };
};
You'll notice that the schema for the select (work) component is different from the rest because we're conditionally validating the company and role fields. This is being done by the when, is and then methods.
The method checks if the selected value is Employed, while the then method handles the validation. We'll take this up a notch in the coming section by rendering both fields based on the value selected.
NOTE
The oneOff method is for telling yup that one of the string values in the provided array will be selected.
Finally, add a resolver key to the useForm object and pass the yupResolver function and schema to it as a value:
// ...
import { useForm } from "@refinedev/react-hook-form";
import { HttpError } from "@refinedev/core";
import { yupResolver } from "@hookform/resolvers/yup";

// ...

const { control } = useForm<IFormValue, HttpError, IFormValue>({
  mode: "onChange",
  defaultValues,
  resolver: yupResolver(schema),
});
That’s all we have to do to set up our schema, next we’ll look at a new way we can handle errors.

Handling errors
Handling errors with Material UI's TextField component is fairly straightforward, all we have to do is destructure the errors property from the useForm’s formState method:
const {
  control,
  formState: { errors },
} = useForm<IFormValue>({
  mode: "onChange",
  defaultValues,
  resolver: yupResolver(schema),
});
Then, pass the error object and message to the error and helperText props like so:
<Controller
  control={control}
  name="firstname"
  render={({ field }) => (
    <TextField
      fullWidth
      {...field}
      sx={{ maxWidth: 600 }}
      label="First Name"
      margin="dense"
      error={!!errors.firstname}
      helperText={errors.firstname && `${errors.firstname.message}`}
    />
  )}
/>
This will check if there's an error with the error prop, then it'll display a dynamic message with the help of the helperText prop.
 Yup validation error styling
Unlike the previous error message we implemented, this approach does not only display an error message that is intrinsic to the field's value, but it also changes the outline color of the TextField to red.
Our form is almost ready, what's left for us to do is to conditionally display the Company and Role fields and look at how we can handle our form's submission function.
How to conditionally render input fields
To go about this, we'll need a function that we can use to track the input value of the Select component. Fortunately for us, React Hook Form has a watch function that lets us do just that.
The watch function does exactly what its name implies. It watches and tracks the values of the input fields.
First, destructure the watch function from the useForm hook, then declare a work variable and pass the watch method to it, with the "work" string passed to it as a parameter:
const {
    control,
    watch,
    formState: { errors },
} = useForm <IFormValue>
{
    mode: "onChange",
    defaultValues,
    resolver: yupResolver(schema),
};

const work = watch("work");
This way, the watch function will be able to track the selected option in the work select component.
Next, wrap the Company and Role fields with the following code:
{
  work === "employed" && (
    <>
      <Controller
        control={control}
        name="company"
        render={({ field }) => (
          <TextField
            {...field}
            fullWidth
            sx={{ maxWidth: 600 }}
            label="Company"
            margin="dense"
            error={!!errors.company}
            helperText={errors.company && `${errors.company.message}`}
          />
        )}
      />
      <Controller
        control={control}
        name="role"
        render={({ field }) => (
          <TextField
            {...field}
            fullWidth
            sx={{ maxWidth: 600 }}
            label="Role"
            margin="dense"
            error={!!errors.role}
            helperText={errors.role && `${errors.role.message}`}
          />
        )}
      />
    </>
  );
}
NOTE
Make sure to add a fragment tag, or else TypeScript will throw an error.
You can find latest version of the code below:
src/pages/create.tsx
import React from "react";
import TextField from "@mui/material/TextField";
import FormControl from "@mui/material/FormControl";
import InputLabel from "@mui/material/InputLabel";
import MenuItem from "@mui/material/MenuItem";
import Select from "@mui/material/Select";
import Button from "@mui/material/Button";
import { Controller } from "react-hook-form";
import { useForm } from "@refinedev/react-hook-form";
import * as Yup from "yup";
import { yupResolver } from "@hookform/resolvers/yup";
import { HttpError } from "@refinedev/core";

interface IFormValue {
  firstname: string;
  lastname: string;
  address: string;
  number: number;
  work: string;
  company: string | undefined;
  role: string | undefined;
}
const defaultValues = {
  firstname: "",
  lastname: "",
  address: "",
  number: 0,
  work: "unemployed",
  company: "",
  role: "",
};

const schema = Yup.object().shape({
  firstname: Yup.string().label("First Name").trim().required().min(3).max(64),
  lastname: Yup.string().label("Last Name").trim().required().min(3).max(64),
  address: Yup.string().label("Address").trim().required().min(3),
  number: Yup.number().label("Number").required(),
  work: Yup.string().label("Work").required().oneOf(["unemployed", "employed"]),
  company: Yup.string().when(
    "work",
    ([work]: string | string[], schema: Yup.AnySchema) => {
      if (work === "employed") {
        return schema.required().min(3).max(64);
      }
      return schema.notRequired();
    },
  ),
  role: Yup.string().when(
    "work",
    ([work]: string | string[], schema: Yup.AnySchema) => {
      if (work === "employed") {
        return schema.required().min(3).max(64);
      }
      return schema.notRequired();
    },
  ),
});

const Create: React.FC = () => {
  const {
    control,
    handleSubmit,
    watch,
    formState: { errors },
  } = useForm<IFormValue, HttpError, IFormValue>({
    mode: "onChange",
    defaultValues,
    resolver: yupResolver(schema),
  });

  const handleSubmission = (data: any) => console.log(data);

  const work = watch("work");

  return (
    <form
      style={{ display: "flex", flexDirection: "column" }}
      onSubmit={handleSubmit(handleSubmission)}
    >
      <Controller
        control={control}
        name="firstname"
        rules={{ required: true, minLength: 5 }}
        render={({ field }) => (
          <TextField
            {...field}
            fullWidth
            sx={{ maxWidth: 600 }}
            label="First Name"
            margin="dense"
            error={!!errors.firstname}
            helperText={errors.firstname && `${errors.firstname.message}`}
          />
        )}
      />
      <Controller
        control={control}
        name="lastname"
        render={({ field }) => (
          <TextField
            {...field}
            fullWidth
            sx={{ maxWidth: 600 }}
            label="Last Name"
            margin="dense"
          />
        )}
      />
      <Controller
        control={control}
        name="address"
        render={({ field }) => (
          <TextField
            {...field}
            fullWidth
            sx={{ maxWidth: 600 }}
            label="Address"
            margin="dense"
          />
        )}
      />
      <Controller
        control={control}
        name="number"
        render={({ field }) => (
          <TextField
            {...field}
            fullWidth
            sx={{ maxWidth: 600 }}
            label="Number"
            margin="dense"
            type="number"
          />
        )}
      />
      <FormControl sx={{ marginTop: 1, marginBottom: 0.7 }}>
        <InputLabel id="type-label">Work</InputLabel>
        <Controller
          control={control}
          name="work"
          render={({ field }) => (
            <Select
              sx={{ maxWidth: 600 }}
              margin="dense"
              {...field}
              type="select"
              labelId="type-label"
              label="Work"
            >
              <MenuItem value="employed">Employed</MenuItem>
              <MenuItem value="unemployed">Unemployed</MenuItem>
            </Select>
          )}
        />
      </FormControl>
      {work === "employed" && (
        <>
          <Controller
            control={control}
            name="company"
            render={({ field }) => (
              <TextField
                {...field}
                fullWidth
                sx={{ maxWidth: 600 }}
                label="Company"
                margin="dense"
                error={!!errors.company}
                helperText={errors.company && `${errors.company.message}`}
              />
            )}
          />
          <Controller
            control={control}
            name="role"
            render={({ field }) => (
              <TextField
                {...field}
                fullWidth
                sx={{ maxWidth: 600 }}
                label="Role"
                margin="dense"
                error={!!errors.role}
                helperText={errors.role && `${errors.role.message}`}
              />
            )}
          />
        </>
      )}
      <Button
        type="submit"
        variant="contained"
        fullWidth
        sx={{
          maxWidth: "600px",
          padding: "10px",
          backgroundColor: "#67BE23",
          color: "white",
          marginTop: "5px",
        }}
      >
        Submit
      </Button>
    </form>
  );
};

export default Create;
Now, if you save your progress and go to the browser, the company and role fields should only display when the Employed option is selected.
 Conditional fields for employment
Form submission
Since our create component is not controlled, the way we're going to handle form submission will be different from what you might be used to.
Rather than adding a click event to the form's button and using it to fire a function that will handle all the submission functionalities, we're going to add an onSubmit event listener directly on the form and pass the handleSubmit method to it.
First off, destructure the handleSubmit method from the useForm hook and create a handleSubmission function like so:
  const {
    control,
    handleSubmit,
    watch,
    formState: { errors },
} = useForm <IFormValue>
{
    mode: "onChange",
    defaultValues,
    resolver: yupResolver(schema),
};

const handleSubmission = (data: IFormValue) => console.log(data);
Lastly, add an onSubmit event handler to the form and pass the handleSubmit method and formSubmission function to it:
<form
  onSubmit={handleSubmit(formSubmission)}
  style={{ display: "flex", flexDirection: "column" }}
>
  ...
</form>
Now, if you save your progress and head over to the browser, you should get a logged object of the form’s data in your console when you fill in the fields and submit the form.
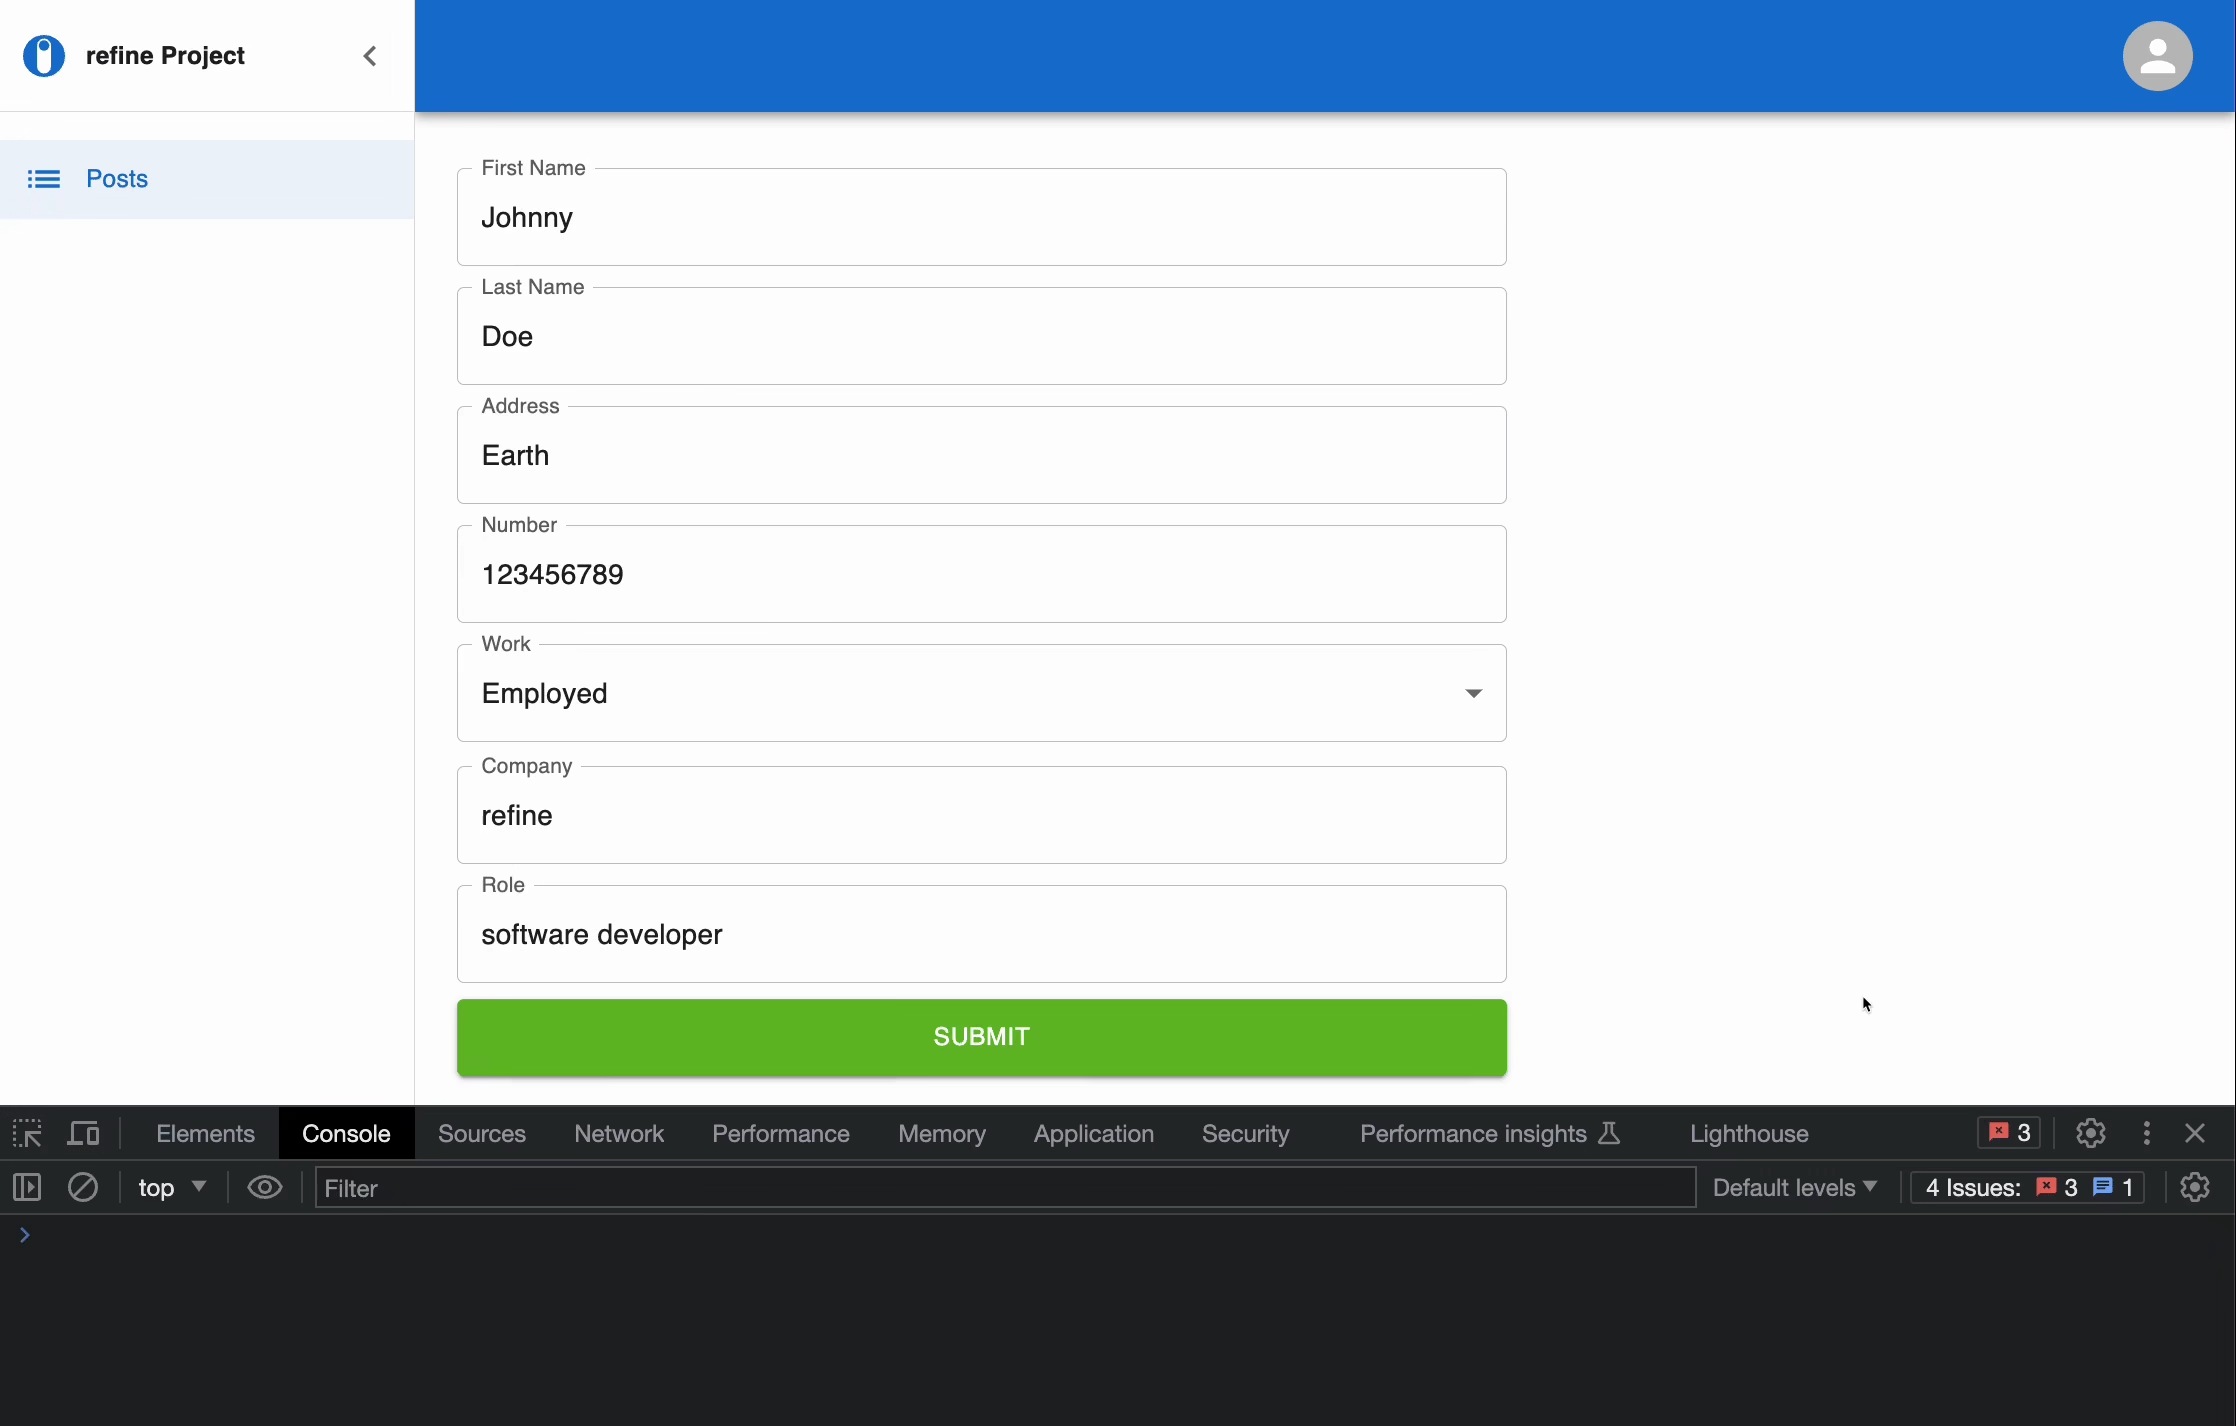 Form submission logged in console
If you’d like to use your form data in other parts of your Refine application, for example, the List page. All you have to do is destructure the onFinish method from the useForm hook and pass it to the handleSubmit function on the form.
Conclusion
There you have it, we’ve successfully built a form that can validate input values, display dynamic error messages, and render fields based on the selected select option, using Refine, React Hook Form, and yup schema validator.
Example
npm create refine-app@latest -- --example blog-refine-react-hook-form