Brief about kubectl and the need for configuration management
The kubectl utility is a command line interface (CLI) for interacting with Kubernetes. You can use it to manage Kubernetes resources such as pods, services, and deployments. Configuration Management is the process of ensuring that a cluster and its components remain in a desired state.
Steps we'll cover in this tutorial:
- Brief about kubectl and the need for configuration management
- Importance of understanding kubectl config set-context
- Basic configuration methods
- Using --kubeconfig flag
- Utilizing kubeconfig environment variable
- Understanding and using set-context
- Switching between contexts
- Best practices for managing contexts
- Regularly pruning old or unused contexts
- Advanced context configurations
- Potential pitfalls \& troubleshooting
- Integration with CI/CD pipelines
Importance of understanding kubectl config set-context
You must have knowledge of kubectl config set-context so that you can change contexts, which are sets of configuration parameters defined for clusters, users and namespaces. The ability to quickly switch from one set of Kubernetes contexts to another is one of the most significant benefits of using kubectl config set-context.
When you work on more than one project or need to manage a number of Kubernetes clusters, this can be particularly useful. You can change the current context or create a new context based upon an existing one by using kubectl config set-context.
Basic configuration methods
Placing kubeconfig in $HOME/.KUBE/CONFIG
The configuration file that kubectl is looking for must be in this location. This file contains the information about cluster, user and namespace. In one file, you can create multiple clusters, users and namespaces or use a number of files. Modifying your configuration file can also be done with kubectl config.
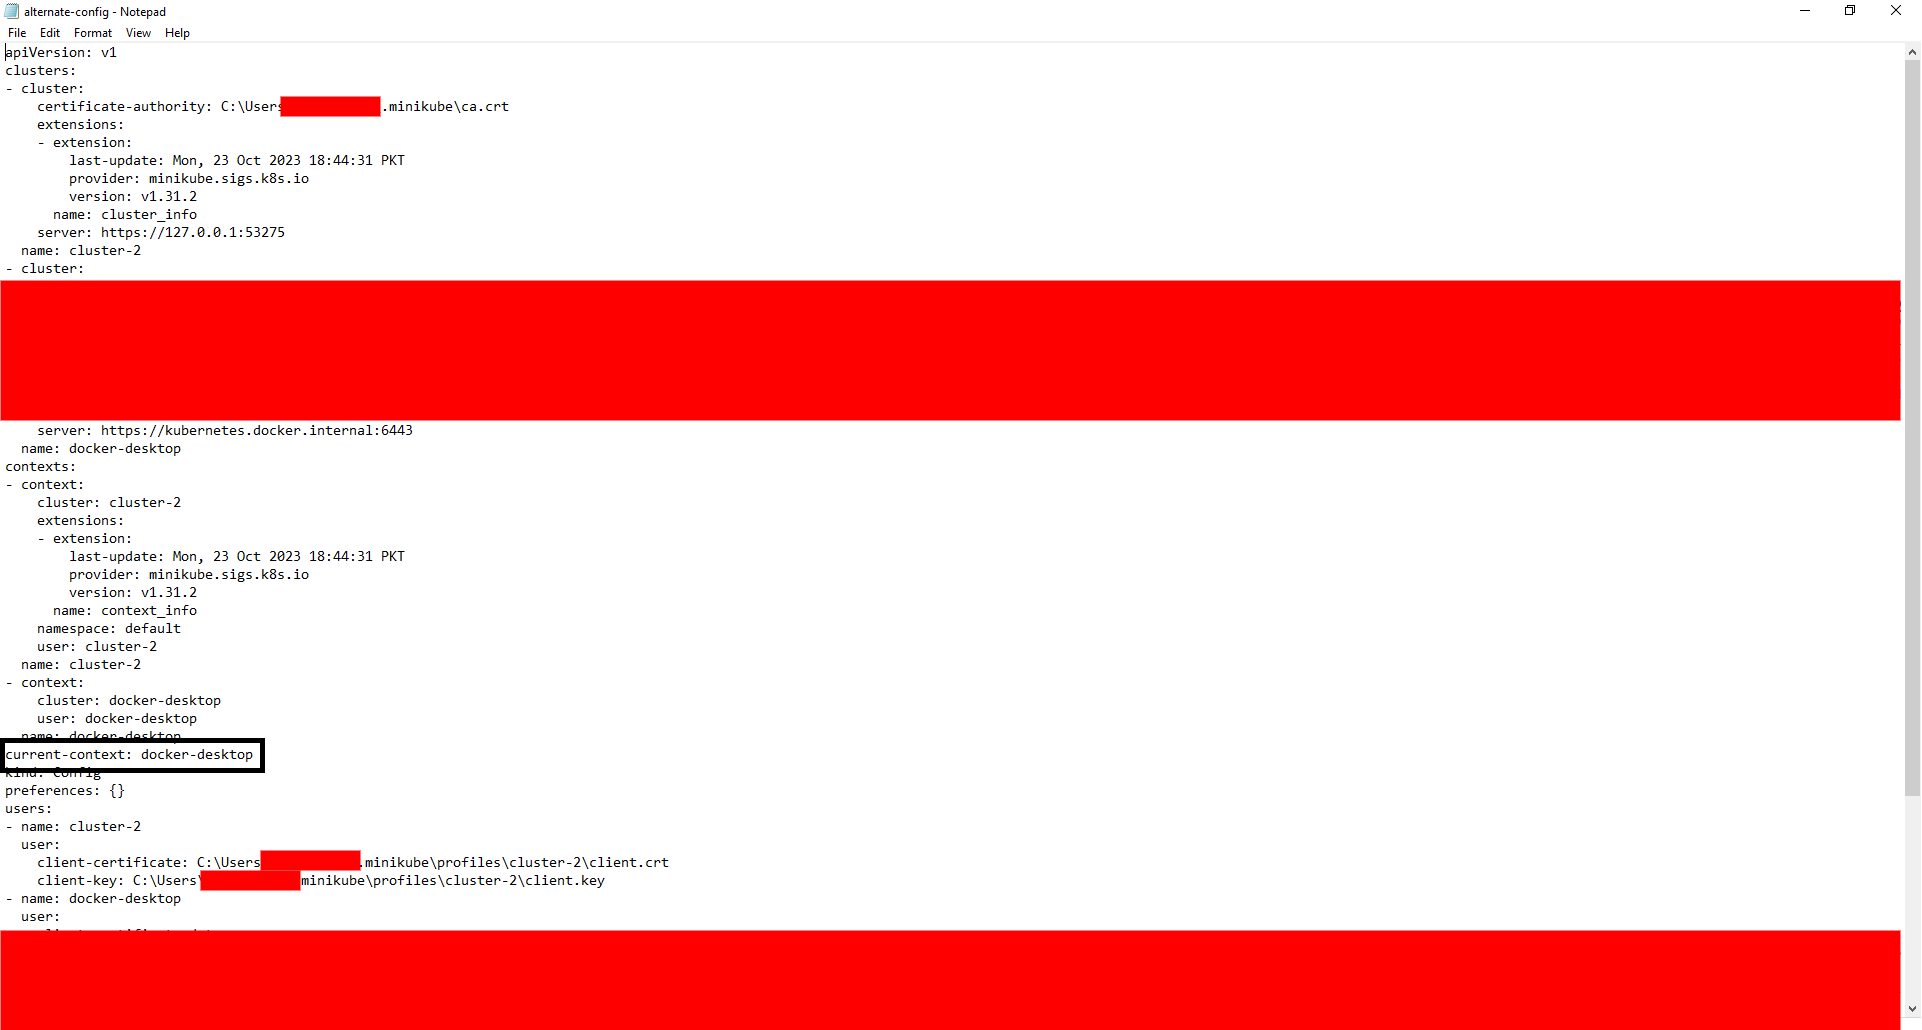
The below configuration is placed at the default location(i.e., C:\Users\username\ .kube), so every kubectl command will use this configuration:

Using --kubeconfig flag
For each of the kubectl commands, this will allow you to define a separate configuration file. This flag may be used to access a series of clusters with different configuration files. The KUBECONFIG environment variable can also define the list of configuration files, which is separated by a colon.
Now, suppose that we have another configuration, having the current context changed to 'docker-desktop' from 'cluster-2'. We can use that configuration by specifying the path where it is located and utilizing the kubeconfig flag.
Here is another configuration:

For Example, in order to view specific configurations using the 'kubectl' and 'kubeconfig' flag, you can run the following command:
kubectl config view --kubeconfig=[Config_File_Path]
Utilizing kubeconfig environment variable
You will be able to create a configuration file for the current shell session. The default location and the '--kubeconfig' flag can be overridden by this variable. To switch from one configuration file to another, you may also change the value of this variable.
Let's view the previous default configuration that has the current-context set to 'cluster-2':

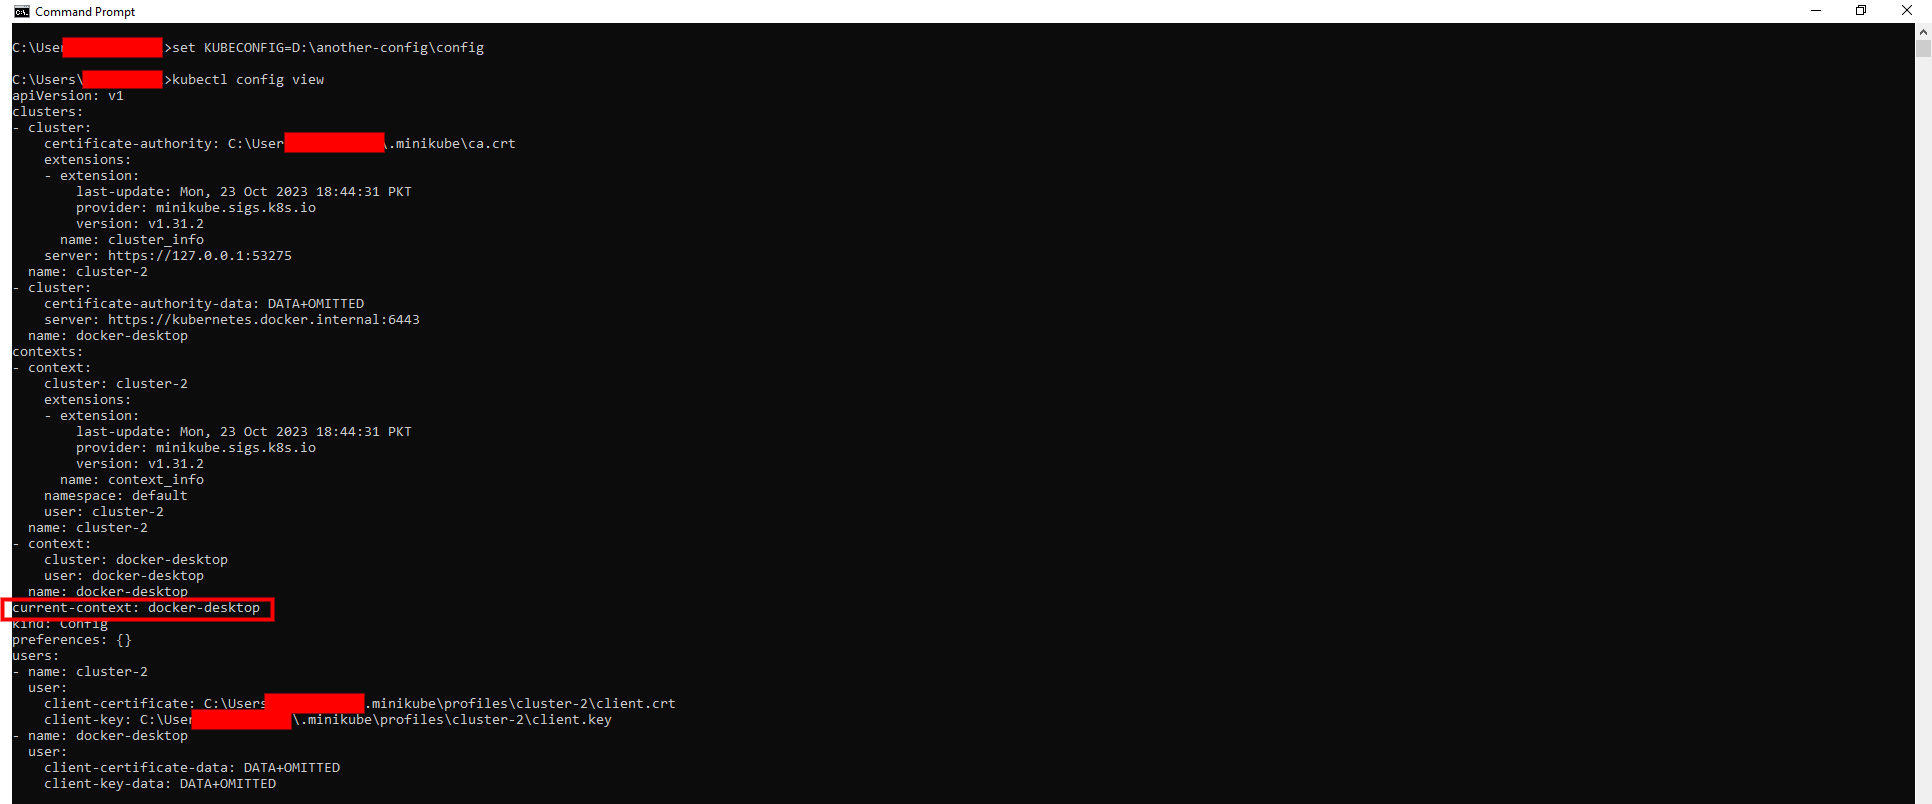
We have another configuration with the current-context set to 'docker-desktop'. By running the command below, we can set that configuration for the current shell session:
Command for Windows:
set KUBECONFIG=[Config_File_Path]
Command for Linux/MacOS:
export KUBECONFIG=[Config_File_Path]
The below output shows that the current shell session is using the configuration specified against the 'KUBECONFIG' environment variable that has the current-context set to 'docker-desktop':

Understanding and using set-context
What is set-context?
Set-context is a kubectl config subcommand that allows you to create or update a context from your kubeconfig file. The new values of the cluster, users, namespaces and other parameters that define a context can be specified in the command.
Setting up multiple contexts
It's not the usual practice to have one Kubernetes cluster, particularly when dealing with different environments such as development, staging and production. Each context associates a cluster, user, and an optional namespace. These groupings allow you to specify access parameters for different cluster environments.
For Example, if we want to add a new development context to the existing cluster (i.e., cluster-2, we can use the following command:
kubectl config set-context dev-context --cluster=cluster-2

Then, we add production context to another cluster existing cluster (i.e., docker-desktop) by running the command below:
kubectl config set-context prod-context --cluster=docker-desktop

Switching between contexts
When you've got a lot of different contexts, it often makes sense to switch between them depending on the requirement. You can use 'kubectl config use-context' followed by the name of a context that you want to use when switching between contexts. Your active Kubernetes context will be changed to the one you specified in the command.
For Example, you are currently using the production context, and you want to switch to the development context. For that purpose, you can run the following command:
kubectl config use-context dev-context

Best practices for managing contexts
Naming conventions for contexts
It will be easier to remember your context if you use consistent naming conventions in different contexts. Generic terms such as test or default should not be used as they may be confusing. Pick a name that is more descriptive instead. To name your contexts, for instance, you may use a format like CLUSTER-USER/ROLE-PROJECT.
As an example, consider the following sample context configuration with a naming convention:

Keeping contexts minimal and specific
Only create contexts you need and often use, avoiding the creation of redundant or overlapping contexts. You don't need to create a bunch of contexts for different namespaces, especially when you are only working with one cluster and one user.
Similarly, you don't have to specify a namespace in the context name if you only work with one namespace within a cluster. In addition, strictly avoid creating contexts that contain sensitive information like passwords and tokens.
Regularly pruning old or unused contexts
The contexts you are using should be reviewed and deleted from time to time if they aren't of any relevance or value anymore. It will make it easier to maintain and organize the kubeconfig file so that you do not run into errors or security problems.
To remove a context from the kubeconfig file, use the 'kubectl config delete-context [NAME_OF_CONTEXT]' command.
For Example, we have an existing context with the name 'QA-andrew-frontend', that is not in use anymore, so we can delete it by running the command below:
kubectl config delete-context QA-andrew-frontend

Advanced context configurations
Using context with namespaces
A namespace is an organizing tool for resources in a cluster. You'll be able to separate and group resources for a variety of projects, teams or purposes using namespaces. The ability to check access and quota for resources can also be achieved by using namespaces. By default, kubectl commands apply to the default namespace unless you specify a different namespace with the --namespace flag.
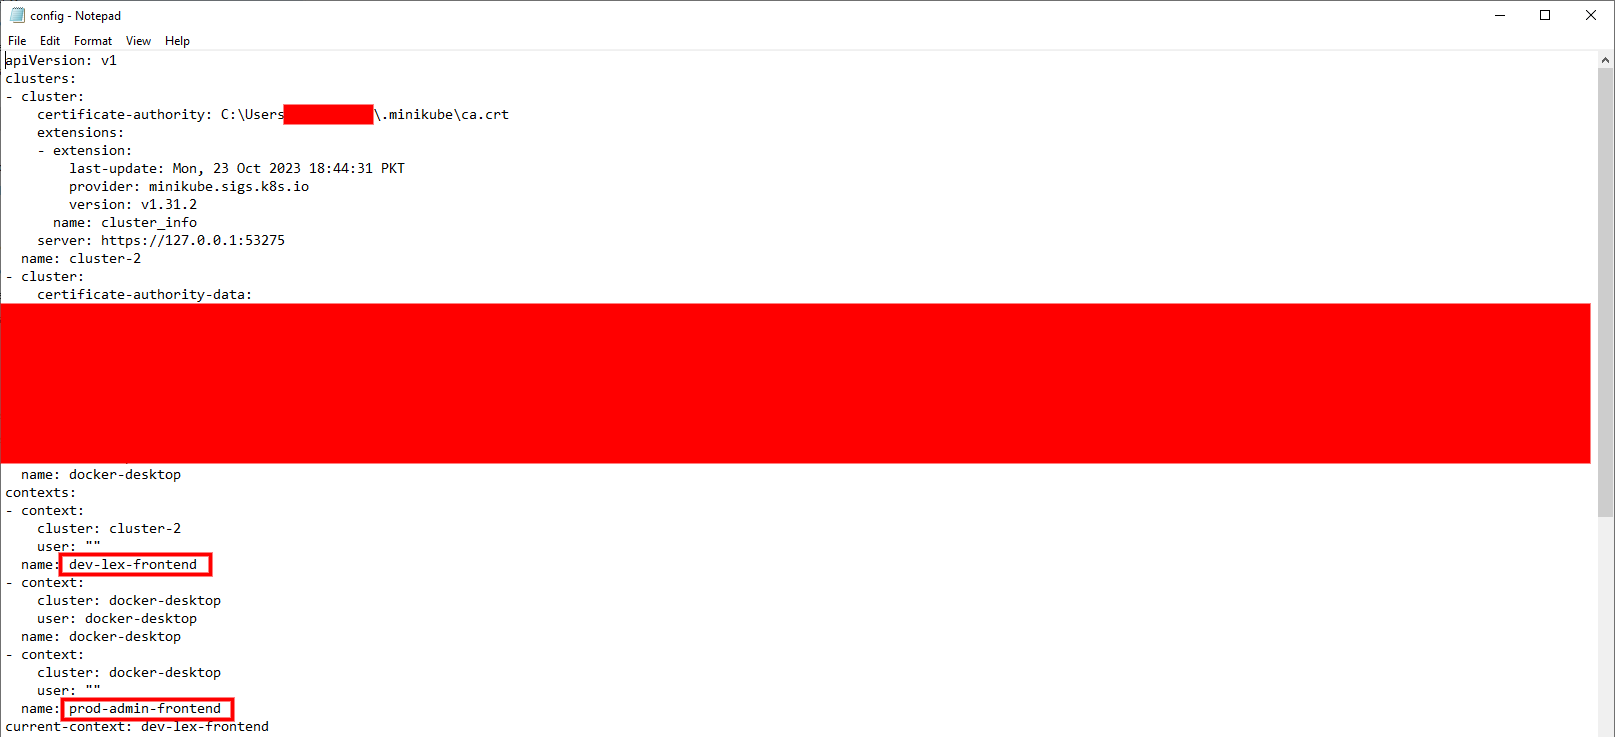
For instance, you can use the following command to update an existing context called 'dev-lex-frontend' which uses the cluster 'cluster-2' and the namespace 'app-frontend':
kubectl config set-context dev-lex-frontend --cluster=cluster-2 --namespace=app-frontend
After running the command above, the configuration will look like this:

Setting specific users or clusters for a context
In some cases, regardless of existing user or cluster settings, you may want to be using a particular user or cluster in your context. For Example, you may require using another user or cluster to run tests or for production purposes. If you create a context or if you modify it, use the --user or --cluster flag to achieve this.
Now, let's modify an existing context that uses the cluster 'cluster-2', by specifying a user for it through the command below:
kubectl config set-context dev-lex-frontend --cluster=cluster-2 --user=lex
After running the command above, the configuration will look like this:

Potential pitfalls & troubleshooting
Common errors and misconfigurations
No Context Found: The following error occurred when kubectl failed to find a valid context in your kubeconfig file or KUBECONFIG Environment Variable. It may occur if you have failed to configure your kubeconfig file correctly or if you've deleted or renamed the context that was used before.
User or cluster does not have context configured correctly: This error indicates that none of the defined users or clusters in the kubeconfig match the user or cluster specified in the context. This may occur if user or cluster credentials are changed or you have more than one kubeconfig file with different settings.
Context isn't working as expected: This error means that the context you are using is not behaving in accordance with your expectations. For Example, resources may appear from a different namespace or cluster than the one specified in this context. This may happen if you've overridden the context settings with other flags or commands, like 'namespace' or 'kubeconfig'.
Tips for troubleshooting context-related issues
- You can use the 'kubectl config set-context' command to create or modify a context or the 'kubectl config use-context' command to switch to an existing context to resolve the no context found error. The kubectl config get-contexts command can be used to specify all the contexts that are accessible for your kubeconfig file.
- Use the 'kubectl config set-context' with user or cluster flags to specify the correct user or cluster for the context to fix the context not set error. In order to see details of your existing user and cluster settings, you may also use the 'kubectl config view' command.
- Check if there are conflicting flags or commands in your kubectl command line to correct a context not working error, and remove them where appropriate. To determine the name of your current context, you may also use a 'kubectl config current-context' command.
Integration with CI/CD pipelines
Brief about how context management can help in continuous deployment and integration scenarios
Context management allows applications to be deployed and updated across different environments, e.g., development, testing, staging or production, which can contribute to the CI/CD integration scenarios. You can also use context management to determine various scenarios or access a variety of resources depending on the users or roles you are using.
Context management makes precise, automated deployments possible when integrated into CI/CD processes. A CD pipeline might, for example, deploy code to a 'staging' or 'production' context in accordance with predetermined criteria, whereas a CI pipeline might build and test the code in a 'development' context.
Conclusion & further reading
Summing up the importance of effective context management
In order to achieve a seamless operation of the processes, context management is required in Kubernetes. Users can quickly and safely switch among various cluster environments through the efficient management of contexts, ensuring security and precise deployment. In multi-project scenarios, it improves efficiency by streamlining operations, reducing errors and increasing productivity.
Pointing to additional resources or documentation
Read the official Kubernetes documentation, specialized community forums and dedicated online trainings to get a better understanding of context management.

