
This article was last updated on July 03, 2024, to add sections for Middleware in API Routes, Testing API Routes, and Securing API Routes.


Introduction
Next.js is a React framework and platform for building production-grade, static and server-side rendered applications, with a lot of useful built-in features and the ability to fully customize your page requests.
Next.js has a page-based routing system, and an API route feature which allows you to create APIs endpoints in a pages directory as though you're writing backend code. Next.js API Routes let you combine backend code along with your frontend code, thereby eliminating the need for extra codebases. With Next.js, building your RESTful or GraphQL APIs has never been easier!
In this article, you'll learn how to set up Next.js API Routes and we'll explain some of their core features and how you can leverage them in your applications along the way. You'll also learn how to submit form data to an API route.
What are Next.js API Routes?
Before you dive into Next.js API Routes let's provide a little background first.
An Application Programming Interface (API) defines how two application or services communicate with each other using HTTP requests and responses. This communication usually involves the two applications exchanging data. For example a client-side web application requesting from a server application a list of users stored in a database.
There are different methods of creating an API based on your requirements and use-cases. The most popular method around the web today is the Representational State Transfer (REST) method. The REST or RESTful method typically involves a client application sending a request - a request can either be for sending data (GET request), submitting data (PUT request), or updating data (UPDATE request) to a server. Some other methods of creating APIs include Simple Object Access Protocol (SOAP), GraphQL, and so on.
To build an application in which you need data and resources provided and stored by an external source, you'll need an API to request for those resources. Basically, you need two different applications that communicate with each other for exchange of data. In modern web development, this is typically done by creating two different applications (assuming you own the application that stores the data), a client-side application that runs in the browser and a server-side application that runs on the server.
In essence, Next.js API Routes eliminate the need for creating an additional backend server in your full-stack web applications. With Next.js API Routes, you can access or store data in your database like you would if you were using a separate backend application. We will discuss how you can begin using this straightforward approach Next.js provides developers in the next section.
How to create API Routes in Next.js
Creating API Routes in Next.js is similar to how you'd create a page route in Next.js. The only difference being that these API Routes are created in the api folder found in the pages folder of your application and any file found in the pages/api folder will be treated as an API endpoint. That is, if you have a file named example.js in pages/api, you can access the API route in your code by making a request to /api/example.
Let's go through an example:
If you open the pages folder in your project root directory, you should see an api folder in it (assuming your project was bootstrapped with create-next-app. If not, you'll need to create this folder yourself). The api folder contains an example API route named hello.js with the following content:
export default function handler(req, res) {
  res.status(200).json({ name: "John Doe" });
}
Navigating to localhost:3000/api/hello in the browser or making a GET request to it returns the following JSON response:
 API response in browser
Here's an explanation for the above code sample.
Every API route or endpoint must export a default function that handles the requests made to that endpoint. The function receives two parameters:
req: An instance of http.IncomingMessage which also includes some built-in helpers - or middlewares - such as req.body, req.query, and so on, for parsing the incoming request
res: An instance of http.ServerResponse which includes some Express.js-like helper methods such as res.send, res.body, and so on
These methods should be familiar if you've worked with Node.js and Express.js before.
In our example, we're exporting a default function named handler - of course this can be named anything you like - and then we're using the res server response object to return an HTTP status code and JSON data.
By default, every HTTP request to the endpoint using any of the HTTP request methods (GET, PUT, DELETE, and so on) will return the same response. To handle different methods in an API route we can write the handler function with switch statement (you can also use methods like if/else- whichever works for you, no hard rules!), like so:
export default function handler(req, res) {
  const requestMethod = req.method;
  const body = JSON.parse(req.body);
  switch (requestMethod) {
    case "POST":
      res
        .status(200)
        .json({ message: `You submitted the following data: ${body}` });

    // handle other HTTP methods
    default:
      res.status(200).json({ message: "Welcome to API Routes!" });
  }
}
Here's another example showing how you can submit data from a form in your application and send it to an API route using a POST request method to save in a database.
The form in pages/post.js below sends a post data to an API route api/post.
import { useState } from "react";

const Post = () => {
  const [title, setTitle] = useState("");
  const [post, setPost] = useState("");

  function handleSubmit(e) {
    e.preventDefault();
    const postData = async () => {
      const data = {
        title: title,
        post: post,
      };

      const response = await fetch("/api/post", {
        method: "POST",
        body: JSON.stringify(data),
      });
      return response.json();
    };
    postData().then((data) => {
      alert(data.message);
    });
  }

  return (
    <form onSubmit={handleSubmit}>
      <div>
        <label htmlFor="Title">Title</label>
        <input
          id="title"
          type="text"
          value={title}
          onChange={(e) => setTitle(e.target.value)}
        />
      </div>
      <div>
        <label htmlFor="post">Post</label>
        <input
          id="post"
          type="text"
          value={post}
          onChange={(e) => setPost(e.target.value)}
        />
      </div>
      <button type="submit">Submit</button>
    </form>
  );
};

export default Post;
With the following code in pages/api/post.js:
export default function handler(req, res) {
  const { title, post } = JSON.parse(req.body);

  // Then save the post data to a database
  res.status(200).json({ message: "Post created successfully" });
}
Dynamic API Routes
API Routes in Next.js can also be dynamic. This is similar to how regular dynamic pages work in Next.js. You can read more about dynamic routes here to understand their syntax. Dynamic API Routes let us send response for different queries to an API endpoint. Let's go through an example.
Create a folder named trivia in the /pages/api folder of your application. Then in the trivia folder create a file named [number].js. Your folder structure looks like : pages/api/trivia/[number].js.
In this example, we're going to return a random fact from an external API (http://numbersapi.com/) about every number query we receive on the API endpoint. We'll use superagent as the HTTP client for making requests to the external API in our API route.
You can install it with the following command:
npm install superagent
Next, add the following code to [number].js:
const superagent = require("superagent");

export default function handler(req, res) {
  const number = Number(req.query.number);

  if (isNaN(number) || typeof number !== "number") {
    res.status(400).send("Invalid request!!");
  }
  superagent.get(`http://numbersapi.com/${number}`).then((response) => {
    res.status(200).send(response.text);
  });
}
Now if you navigate to http://localhost:3000/api/trivia/34 or any other random number at the end of the URL a random trivia should be generated for that number and a 400 Bad Request will be returned if an invalid number is used.
Here's a GIF showing an example:
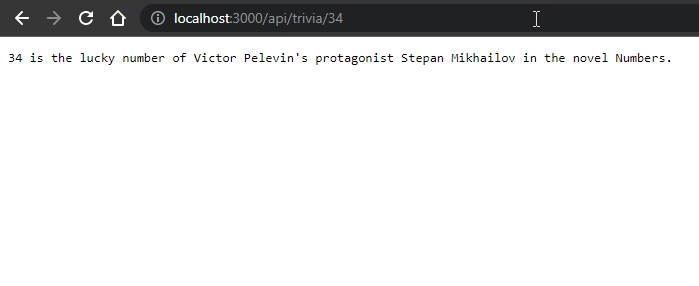 dynamic API routes
API Routes custom configuration
In addition to the powerful features of API Routes, Next.js also allows for customization of their default configuration. The default configuration in every API route in Next.js can be customized by exporting a config object in the same file. api in the config object contains all configuration options that are specific to every API route.
export default function handler(req, res) {
  res.status(200).json({ name: "John Doe" });
}

export const config = {
  api: {
    bodyParser: false, // Defaults to true. Setting this to false disables body parsing and allows you to consume the request body as stream or raw-body.
    responseLimit: false, // Determines how much data should be sent from the response body. It is automatically enabled and defaults to 4mb.
    externalResolver: true, // Disables warnings for unresolved requests if the route is being handled by an external resolver like Express.js or Connect. Defaults to false.
  },
};
You can read more about other available configuration options here.
I have been improving our article on Next.js API Routes and would like to provide a section on using Middleware. Here is a preliminary version of the text we can add:
Middleware in API Routes
The middleware functions of the API routes are essential in an API for performing tasks such as authentication, logging, and request validation. They allow us to pre-process requests before they reach our route handlers, which makes our routes more secure and maintainable.
Example Below is an example of applying middleware to an API route using Next.js. In this example, let's create a small instance of middleware and apply it to an API route.
- Make a Middleware Function:
// middleware/auth.js
export function authenticate(req, res, next) {
  const token = req.headers.authorization;

  if (token === "your-secret-token") {
    next(); // Proceed to the next middleware or route handler
  } else {
    res.status(401).json({ message: "Unauthorized" });
  }
}
- Apply Middleware to an API Route
// pages/api/protected.js
import { authenticate } from "../../middleware/auth";

export default function handler(req, res) {
  authenticate(req, res, () => {
    res.status(200).json({ message: "You are authenticated!" });
  });
}
In this case, the authenticate middleware verifies whether a valid token is included in the request headers. It checks out for a valid token and, if the token is valid, moves on to the handler; otherwise, it returns a 401 Unauthorized response.
Popular Middleware Libraries
There are some different shared middleware libraries one can include with Next.js API routes to make working with middleware relatively easy.
next-connectis a popular library for working with middleware within Next.js API routes. It enables us to use middleware functions as we write them in Express.
import nextConnect from "next-connect";
import { authenticate } from "../../middleware/auth";

const handler = nextConnect();

handler.use(authenticate);

handler.get((req, res) => {
  res.status(200).json({ message: "GET request - authenticated" });
});

export default handler;
Express
You can, similarly, use Express middleware in a Next.js API route; just wrap your handlers with an Express app.
import express from "express";
import { authenticate } from "../../middleware/auth";

const app = express();

app.use(authenticate);

app.get((req, res) => {
  res.status(200).json({ message: "GET request - authenticated" });
});

export default (req, res) => app(req, res);
Typing API Routes with TypeScript
Next.js provides automatic types to ensure your API Routes are type-safe and involves zero configuration to set up.
NOTE: You need to have integrated TypeScript in your Next.js project before using these features. Learn how to add TypeScript to your Next.js project here.
Typing request and response objects
Here's how to provide types for the request and response objects with NextApiRequest and NextApiResponse respectively:
import type { NextApiRequest, NextApiResponse } from "next";

export default function handler(req: NextApiRequest, res: NextApiResponse) {
  res.status(200).json({ name: "John Doe" });
}
Typing response data
We can also type the response data returned from an API endpoint by adding types to res: NextApiResponse.
Using the example from dynamic routes section above, we can add types to the response from the API endpoint like below:
import type { NextApiRequest, NextApiResponse } from "next";
const superagent = require("superagent");

type ResponseData = string;

export default function handler(
  req: NextApiRequest,
  res: NextApiResponse<ResponseData>,
) {
  const number = Number(req.query.number);

  if (isNaN(number) || typeof number !== "number") {
    res.status(400).send("Invalid request!!");
  }
  superagent.get(`http://numbersapi.com/${number}`).then((response) => {
    res.status(200).send(response.text);
  });
}
You can learn more about extending the res and req objects with TypeScript here.
Testing API Routes in Next.js
I have written a new section for our article about testing API routes in Next.js. This deals with unit and integration testing to ensure our API routes are reliable and maintainable.
Testing API Routes
Unit Testing API Routes
Overview: Unit testing is essential for verifying that individual parts of our application work as expected. For API routes, this means testing the route handlers to ensure they return the correct responses for given inputs. We can use testing frameworks like Jest to write these unit tests.
Example: Here’s a simple example of a unit test for an API route using Jest.
- API Route Handler:
// pages/api/hello.js
export default function handler(req, res) {
  res.status(200).json({ name: "John Doe" });
}
- Unit Test:
// __tests__/api/hello.test.js
import { createMocks } from "node-mocks-http";
import handler from "../../pages/api/hello";

describe("/api/hello API Endpoint", () => {
  test("returns a 200 status and correct response", async () => {
    const { req, res } = createMocks();
    await handler(req, res);

    expect(res.statusCode).toBe(200);
    expect(res._getJSONData()).toEqual({ name: "John Doe" });
  });
});
Here's how you do it with node-mocks-http to create mock request and response objects in the following test of an API handler, at which point we assert that a correct response status and body have been sent.
Integration Testing
Overview: What integration testing tries to achieve is that the different parts of our application work perfectly together. Regarding the API routes, this would imply that the routes must be tested about other parts of the application, such as the database connection or any other APIs.
Example: The following would be an example of an integration test for a route to an API, including a database.
- API Route Handler:
// pages/api/user.js
import { getUser } from "../../lib/user";

export default async function handler(req, res) {
  const user = await getUser(req.query.id);
  if (user) {
    res.status(200).json(user);
  } else {
    res.status(404).json({ message: "User not found" });
  }
}
- Integration Test:
We will mock the function getUser to make different return scenarios. The integration test should make sure that the API route is returning a different status and response if a user exists or doesn't exist in the database. Unit and integration tests can be written to make the Next.js API routes sturdy and trustworthy.
// __tests__/api/user.test.js
import { createMocks } from "node-mocks-http";
import handler from "../../pages/api/user";
import { getUser } from "../../lib/user";

jest.mock("../../lib/user");

describe("/api/user API Endpoint", () => {
  test("returns a 200 status and user data if user exists", async () => {
    const { req, res } = createMocks({ query: { id: "1" } });
    getUser.mockResolvedValue({ id: "1", name: "John Doe" });

    await handler(req, res);

    expect(res.statusCode).toBe(200);
    expect(res._getJSONData()).toEqual({ id: "1", name: "John Doe" });
  });

  test("returns a 404 status if user does not exist", async () => {
    const { req, res } = createMocks({ query: { id: "2" } });
    getUser.mockResolvedValue(null);

    await handler(req, res);

    expect(res.statusCode).toBe(404);
    expect(res._getJSONData()).toEqual({ message: "User not found" });
  });
});
Securing API Routes
I have also included a part regarding securing API routes in our Next.js article, which shall discuss the significance of API route security and best practices to keep our applications safe and secure.
Overview
Since the data exposed can be susceptible and unauthorized access is in place, API routes have to be secured. Our API routes, without the proper security measures, are wide open for all sorts of malicious use that include data breaches, unauthorized entry, and injection. Secure API routes guarantee the integrity and confidentiality of the application and its data.
Best Practices
Following are some good practices on how to secure your API routes in Next.js:
1. Enable HTTPS
- Why: HTTPS encrypts data sent from the client to the server, so attackers cannot eavesdrop or tamper with data.
- How: Ensure your production environment runs using HTTPS. A platform such as Vercel or Netlify uses HTTPS out of the box.
2. Implement Rate Limiting
- Why: Rate limiting is a way to protect your API from abuse. By adding limits, you will ensure that only a set number of requests can be made from the client within a certain period.
- How: Rate limiting using middleware to restrict requests, for example
express-rate-limit.
import rateLimit from "express-rate-limit";

const limiter = rateLimit({
  windowMs: 15 * 60 * 1000, // 15 minutes
  max: 100, // Limit each IP to 100 requests per windowMs
});

export default function handler(req, res) {
  limiter(req, res, () => {
    // Your API route logic here
  });
}
- Validate Input Data
- Why: By doing input validation, we establish the first perimeter defense to preclude injection attacks, as data will arrive at the server in the expected format and type.
- How: Use libraries like
joioryupto validate the request data.
import { object, string } from "yup";

const schema = object({
  name: string().required(),
  email: string().email().required(),
});

export default async function handler(req, res) {
  try {
    await schema.validate(req.body);
    // Proceed with your API logic
    res.status(200).json({ message: "Data is valid" });
  } catch (error) {
    res.status(400).json({ message: error.message });
  }
}
4. Authenticate and Authorize Requests
- Why: Authentication means that a legitimate user is making a request, while authorization ensures a legitimate user has access rights to the resource.
- How: Establish an authentication mechanism with JWT (JSON Web Tokens) or OAuth, and verify the roles and permissions of user.
import jwt from "jsonwebtoken";

export default function handler(req, res) {
  const token = req.headers.authorization?.split(" ")[1];
  if (!token) {
    return res.status(401).json({ message: "Unauthorized" });
  }

  try {
    const user = jwt.verify(token, process.env.JWT_SECRET);
    // Check user roles and permissions here
    res.status(200).json({ message: "Authorized", user });
  } catch (error) {
    res.status(403).json({ message: "Forbidden" });
  }
}
5. Secure Sensitive Data
- Why: Sensitive data, such as API keys and passwords, should be protected from unauthorized access to prevent data breaches.
- How: Use environment variables to store secrets and sensitive data instead of hard coding them into your codebase.
export default function handler(req, res) {
  const apiKey = process.env.API_KEY;
  // Use the API key securely
  res.status(200).json({ message: "API key is secure" });
}
Implementing these best practices would make our Next.js API routes very secure and protect the application from potential security breaches.
Conclusion
In this article we introduced you to API Routes in Next.js and how to use them to create API endpoints for your application. You learned how to add custom configurations to API Routes and also how to include typings among other things. Ready to get started with API Routes in your next project?