
This article was last updated on January 2, 2025, to address common queries about React Slick and a dedicated section for Common Mistakes When Working with React Slick to improve usability and clarity.


Introduction
Developers need a visually appealing way to display or showcase multiple items, services, features, or products in a single space while maintaining a good user experience. That's where Carousels (interactive, rotating slideshows) come in to enable developers to achieve this by making it easy for their users to navigate through large amounts of information while improving the user experience.
However, developers still need an efficient and easier way to create customizable and responsive carousels. A library called React Slick was developed to help developers achieve this. This library is popularly used and highly efficient, as it offers a variety of features that will be covered in this article.
In this article, you will learn about React Slick—what it is, why it's important, its features, benefits, and more. You'll learn how to use React Slick in your React projects through a step-by-step guide and hands-on demo.
Overview of React Slick
Before you learn how to use React Slick in your React projects, it's essential to understand what it is, why you need it as a developer, its core features, and how they can help you create carousels more efficiently.
What is React Slick?
As mentioned earlier in the introduction, React Slick is a popular library with over 11k stars on GitHub and 73M downloads, making it an efficient choice for creating carousels in React applications. It is based on the widely used jQuery plugin known as the Slick carousel library, commonly used for building carousels.
React Slick offers many features, components, and customization capabilities, empowering developers to create image sliders, content sliders, and interactive, dynamic carousels.
Why do developers need React Slick?
For several concrete reasons, developers need React Slick as it benefits them and their users. One of the primary reasons is the time it saves developers from building carousels from scratch. React Slick provides ready-made features that will be discussed later in this article, offering responsive design and smooth carousel transitions.
Another reason developers need React Slick is that it simplifies the process of creating user-friendly and dynamic carousels, allowing developers to customize their carousels according to their project's needs. Hence, developers have the flexibility to customize their carousels' behavior and appearance, due to the many options made available by React Slick. These features also enhance the user experience.
As a React developer, you can leverage the power and flexibility of React Slick to create unique, visually appealing, user-friendly, and dynamic carousels tailored to your project's and users' needs.
Core features of React Slick
Let’s see some of the core features of React Slick:
- Autoplay: This feature allows developers to set their sliders to transition automatically for a specific duration. In other words, developers can make their slides move from one to the next without requiring user interaction based on their set time duration. You can see the Autoplay feature in action below from the React Slick documentation:
 Autoplay carousel demo
Lazy loading: This feature allows developers to implement lazy loading for their images, which means that images load only when they become visible to the user. This reduces the initial data load and improves the performance of sliders by reducing page load times, particularly on mobile devices.
Responsive Design: This feature makes carousels responsive, meaning that carousels can automatically adapt to devices with screens of different viewport sizes to ensure a visually appealing effect for users. Let's see this feature in action using the example provided in the React Slick documentation:
This is the Desktop view:
 Responsive carousel on desktop
This is the Mobile view:
 Responsive carousel on mobile
The demonstrations show how the carousels automatically become responsive when switched from a desktop device to a mobile device
- Swipe Slide Transition: This feature makes navigating through your sliders on mobile devices easy. It uses several techniques, like event listeners, to enable your carousels to have the swipe-to-slide functionality triggered by touch. Let’s see how it works on mobile devices using the example provided in the React Slick documentation:
 Swipe-to-slide carousel on mobile
About React Slick APIs
React Slick provides several APIs that offer options as props that you can use to customize your carousels. Let's explore some of these APIs and their respective functions:
infinite: This prop enables infinite looping of the carousel slides, allowing the user to scroll through them continuously. It automatically restarts from the beginning when the user reaches the end. For example, you can use this prop to display many items. To enable it, simply set the prop to 'true.' Here's how to configure it:
Type: bool
Default: true
Description: Infinitely wrap around contents
dots: This prop allows developers to control the display of navigation dots in their carousel. These dots help users indicate the current slide, navigate to a specific slide, and understand the total number of slides in the carousel. Developers can use thedotsprop, setting it to either true or false, to determine whether navigation dots should be displayed. This is how it is configured:
dots
Type: bool
Default: Default
Description:
slidesToScroll: This prop is used to set how many slides you want your users to be able to scroll at once. It helps you display multiple slides simultaneously when users scroll, especially when there are many items to display. This will save your users from having to click the 'Next' button multiple times or scroll individually. It can be configured by setting the prop to the desired number:
Type: int
Default: 1
Description: How many slides to scroll at once
slidesToShow: This prop allows you to specify how many slides you want visible in the carousel for your users at any time. Regardless of the screen size, the number of slides will always remain the same unless you use it with the responsive prop. Also, it is not an optional prop, so it must be set. You can also leave it at the default value of 1:
Type: int
Default: 1
Description: How many slides to show in one frame
autoplaySpeed: This prop allows you to enable automatic sliding for your carousel contents by setting a particular speed in milliseconds, with a default value of 3000. You can use this prop when you want to adjust the sliding speed of your carousel contents, making it slower or faster based on your user's or project's needs. This is how it’s configured:
Type: int
Default: 3000
Description: Delay between each auto scroll (in milliseconds)
Benefits of using React Slick
There are several benefits of using React Slick. Let’s take a look at some of them:
Enhanced Performance: React Slick enhances the performance of carousels by using several techniques, such as lazy loading, which involves loading images only when they are visible to the user, reducing the initial load time of the carousel. This, in turn, improves the overall performance of the carousels, making them faster than building carousels with other methods.
Improved User Experience: The more visually appealing, easy-to-use, and responsive carousels are, the better the user experience becomes. React Slick is customizable and responsive, making it look good on any device, whether a desktop or a mobile device. Due to these features, It creates a better experience for users.
Documentation: React Slick's documentation is well-written, user-friendly, and structured, with examples of all the features and API demonstrating how to use them. Developers would not have to struggle with understanding all the options and features of React Slick, nor would they have to struggle with implementing it to create carousels or finding information in the documentation.
Ease of use: React Slick offers a simple and easy-to-use set of APIs for building carousels. The architecture of React Slick, which automatically renders carousels, simplifies the entire process of creating carousels for developers.
Customization: With React Slick, developers can build carousels and customize the appearance and behavior to suit their project's or users' preferences, including features like navigation arrows and slide transitions.
Demo: Getting Started with React Slick
Let’s build a simple React application to demonstrate how React Slick works.
Here’s the link to the complete source code of the App.
Setting up a React project
We’ll start by setting up a React project. Run the following command to create a new React project:
npx create-react-app carousels_app
Installing React Slick
You can use the yarn or the npm command to install React Slick. For this tutorial, we are using npm. Run the following command in your project directory to install React Slick:
npm install react-slick --save
Once you run the command, the react slick library will be installed and added to your project:
Importing React Slick
Now that we have React Slick installed, we can import it into our project. To do this, we have to use the Slider component provided by React Slick, which would enable us to create a carousel or slider component.
In your App.js file, add this import statement at the top:
import Slider from "react-slick";
Importing the CSS file for React Slick
Next, we'll need to import the CSS file that we will use for our React application since it does not have its own styling. To achieve this, we'll be using Slick Carousel, which is a jQuery library used for creating carousels. It provides the necessary CSS and JavaScript files for React Slick to work.
To install the library, run the following command:
npm install slick-carousel
After installing the library, you will now have access to the CSS files to import into your project. Add the following import statements to your App.js file:
import "slick-carousel/slick/slick.css";
import "slick-carousel/slick/slick-theme.css";
Using React Slick
Now that everything is set up, we can start using React Slick to create our carousel component.
Creating our carousel component
Let’s say we want a total number of 4 slides for our carousel. We can use the customization options provided by the React Slick APIs to create our carousel component.
Add the following code to your App.js file:
import Slider from "react-slick";
import "slick-carousel/slick/slick.css";
import "slick-carousel/slick/slick-theme.css";

const App = () => {
  const settings = {
    dots: true,
    speed: 500,
    slidesToShow: 1,
    slidesToScroll: 1,
    infinite: true,
    autoplay: true,
    autoplaySpeed: 1000,
  };

  return (
    <div>
      <h2>Carousel Component</h2>
      <Slider {...settings}>
        <div>
          <h3>FIRST SLIDE</h3>
        </div>
        <div>
          <h3>SECOND SLIDE</h3>
        </div>
        <div>
          <h3>THIRD SLIDE</h3>
        </div>
        <div>
          <h3>FORTH SLIDE</h3>
        </div>
      </Slider>
    </div>
  );
};

export default App;
From the code above, you can see that we used the props provided by the React Slick APIs, which we discussed earlier in this article. And we set the props to their respective values, which we used to customize our carousel. You can play around with it by using any values of your choice.
Adding Style to our Carousel Component
Let’s style our carousel component in our index.css file with the following:
body {
  margin: 0;
  padding: 0;
}
h2 {
  font-size: 60px;
  font-family: sans-serif;
  display: flex;
  justify-content: center;
}
h3 {
  font-size: 40px;
  background-color: red;
  display: flex;
  justify-content: center;
  border-radius: 5px;
  padding: 150px 0;
  margin: 0px auto;
  font-family: sans-serif;
  margin: 0 50px;
}
Let's run the application and see how our carousel looks. To do this, navigate to your project directory and run the following command in your terminal:owing command:
npm start
Go to the URL where it is running:
 Basic carousel output
Building a Fashion Carousel with React Slick
Now that you've learned to create a simple carousel with React Slick, note that you can easily add and customize additional features like Arrow Navigation, thumbnails, and responsiveness. Building another React project can help you understand how to add these features into your carousel using React Slick. Run the following command in your terminal:
npx create-react-app afro_styles
Here’s the link to the complete source code
Creating Slides for the Carousel
You need to create slides for your carousel to add descriptions or captions to the images you will showcase. To do this, follow the steps outlined below:
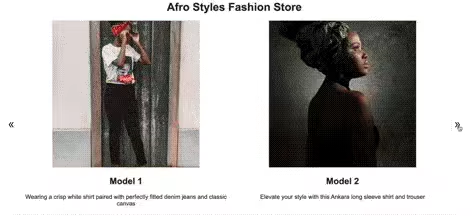
Create a file in your src directory called afroStyles.js to serve as the component for storing the content of your carousel images. You can store your images in an array that contains the unique identifiers for your images, their titles, descriptions, alt text, and image sources as follows:
src/afroStyles.js
const AfroStyles = [
  {
    id: 1,
    title: "Model 1",
    description:
      "Wearing a crisp white shirt paired with perfectly fitted denim jeans and classic canvas",
    alt: "First Image",
    src: "https://images.unsplash.com/photo-1528991435120-e73e05a58897?auto=format&fit=crop&q=80&w=2787&ixlib=rb-4.0.3&ixid=M3wxMjA3fDB8MHxwaG90by1wYWdlfHx8fGVufDB8fHx8fA%3D%3D",
  },
  {
    id: 2,
    title: "Model 2",
    description:
      "Elevate your style with this Ankara long sleeve shirt and trouser",
    alt: "Second Image",
    src: "https://images.unsplash.com/photo-1572495532056-8583af1cbae0?auto=format&fit=crop&q=80&w=2787&ixlib=rb-4.0.3&ixid=M3wxMjA3fDB8MHxwaG90by1wYWdlfHx8fGVufDB8fHx8fA%3D%3D",
  },
  {
    id: 3,
    title: "Model 3",
    description: "Elevate your style with Ankara dresses.",
    alt: "Third Image",
    src: "https://images.unsplash.com/photo-1607823489283-1deb240f9e27?auto=format&fit=crop&q=60&w=800&ixlib=rb-4.0.3&ixid=M3wxMjA3fDB8MHxzZWFyY2h8MjZ8fEFmcmljYW4lMjBmYXNoaW9ufGVufDB8fDB8fHww",
  },
  {
    id: 4,
    title: "Model 4",
    description: "An elegant monochromatic image of a female figure.",
    alt: "Forth Image",
    src: "https://images.unsplash.com/flagged/photo-1578907015404-bd0176fb3108?auto=format&fit=crop&q=60&w=800&ixlib=rb-4.0.3&ixid=M3wxMjA3fDB8MHxzZWFyY2h8Mjh8fEFmcmljYW4lMjBmYXNoaW9ufGVufDB8fDB8fHww",
  },
  {
    id: 5,
    title: "Model 5",
    description: "Stylish trendy afro france man in red hat & white outfit",
    alt: "Fifth Image",
    src: "https://images.unsplash.com/photo-1584530193960-b4eb6c87081c?auto=format&fit=crop&q=80&w=2824&ixlib=rb-4.0.3&ixid=M3wxMjA3fDB8MHxwaG90by1wYWdlfHx8fGVufDB8fHx8fA%3D%3D",
  },
  {
    id: 6,
    title: "Model 6",
    description: "African woman in a red dinner gown",
    alt: "Sixth Image",
    src: "https://images.unsplash.com/photo-1560457099-64cb8a5eb503?auto=format&fit=crop&q=80&w=2786&ixlib=rb-4.0.3&ixid=M3wxMjA3fDB8MHxwaG90by1wYWdlfHx8fGVufDB8fHx8fA%3D%3D",
  },
  {
    id: 7,
    title: "Model 7",
    description: "Man in Suit",
    alt: "Seventh Image",
    src: "https://images.unsplash.com/photo-1530884698386-d42ad3199b1f?auto=format&fit=crop&q=80&w=2787&ixlib=rb-4.0.3&ixid=M3wxMjA3fDB8MHxwaG90by1wYWdlfHx8fGVufDB8fHx8fA%3D%3D",
  },
];

export default AfroStyles;
Import the AfroStyles component, the Slider component, as well as the React and slick-carousel files into your App.js file to use them in your carousel. Next, copy and paste the settings that contain the React slick props you used in the previous section, and export your App component:
import React from "react";
import Slider from "react-slick";
import "slick-carousel/slick/slick.css";
import "slick-carousel/slick/slick-theme.css";
import AfroStyles from "./afroStyles";

const App = () => {
  const settings = {
    dots: true,
    speed: 500,
    slidesToShow: 2,
    slidesToScroll: 2,
    infinite: true,
    autoplay: true,
    autoplaySpeed: 1000,
  };

  return <> </>;
};

export default App;
Display your images within your Slider component using a map method that iterates over the id, title, description, alt, and src of the images in the AfroStyles component, structuring them within a <div> container as follows:
<div className="content">
  <h1 className="header">Afro Styles Fashion Store</h1>
  <div className="container">
    <Slider {...settings}>
      {AfroStyles.map((item) => (
        <div key={item.id}>
          <div className="img-body">
            <img src={item.src} alt={item.alt} />
          </div>
          <div>
            <h2>{item.title}</h2>
            <p>{item.description}</p>
          </div>
        </div>
      ))}
    </Slider>
  </div>
</div>
Styling the Fashion Carousel
Now that you have set up your carousel to display images, you can add styles to your carousel to give it a nice look within your index.css file as follows:
body {
  margin: 0 auto;
  padding: 0;
  font-family: Arial, Helvetica, sans-serif;
  box-sizing: border-box;
  width: 90%;
  color: rgb(52, 48, 48);
}

.content {
  text-align: center;
  margin-bottom: 30px;
}
.header {
  font-size: 30px;
}

.img-body img {
  display: flex;
  margin: 0 auto;
  height: 40vh;
  object-fit: cover;
  width: 100%;
  height: 100%;
}

.img-body {
  width: 400px;
  aspect-ratio: 1/1;
  outline-color: red;
  display: inline-block;
}

.container {
  margin: 0 auto;
  width: 100%;
  height: 80vh;
  border-color: white;
}
Run your application to view your carousel. It should look like this:
 Fashion carousel animation
Adding Arrow Navigation
Now that you’ve set up your Fashion Carousel with React Slick, you can improve the user experience by adding Arrow Navigation with React Slick. This feature allows for easy navigation through carousel items, and you can customize it to your needs with React Slick.
React Slick provides custom arrow props that you can use to create and customize your arrow navigation, namely the prevArrow and nextArrow props. You'll add these props to your settings in your App.js file as follows:
    nextArrow: (
      <div>
        <div className="next-slick-arrow">
            <svg xmlns="http://www.w3.org/2000/svg" stroke="black" height="24" viewBox="0 -960 960 960" width="24"><path d="m242-200 200-280-200-280h98l200 280-200 280h-98Zm238 0 200-280-200-280h98l200 280-200 280h-98Z"/></svg>
        </div>
      </div>
    ),

    prevArrow: (
      <div>
        <div className="next-slick-arrow rotate-180">
          <svg xmlns="http://www.w3.org/2000/svg" stroke="black" height="24" viewBox="0 -960 960 960" width="24"><path d="m242-200 200-280-200-280h98l200 280-200 280h-98Zm238 0 200-280-200-280h98l200 280-200 280h-98Z"/></svg>
        </div>
      </div>
    ),
Styling the Arrow Navigation
Add the following style to your index.css to make your arrows more visually appealing:
.rotate-180 {
  transform: rotate(180deg);
}
Run your application and see your custom arrows displayed on both sides:
 Carousel with custom arrow buttons
Adding Thumbnails
React Slick provides another property called AsNavFor that you can use to add thumbnails to your carousel. This property creates synchronized carousel navigation between two carousels: one for the main content and another for the thumbnails. When a user clicks on a thumbnail, the main carousel will slide to the corresponding item.
You'll require two methods: namely, centerMode to center the selected thumbnail and make it easy for users to see which item is currently selected, and focusOnSelect to automatically focus on the thumbnail that the user selected in the carousel and make it clear which item is currently selected.
Import the useState and useEffect hooks in your App.js file to manage the state of the thumbnail component:
import { useState, useEffect } from "react";
You'll need to do the following:
- Create three state variables (
nav1,currentSlide, andslider1) usinguseStateanduseEffecthooks to synchronize aSlidercomponent with thumbnails. - Use the
nav1variable to store the reference to the synchronizedSlider. - Use the
currentSlidevariable to track the selected slide index. - Use the
slider1variable to reference the thumbnail display Slider. - Use the
useEffecthook to updatenav1wheneverslider1changes, ensuring they stay in sync.
Add the following in your App component:
const [nav1, setNav1] = useState(null);
const [currentSlide, setCurrentSlide] = useState(0);
const [slider1, setSlider1] = useState(null);

useEffect(() => {
  setNav1(slider1);
}, [slider1]);
Next, update your carousel component with the following:
 const settings = {
    onReInit: () => setCurrentSlide(slider1?.innerSlider.state.currentSlide),
    lazyLoad: true,
    asNavFor: ".slider-nav",
    focusOnSelect: true,
  };

  return (
    <>
        <Slider {...settings}
            asNavFor={nav1}
            ref={(slider) => setSlider1(slider)}
        >
        </Slider>
        <div className="thumb-wrapper">
          {AfroStyles.map((item, idx) => (
            <div
              key={item.id}
              className={currentSlide === idx ? "active": null}
              onClick={() => {
                slider1?.slickGoTo(idx)
              }}>
              <img src={item.src} alt={item.alt}/>
              {currentSlide}
            </div>
          ))}
        </div>
      </div>
    </div>
  </>
  );
Here, you used the thumb-wrapper element and the currentSlide variable to handle the active class for the selected div element. When a user clicks on a div within the thumb-wrapper, it triggers the onClick event, which, in turn, calls the slickGoTo() method on the slider1 variable to navigate to a specified slide.
Styling the Thumbnails
Add the following style to your index.css file in order to style your thumbnails:
.thumb-wrapper {
  width: 100px;
  aspect-ratio: 1/1;
}

.thumb-wrapper img {
  width: 100%;
  height: 100%;
  object-fit: cover;
}
.thumb-wrapper {
  display: flex;
  width: 100%;
  margin-top: 30px;
}

.thumb-wrapper > div {
  width: 100%;
  max-height: 200px;
  aspect-ratio: 1/1;
  overflow: hidden;
  transition: all 0.1s;
}
.thumb-wrapper > div:hover,
.thumb-wrapper > div.active {
  border: 3px solid rgba(216, 35, 35, 0.732);
  max-height: calc(200px - 6px);
}
.thumb-wrapper > div img {
  width: 100%;
  height: 100%;
  object-position: center 0;
  object-fit: cover;
}
Run your application to see how thumbnails look:
 Carousel with thumbnail navigation
Adding Responsiveness
Ensure that your carousel adapts to various screen sizes and devices by adding responsiveness with React Slick. You can utilize the responsive property provided by React Slick, which allows you to specify different settings for different screen sizes. This ensures that your carousel looks great and functions properly on all devices.
The responsive property is an array of objects that consists of two values: breakpoint and settings. You can set the breakpoint value to a number in pixels, determining when the associated or subsequent settings should be applied. The settings is an object containing carousel settings to apply when the viewport reaches the specified breakpoint:
responsive: [
  {
    breakpoint: 600,
    settings: {
      slidesToShow: 1,
    },
  },
  {
    breakpoint: 1024,
    settings: {
      slidesToShow: 2,
    },
  },
];
Run your application and see how the carousel shrinks from 2 to 1 when it reaches the breakpoint you've set:
 Responsive carousel with breakpoint settings
Common Mistakes When Using React Slick (and How to Avoid Them)
Over the years, I’ve seen (and made!) plenty of mistakes while working with React Slick. Let me share a few common ones and how to steer clear of them:
Forgetting the CSS Files
This is a classic! React Slick doesn’t come styled out of the box. If you forget to include the slick.css and slick-theme.css files, your carousel won’t look right—it’ll function, but it’ll be pretty ugly.
What to do: Always add these imports in your code after installing slick-carousel:
import "slick-carousel/slick/slick.css";
import "slick-carousel/slick/slick-theme.css";
Overloading the Carousel with Too Many Items
Adding tons of slides can make the carousel sluggish, especially on mobile devices. Nobody likes a slow app, right?
What to do: Use the lazyLoad option to load only the visible slides:
const settings = {
  lazyLoad: "ondemand",
  // other settings
};
Misconfiguring Breakpoints
I’ve often seen developers set breakpoints but forget to test them properly. This can result in carousels looking weird on different devices.
What to do: Test your responsive settings thoroughly. Here’s an example:
const settings = {
  responsive: [
    {
      breakpoint: 1024,
      settings: {
        slidesToShow: 2,
      },
    },
    {
      breakpoint: 600,
      settings: {
        slidesToShow: 1,
      },
    },
  ],
};
Ignoring Accessibility
Carousels can be a nightmare for users with disabilities if accessibility isn’t handled well. For instance, navigation arrows might not be keyboard-friendly.
What to do:
- Add aria-labels to navigation elements.
- Use React Slick’s built-in accessibility prop (it’s enabled by default):
const settings = {
  accessibility: true,
  // other settings
};
By keeping these in mind, you’ll avoid headaches later on!
Performance Optimization Tips
React Slick is great, but if you’re not careful, it can slow down your app. Here are some easy ways to keep it running smoothly:
Use Lazy Loading
Loading all the images at once can slow down the initial page load, especially if you’ve got a lot of slides.
What to do: Turn on lazy loading so images load only when they’re needed:
const settings = {
  lazyLoad: "ondemand",
  // other settings
};
Optimize Your Images
Large image files can kill performance.
What to do:
- Use optimized images (e.g., compress them with tools like TinyPNG).
- Use responsive image sizes for different screen widths.
Limit Slide Animations
Too many fancy animations can make your carousel feel slow, especially on older devices.
What to do: Stick to a simple transition and set a reasonable speed:
const settings = {
  speed: 500, // milliseconds
  cssEase: "ease-in-out",
  // other settings
};
Avoid Re-renders
Re-renders can happen when props or state change unnecessarily.
What to do: Use React.memo for your carousel component if the slides don’t change frequently:
import React, { memo } from "react";

const MyCarousel = memo(() => {
  return <Slider {...settings}>/* slides */</Slider>;
});
Conclusion
You've reached the end of this article, where we covered the following aspects of React Slick: what React Slick is, why developers need it, its core features, React Slick APIs and the benefits of using it. Additionally, we demonstrated two hands-on examples in which we created a carousel component using React Slick. React Slick is a user-friendly library with a wide range of features and advantages you can leverage to create carousels for simple and complex applications.