


Introduction
In this blog, we'll show you how to create a React admin panel using Refine and PrimeReact.
First, we'll explain what Refine is and how it helps build admin panels easily.
Next, we'll guide you step-by-step on creating a new Refine application and installing PrimeReact. You'll learn how to combine these technologies to make a fully functional React admin panel.
Throughout this post, we'll also cover the basics of PrimeReact, including its components and how to use them in your app.
By the end of this blog, you'll have a fully functional React admin panel that you can use as a starting point for your future projects.
Let's get started and explore the power of Refine and PrimeReact together!
What is Refine?
Refine is a powerful framework for building web applications, specifically focused on creating admin panels, internal tools, and dashboards. It provides hooks and components that simplify the development process, making it faster and more efficient.
Instead of building everything from scratch, Refine comes with ready-made features like data handling, authentication, access control, and more. You can also customize these features to suit your needs. This way, you can focus on building your app's core functionality instead of worrying about the infrastructure.
Moreover, Refine is designed to be "headless" which gives you the freedom to style it exactly as you want. So, you can use any UI library like PrimeReact to build your app's user interface. Additionally, it supports out-of-the-box UI libraries.
You can learn more about Refine from the documentation.
Create a new Refine app
We have two scaffolder options for bootstrapping a new Refine application: Browser-based Scaffolder and CLI-based Scaffolder. You can choose whichever you prefer.
With Browser-based
The Browser-based Scaffolder is an efficient tool that allows you to create Refine app seamlessly in your browser.
You can choose the libraries and frameworks you want to work with, and the tool will generate a boilerplate code for you.
For this tutorial, we'll be select the following options:
React Platform: Vite UI Framework: Headless Backend: REST API Authentication Provider: No Auth
 Create Refine project prompt
Once you've completed the steps, you'll have the ability to download your project. From there, proceed to the project directory and run your app with:
npm run dev
With CLI-based
We'll use the npm create refine-app command to interactively initialize the project.
npm create refine-app@latest -- --branch inferencer refine-with-primereact
Select the following options when prompted:
✔ Choose a project template · refine-react
✔ What would you like to name your project?: · refine-with-primereact
✔ Choose your backend service to connect: · REST API
✔ Do you want to use a UI Framework?: · Headless
✔ Do you want to add example pages?: · Yes
✔ Do you need i18n (Internationalization) support?: · No
✔ Choose a package manager: · npm
✔ Would you mind sending us your choices so that we can improve create refine-app? · yes
Once the setup is complete, navigate to the project folder and start your app with:
npm run dev
Your project created according to the options we selected. It includes CRUD pages for the products and categories resources with a simple layout. The CRUD pages are generated using inferencer, which is a powerful tool that allows you to create CRUD pages automatically based on your API. Most of time, it's great point to start building your admin panel.
In this blog, we won't be using the generated pages. Instead, we'll build our admin panel pages from scratch to show you everything from the ground up. However, you can play around with the generated pages to get a feel for how inferencer works.
Once your project is successfully run, you will see the following page:
 Fresh Refine project structure
What is PrimeReact?
PrimeReact is a free and open source UI library specifically designed for React. It provides a rich set of components that you can use to build your app's user interface.
One of the standout features of PrimeReact is its theme designer, which allows you to customize the look and feel of your applications effortlessly. Additionally, you have the option to choose from various theme alternatives, such as Material, Bootstrap, and Tailwind, giving you the flexibility to match your project's design to your preferences.
PrimeReact also includes premium templates to further enhance the appearance and functionality of your apps. And if you ever need help or support, you can rely on their professional support team.
Check out the PrimeReact website to learn more.
Overview
Now that we've covered the basics of Refine and PrimeReact, let's build a React admin panel using these technologies.
At the end of this tutorial, we'll have a project structure like below:
 Project folder structure
We'll use the fake restaurant API for our data. It's a REST API that provides data for products, categories, orders, and specific endpoints for the dashboard.
Housekeeping to start
Previously, we mentioned that the scaffolded project includes auto-generated CRUD pages and basic styling. We'll remove these to start with a clean state.
Replace the
App.csswith the following:App.csshtml {
font-size: 14px;
}
body {
margin: 0px;
// Build-in PrimeReact themes use this variable
font-family: var(--font-family);
}Since we won't be using the generated CRUD pages for this example app, we'll remove the
src/pagesdirectory.Replace the
src/App.tsxwith the following:src/App.tsximport { ErrorComponent, Refine } from "@refinedev/core";
import { RefineKbar, RefineKbarProvider } from "@refinedev/kbar";
import routerProvider, {
DocumentTitleHandler,
UnsavedChangesNotifier,
} from "@refinedev/react-router";
import dataProvider from "@refinedev/simple-rest";
import { BrowserRouter, Route, Routes } from "react-router-dom";
import "./App.css";
function App() {
return (
<BrowserRouter>
<RefineKbarProvider>
<Refine
dataProvider={dataProvider("https://api.finefoods.refine.dev")}
routerProvider={routerProvider}
options={{
syncWithLocation: true,
warnWhenUnsavedChanges: true,
}}
>
<Routes>
<Route path="*" element={<ErrorComponent />} />
</Routes>
<RefineKbar />
<UnsavedChangesNotifier />
<DocumentTitleHandler />
</Refine>
</RefineKbarProvider>
</BrowserRouter>
);
}
export default App;
After these changes, we ready to start building our admin panel step-by-step. In the next sections, we'll update the src/App.tsx file to add the necessary components and pages.
If you don't have any experience with Refine, we recommend you to check out the tutorial to learn more about the framework.
Install PrimeReact
Let's install PrimeReact and its dependencies using the following command:
npm install primereact primeicons primeflex chart.js
After the installation is complete, we'll import the styles in src/App.tsx:
import "primereact/resources/themes/saga-blue/theme.css";
import "primereact/resources/primereact.css";
import "primeflex/primeflex.css";
import "primeicons/primeicons.css";
Building the Dashboard
We'll start by creating a dashboard page. It will be the first page that users see when they open our admin panel. The dashboard will display KPI cards, charts and recent orders to give users a quick overview of the business.
First, let's create a <Dashboard /> component in src/pages/dashboard/index.tsx directory with the following code:
import { Button } from "primereact/Button";

export const Dashboard = () => {
  return (
    <div className="justify-content-center flex">
      <Button label="Hello PrimeReact!" icon="pi pi-prime" />
    </div>
  );
};
In the code above, we just created a simple component that renders a button. We'll update it later.
Now that we have the <Dashboard /> component, let's import it in src/App.tsx and add a route for rendering on "/" path as follows:
src/App.tsx
import { ErrorComponent, Refine } from "@refinedev/core";
import { RefineKbar, RefineKbarProvider } from "@refinedev/kbar";
import routerProvider, {
    DocumentTitleHandler,
    UnsavedChangesNotifier,
} from "@refinedev/react-router";
import dataProvider from "@refinedev/simple-rest";
import { BrowserRouter, Route, Routes } from "react-router-dom";

import { Dashboard } from "./pages/dashboard";

import "primereact/resources/themes/saga-blue/theme.css";
import "primereact/resources/primereact.css";
import "primeflex/primeflex.css";
import "primeicons/primeicons.css";

import "./App.css";

function App() {
    return (
        <BrowserRouter>
            <RefineKbarProvider>
                <Refine
                    dataProvider={dataProvider(
                        "https://api.finefoods.refine.dev",
                    )}
                    routerProvider={routerProvider}
                    resources={[
                        {
                            name: "dashboard",
                            list: "/",
                        },
                    ]}
                    options={{
                        syncWithLocation: true,
                        warnWhenUnsavedChanges: true,
                    }}
                >
                    <Routes>
                        <Route path="/">
                            <Route index element={<Dashboard />} />
                        </Route>

                        <Route path="*" element={<ErrorComponent />} />
                    </Routes>
                    <RefineKbar />
                    <UnsavedChangesNotifier />
                    <DocumentTitleHandler />
                </Refine>
            </RefineKbarProvider>
        </BrowserRouter>
    );
}

export default App;
You can find more information about resources and adding routes in the React Router v6.
Now, if you navigate to the "/" path, you should see the created <Dashboard /> component.
Create KpiCard component
Let's start enhancing the dashboard by adding KPI cards to display the weekly revenue, weekly orders, and new customers. For this, we'll create a <KpiCard /> component in src/components/dashboard/kpiCard/index.tsx directory with the following code:
src/components/dashboard/kpiCard/index.tsx
import { Card } from "primereact/card";

type KpiCardProps = {
  title: string;
  total: number;
  trend: number;
  icon: string;
  color: string;
  formatTotal?: (value: number) => number | string;
};

export const KpiCard = ({
  title,
  color,
  total,
  trend,
  icon,
  formatTotal = (value) => value,
}: KpiCardProps) => {
  const renderTrend = () => {
    const calc = Math.round((trend / total) * 100);

    if (total < trend) {
      return (
        <div className="text-green-500">
          <span className="mr-2 font-medium">+{calc}%</span>
        </div>
      );
    }

    return (
      <div className="text-pink-500">
        <span className="mr-2 font-medium">-{calc}%</span>
      </div>
    );
  };

  return (
    <Card
      className={`shadow-1 border-left-3 border-${color}`}
      title={
        <div className="justify-content-between flex">
          <div>
            <span className="mb-3 block text-xl font-bold">{title}</span>
            <div className="text-900 text-2xl font-medium">
              {formatTotal(total)}
            </div>
          </div>
          <div
            className="align-items-center justify-content-center flex"
            style={{ width: "2.5rem", height: "2.5rem" }}
          >
            <i className={`pi ${icon} text-${color} text-2xl`} />
          </div>
        </div>
      }
    >
      <div className="flex">
        {renderTrend()}
        <span className="text-500">since last week</span>
      </div>
    </Card>
  );
};
This component is built using PrimeReact and PrimeFlex libraries. If you want to dive deeper into the code, you can explore PrimeFlex and PrimeReact Card for a better understanding.
In the code above, we created a <KpiCard /> component that renders a card with the given props. It displays the title, total, trend, and icon. The formatTotal prop allows you to format the total value as you wish.
Let's import the <KpiCard /> component in src/pages/dashboard/index.tsx and pass the necessary props to render the cards. Before that, we need to fetch the data from the API. For this, we'll use the useCustom hook from Refine and dayjs to arrange query parameters.
useCustom allows us to make specific requests to the API. It should be used on non-resource endpoints which means that it doesn't have a CRUD operation. In our case, we'll use it to fetch the data for the KPI cards and charts.
Before continuing, let's install dayjs using the following command:
npm i dayjs
After the installation is complete, update the <Dashboard /> component as follows:
src/pages/dashboard/index.tsx
import React from "react";
import { useApiUrl, useCustom } from "@refinedev/core";
import dayjs from "dayjs";

import { KpiCard } from "../../components/dashboard/kpiCard";

import { IChart } from "../../interfaces";

const query = {
  start: dayjs().subtract(7, "days").startOf("day"),
  end: dayjs().startOf("day"),
};

export const Dashboard: React.FC = () => {
  const API_URL = useApiUrl();

  const { data: dailyRevenue } = useCustom<IChart>({
    url: `${API_URL}/dailyRevenue`,
    method: "get",
    config: {
      query,
    },
  });

  const { data: dailyOrders } = useCustom<IChart>({
    url: `${API_URL}/dailyOrders`,
    method: "get",
    config: {
      query,
    },
  });

  const { data: newCustomers } = useCustom<IChart>({
    url: `${API_URL}/newCustomers`,
    method: "get",
    config: {
      query,
    },
  });

  return (
    <div className="grid">
      <div className="col-12 lg:col-6 xl:col-4">
        <KpiCard
          title="Weekly Revenue"
          color="blue-300"
          total={dailyRevenue?.data.total ?? 0}
          trend={dailyRevenue?.data.trend ?? 0}
          formatTotal={(value) => `$ ${value}`}
          icon="pi-dollar"
        />
      </div>
      <div className="col-12 lg:col-6 xl:col-4">
        <KpiCard
          title="Weekly Orders"
          color="orange-300"
          total={dailyOrders?.data.total ?? 0}
          trend={dailyOrders?.data.trend ?? 0}
          icon="pi-shopping-cart"
        />
      </div>
      <div className="col-12 lg:col-6 xl:col-4">
        <KpiCard
          title="New Customers"
          color="green-500"
          total={newCustomers?.data.total ?? 0}
          trend={newCustomers?.data.trend ?? 0}
          icon="pi-users"
        />
      </div>
    </div>
  );
};
In next sections, we'll assume that you have the following interfaces in src/interfaces/index.d.ts file.
src/interfaces/index.d.ts
export interface IOrder {
  id: number;
  user: IUser;
  createdAt: string;
  status: IOrderStatus;
  address: IAddress;
  amount: number;
}

export interface IUser {
  id: number;
  fullName: string;
  gender: string;
  gsm: string;
  createdAt: string;
  addresses: IAddress[];
}

export interface IOrderStatus {
  id: number;
  text: "Pending" | "Ready" | "On The Way" | "Delivered" | "Cancelled";
}

export interface IAddress {
  text: string;
  coordinate: [string, string];
}

export interface IChartDatum {
  date: string;
  value: string;
}

export interface IChart {
  data: IChartDatum[];
  total: number;
  trend: number;
}

export interface IProduct {
  id: number;
  name: string;
  isActive: boolean;
  description: string;
  createdAt: string;
  price: number;
  category: ICategory;
  stock: number;
}

export interface ICategory {
  id: number;
  title: string;
  isActive: boolean;
}
We used the useCustom hook to fetch the data for the KPI cards. It makes a request to the /dailyRevenue, /dailyOrders, and /newCustomers endpoints with the query parameters. The query parameters are used to get the data for the last 7 days.
After fetching the data, we passed the necessary props to the <KpiCard /> component to render the cards. After these changes, our dashboard looks like below:
 KPI cards grid
Create ChartView component
Next, we'll add charts to the dashboard to display the KPI data visually. We'll use the <ChartView /> component to render the charts. It will display the daily revenue, daily orders, and new customers charts. For this, let's create a <ChartView /> component in src/components/dashboard/chartView/index.tsx directory.
src/components/dashboard/chartView/index.tsx
import { Card } from "primereact/card";
import { Chart } from "primereact/chart";
import { TabView, TabPanel } from "primereact/tabview";

import { ChartData, ChartOptions } from "chart.js";

import { IChartDatum } from "../../../interfaces";

interface ChartViewProps {
  revenue: IChartDatum[];
  orders: IChartDatum[];
  customers: IChartDatum[];
}

const commonLineOptions: ChartOptions = {
  maintainAspectRatio: false,
  responsive: true,
  plugins: {
    legend: {
      display: false,
    },
  },
  scales: {
    y: {
      beginAtZero: true,
    },
  },
};

const formatDate = new Intl.DateTimeFormat("en-US", {
  month: "short",
  year: "numeric",
  day: "numeric",
});

export const ChartView = ({ revenue, orders, customers }: ChartViewProps) => {
  const dailyRevenueLabels = revenue.map((dataObj) => {
    const date = new Date(dataObj.date);
    return formatDate.format(date);
  });
  const dailyRevenueData = revenue.map((data) => Number(data.value));

  const dailyOrdersLabels = orders.map((data) => {
    const date = new Date(data.date);
    return formatDate.format(date);
  });
  const dailyOrdersData = orders.map((data) => Number(data.value));

  const newCustomersLabels = customers.map((data) => {
    const date = new Date(data.date);
    return formatDate.format(date);
  });
  const newCustomersData = customers.map((data) => Number(data.value));

  const documentStyle = getComputedStyle(document.documentElement);

  const revenuelineData: ChartData = {
    labels: dailyRevenueLabels,
    datasets: [
      {
        label: "Daily Revenue",
        data: dailyRevenueData,
        fill: true,
        borderColor: documentStyle.getPropertyValue("--blue-500"),
        backgroundColor: "rgba(54, 162, 235, 0.2)",
        tension: 0.4,
      },
    ],
  };

  const orderBarData: ChartData = {
    labels: dailyOrdersLabels,
    datasets: [
      {
        label: "Daily Orders",
        data: dailyOrdersData,
        backgroundColor: "rgba(255, 159, 64, 0.5)",
      },
    ],
  };

  const newCustomersLineData: ChartData = {
    labels: newCustomersLabels,
    datasets: [
      {
        label: "New Customers",
        data: newCustomersData,
        fill: true,
        borderColor: documentStyle.getPropertyValue("--green-500"),
        backgroundColor: "rgba(75, 192, 192, 0.2)",
        tension: 0.4,
      },
    ],
  };

  return (
    <Card className="shadow-1">
      <TabView>
        <TabPanel header="Daily Revenue">
          <Chart
            type="line"
            data={revenuelineData}
            options={commonLineOptions}
            style={{ height: "400px" }}
          />
        </TabPanel>
        <TabPanel header="Daily Orders">
          <Chart
            type="bar"
            data={orderBarData}
            options={commonLineOptions}
            style={{ height: "400px" }}
          />
        </TabPanel>
        <TabPanel header="New Customers">
          <Chart
            type="line"
            data={newCustomersLineData}
            options={commonLineOptions}
            style={{ height: "400px" }}
          />
        </TabPanel>
      </TabView>
    </Card>
  );
};
In the code above, we created a <ChartView /> component that renders a tab view with three charts. It uses the <Chart /> component from PrimeReact to render the charts.
Let's import the <ChartView /> component in src/pages/dashboard/index.tsx and pass the necessary props to render the charts. At this point, we'll use same endpoints that we used for the KPI cards. So there is no need to fetch the data again. We'll pass the data that we fetched previously to the <ChartView /> component.
You can simply copy-paste the highlighted code below into the src/pages/dashboard/index.tsx file.
src/pages/dashboard/index.tsx
import React from "react";
import { useApiUrl, useCustom } from "@refinedev/core";
import dayjs from "dayjs";

import { KpiCard } from "../../components/dashboard/kpiCard";
import { ChartView } from "../../components/dashboard/chartView";

import { IChart } from "../../interfaces";

const query = {
  start: dayjs().subtract(7, "days").startOf("day"),
  end: dayjs().startOf("day"),
};

export const Dashboard: React.FC = () => {
  const API_URL = useApiUrl();

  const { data: dailyRevenue } = useCustom<IChart>({
    url: `${API_URL}/dailyRevenue`,
    method: "get",
    config: {
      query,
    },
  });

  const { data: dailyOrders } = useCustom<IChart>({
    url: `${API_URL}/dailyOrders`,
    method: "get",
    config: {
      query,
    },
  });

  const { data: newCustomers } = useCustom<IChart>({
    url: `${API_URL}/newCustomers`,
    method: "get",
    config: {
      query,
    },
  });

  return (
    <div className="grid">
      {/* ... */}

      <div className="col-12">
        <ChartView
          revenue={dailyRevenue?.data.data ?? []}
          orders={dailyOrders?.data.data ?? []}
          customers={newCustomers?.data.data ?? []}
        />
      </div>
    </div>
  );
};
After these changes, our dashboard looks like below:
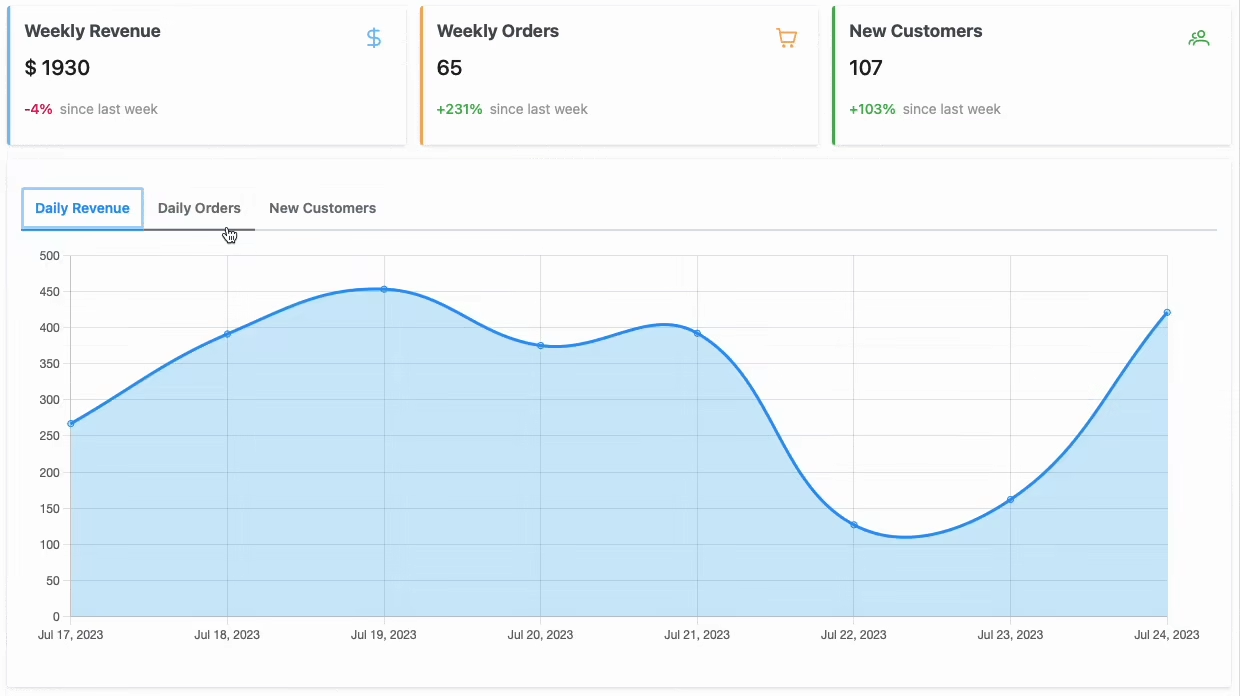 Sales charts section
Create RecentSales component
Lastly, we'll add a table to display the recent sales. We'll use the <RecentSales /> component to render the table. It will display the recent sales with the order id, amount, ordered by, status, and date.
Let's create a <RecentSales /> component in src/components/dashboard/recentSales/index.tsx directory with the following code:
src/components/dashboard/recentSales/index.tsx
import { useTable, getDefaultFilter } from "@refinedev/core";

import { DataTable } from "primereact/datatable";
import { Column } from "primereact/column";
import { Card } from "primereact/card";
import { Tag } from "primereact/tag";
import { Button } from "primereact/button";
import { InputText } from "primereact/inputtext";

import { IOrder, IOrderStatus } from "../../../interfaces";

export const RecentSales = () => {
  const {
    tableQuery,
    pageCount,
    currentPage,
    pageSize,
    sorters,
    filters,
    setCurrentPage,
    setPageSize,
    setSorters,
    setFilters,
  } = useTable<IOrder>({
    resource: "orders",
    pagination: {
      pageSize: 5,
    },
  });

  const orders = tableQuery?.data?.data;

  const formatCurrency = (value: number) => {
    return value.toLocaleString("en-US", {
      style: "currency",
      currency: "USD",
    });
  };

  const formatDateTime = (value: string) => {
    return new Date(value).toLocaleString("en-US", {
      dateStyle: "short",
      timeStyle: "short",
    });
  };

  const getSeverity = (status: IOrderStatus["text"]) => {
    switch (status) {
      case "Cancelled":
        return "danger";

      case "Ready":
        return "success";

      case "On The Way":
        return "info";

      case "Pending":
        return "warning";

      case "Delivered":
        return null;
    }
  };

  const amountBodyTemplate = (rowData: IOrder) => {
    return formatCurrency(rowData.amount);
  };

  const statusBodyTemplate = (rowData: IOrder) => {
    return (
      <Tag
        value={rowData.status.text}
        severity={getSeverity(rowData.status.text)}
      />
    );
  };

  const dateBodyTemplate = (rowData: IOrder) => {
    return formatDateTime(rowData.createdAt);
  };

  const header = (
    <div className="justify-content-between flex">
      <Button
        type="button"
        icon="pi pi-filter-slash"
        label="Clear"
        outlined
        onClick={() => {
          setCurrentPage(1);
          setFilters([], "replace");
        }}
      />
      <span className="p-input-icon-left">
        <i className="pi pi-search" />
        <InputText
          value={getDefaultFilter("q", filters)}
          onChange={(e) => {
            setCurrentPage(1);
            setFilters([
              {
                field: "q",
                value: e.target.value,
                operator: "contains",
              },
            ]);
          }}
          placeholder="Keyword Search"
        />
      </span>
    </div>
  );

  return (
    <Card className="shadow-1" title="Recent Sales">
      <DataTable
        value={orders}
        dataKey="id"
        lazy
        paginator
        rows={pageSize}
        rowsPerPageOptions={[5, 10, 25, 50]}
        first={currentPage * pageSize - pageSize}
        totalRecords={pageCount * pageSize}
        onPage={(event) => {
          setCurrentPage((event.page ?? 0) + 1);
          setPageSize(event.rows);
        }}
        onSort={(event) => {
          setSorters([
            {
              field: event.sortField,
              order: event.sortOrder === 1 ? "asc" : "desc",
            },
          ]);
        }}
        sortField={sorters[0]?.field}
        sortOrder={sorters[0]?.order === "asc" ? 1 : -1}
        loading={tableQuery?.isLoading}
        header={header}
      >
        <Column field="id" header="Id" sortable style={{ minWidth: "2rem" }} />
        <Column
          field="amount"
          header="Amount"
          body={amountBodyTemplate}
          sortable
        />
        <Column
          field="user.fullName"
          header="Ordered By"
          style={{ minWidth: "10rem" }}
          sortable
        />
        <Column field="user.gender" header="Gender" sortable />
        <Column
          field="user.gsm"
          header="Tel"
          align="center"
          style={{ minWidth: "12rem" }}
        />
        <Column
          field="address.text"
          header="Delivery Address"
          style={{ minWidth: "16rem" }}
        />
        <Column
          field="status.text"
          header="Delivery Status"
          body={statusBodyTemplate}
          align="center"
          sortable
          style={{ minWidth: "10rem" }}
        />
        <Column
          field="createdAt"
          header="Created At"
          body={dateBodyTemplate}
          align="center"
          sortable
          style={{ minWidth: "12rem" }}
        />
      </DataTable>
    </Card>
  );
};
In the code above, we used the <DataTable /> component from PrimeReact for UI and the useTable hook from Refine for data fetching, pagination, sorting, and filtering.
Let's import the <RecentSales /> component in src/pages/dashboard/index.tsx and render it below the charts.
You can simply copy the highlighted code below and paste it into the src/pages/dashboard/index.tsx file.
import React from "react";
/* ... */
import { RecentSales } from "../../components/dashboard/recentSales";

export const Dashboard: React.FC = () => {
  /* ... */
  return (
    <div className="grid">
      {/* ... */}
      <div className="col-12">
        <RecentSales />
      </div>
    </div>
  );
};
After these changes, the final version of the dashboard looks like below:
 Recent sales table
Create Product CRUD Pages
Now that we have the dashboard, let's create the product CRUD pages. Before that, we should define the "product" resource in src/App.tsx as follows:
src/App.tsx
import { ErrorComponent, Refine } from "@refinedev/core";
import { RefineKbar, RefineKbarProvider } from "@refinedev/kbar";
import routerProvider, {
  DocumentTitleHandler,
  UnsavedChangesNotifier,
} from "@refinedev/react-router";
import dataProvider from "@refinedev/simple-rest";
import { BrowserRouter, Route, Routes } from "react-router-dom";

import { Dashboard } from "./pages/dashboard";

import "primereact/resources/themes/saga-blue/theme.css";
import "primereact/resources/primereact.css";
import "primeflex/primeflex.css";
import "primeicons/primeicons.css";

import "./App.css";

function App() {
  return (
    <BrowserRouter>
      <RefineKbarProvider>
        <Refine
          dataProvider={dataProvider("https://api.finefoods.refine.dev")}
          routerProvider={routerProvider}
          resources={[
            {
              name: "dashboard",
              list: "/",
            },
            {
              name: "products",
              list: "/products",
              create: "/products/create",
              edit: "/products/edit/:id",
              show: "/products/show/:id",
            },
          ]}
          options={{
            syncWithLocation: true,
            warnWhenUnsavedChanges: true,
          }}
        >
          <Routes>
            <Route path="/">
              <Route index element={<Dashboard />} />
            </Route>

            <Route path="*" element={<ErrorComponent />} />
          </Routes>
          <RefineKbar />
          <UnsavedChangesNotifier />
          <DocumentTitleHandler />
        </Refine>
      </RefineKbarProvider>
    </BrowserRouter>
  );
}

export default App;
The resource definition above don't create any CRUD pages. It just defines the routes for the CRUD pages. The routes are used by Refine hooks and components. For example, the useNavigation hook uses the list, create, edit, and show routes to navigate between the pages. Also, data hooks like useTable use the resource name when you don't pass the resource prop.
You can find more information about resources on the Refine documentation.
Let's create the product CRUD pages step by step and add routes for rendering them.
List Page
The product list page will display the products in a table. It will allow users to filter, sort, and paginate the products. For this, we'll use the useTable hook from Refine and the <DataTable /> component from PrimeReact.
Let's create a <ProductList /> component in src/pages/products/list.tsx directory with the following code:
src/pages/products/list.tsx
import {
  useTable,
  getDefaultFilter,
  useNavigation,
  useDelete,
  useMany,
} from "@refinedev/core";

import { DataTable } from "primereact/datatable";
import { Column } from "primereact/column";
import { Card } from "primereact/card";
import { Button } from "primereact/button";
import { InputText } from "primereact/inputtext";
import { confirmDialog } from "primereact/confirmdialog";

import { ICategory, IProduct } from "../../interfaces";

const formatCurrency = (value: number) => {
  return value.toLocaleString("en-US", {
    style: "currency",
    currency: "USD",
  });
};

export const ProductList = () => {
  const {
    result,
    pageCount,
    currentPage,
    pageSize,
    sorters,
    filters,
    setCurrentPage,
    setPageSize,
    setSorters,
    setFilters,
  } = useTable();
  const { edit, show, create } = useNavigation();
  const { mutate: deleteProduct } = useDelete();

  const products = result?.data;

  const { result: categoryData } = useMany<ICategory>({
    resource: "categories",
    ids: products?.map((item) => item?.category?.id) ?? [],
    queryOptions: {
      enabled: !!products,
    },
  });

  const confirmDeleteProduct = (id: number) => {
    confirmDialog({
      message: "Do you want to delete this record?",
      header: "Delete Confirmation",
      icon: "pi pi-exclamation-triangle",
      acceptClassName: "p-button-danger",
      accept: () => {
        deleteProduct({
          resource: "products",
          id,
        });
      },
    });
  };

  const amountBodyTemplate = (rowData: IProduct) => {
    return formatCurrency(rowData.price);
  };

  const categoryBodyTemplate = (rowData: IProduct) => {
    const category = categoryData?.data?.find(
      (item) => item.id === rowData.category?.id,
    );

    return category?.title ?? "Loading...";
  };

  const actionBodyTemplate = (rowData: IProduct) => {
    return (
      <>
        <Button
          icon="pi pi-pencil"
          rounded
          text
          severity="secondary"
          onClick={() => edit("products", rowData.id)}
        />
        <Button
          icon="pi pi-eye"
          rounded
          text
          severity="secondary"
          onClick={() => show("products", rowData.id)}
        />
        <Button
          icon="pi pi-trash"
          rounded
          text
          severity="danger"
          onClick={() => confirmDeleteProduct(rowData.id)}
        />
      </>
    );
  };

  const header = (
    <div className="justify-content-between flex">
      <Button
        type="button"
        icon="pi pi-filter-slash"
        label="Clear"
        outlined
        onClick={() => {
          setCurrentPage(1);
          setFilters([], "replace");
        }}
      />
      <span className="p-input-icon-left">
        <i className="pi pi-search" />
        <InputText
          value={getDefaultFilter("q", filters)}
          onChange={(e) => {
            setCurrentPage(1);
            setFilters([
              {
                field: "q",
                value: e.target.value,
                operator: "contains",
              },
            ]);
          }}
          placeholder="Keyword Search"
        />
      </span>
    </div>
  );

  return (
    <Card
      className="shadow-1"
      title={
        <div className="justify-content-between align-items-center flex">
          <span className="p-card-title">Products</span>
          <Button
            icon="pi pi-plus"
            label="Create"
            onClick={() => create("products")}
          />
        </div>
      }
    >
      <DataTable
        value={products}
        dataKey="id"
        showGridlines
        lazy
        paginator
        rows={pageSize}
        rowsPerPageOptions={[5, 10, 25, 50]}
        first={currentPage * pageSize - pageSize}
        totalRecords={pageCount * pageSize}
        onPage={(event) => {
          setCurrentPage((event.page ?? 0) + 1);
          setPageSize(event.rows);
        }}
        onSort={(event) => {
          setSorters([
            {
              field: event.sortField,
              order: event.sortOrder === 1 ? "asc" : "desc",
            },
          ]);
        }}
        sortField={sorters[0]?.field}
        sortOrder={sorters[0]?.order === "asc" ? 1 : -1}
        loading={tableQuery?.isLoading}
        header={header}
      >
        <Column field="id" header="Id" sortable style={{ minWidth: "1rem" }} />
        <Column
          field="name"
          header="Name"
          style={{ minWidth: "12rem" }}
          sortable
        />
        <Column
          field="price"
          header="Price"
          body={amountBodyTemplate}
          sortable
        />
        <Column header="Category" body={categoryBodyTemplate} />
        <Column
          field="description"
          header="Description"
          style={{ minWidth: "24rem" }}
        />
        <Column
          body={actionBodyTemplate}
          header="Actions"
          align="center"
          style={{ minWidth: "10rem" }}
        />
      </DataTable>
    </Card>
  );
};
We used the useTable hook to fetch the data for the table. It makes a request to the /products endpoint with the query parameters. The query parameters are used to filter, sort, and paginate the products. Since we defined the products resource in src/App.tsx, the useTable hook knows which endpoint to use for fetching the data.
After fetching the data, we passed the necessary props to the <DataTable /> component to render the table.
Additionally, we used the useDelete hook and confirmDialog method from PrimeReact to delete the products. To open the delete confirmation dialog, we should to render <ConfirmDialog /> component in the root of the application. So we'll also add it in src/App.tsx.
To export the product CRUD pages, let's create an index.ts file in src/pages/products directory with the following code:
export * from "./list";
Next, import the <ProductList /> component in src/App.tsx and add a route for rendering it.
src/App.tsx
import { ErrorComponent, Refine } from "@refinedev/core";
import { RefineKbar, RefineKbarProvider } from "@refinedev/kbar";
import routerProvider, {
  DocumentTitleHandler,
  UnsavedChangesNotifier,
} from "@refinedev/react-router";
import dataProvider from "@refinedev/simple-rest";
import { BrowserRouter, Route, Routes } from "react-router-dom";
import { ConfirmDialog } from "primereact/confirmdialog";

import { Dashboard } from "./pages/dashboard";
import { ProductList } from "./pages/products";

import "primereact/resources/themes/saga-blue/theme.css";
import "primereact/resources/primereact.css";
import "primeflex/primeflex.css";
import "primeicons/primeicons.css";

import "./App.css";

function App() {
  return (
    <BrowserRouter>
      <RefineKbarProvider>
        <Refine
          dataProvider={dataProvider("https://api.finefoods.refine.dev")}
          routerProvider={routerProvider}
          resources={[
            {
              name: "dashboard",
              list: "/",
            },
            {
              name: "products",
              list: "/products",
              create: "/products/create",
              edit: "/products/edit/:id",
              show: "/products/show/:id",
            },
          ]}
          options={{
            syncWithLocation: true,
            warnWhenUnsavedChanges: true,
          }}
        >
          <Routes>
            <Route path="/">
              <Route index element={<Dashboard />} />
            </Route>

            <Route path="/products">
              <Route index element={<ProductList />} />
            </Route>

            <Route path="*" element={<ErrorComponent />} />
          </Routes>
          <RefineKbar />
          <UnsavedChangesNotifier />
          <DocumentTitleHandler />
          <ConfirmDialog />
        </Refine>
      </RefineKbarProvider>
    </BrowserRouter>
  );
}

export default App;
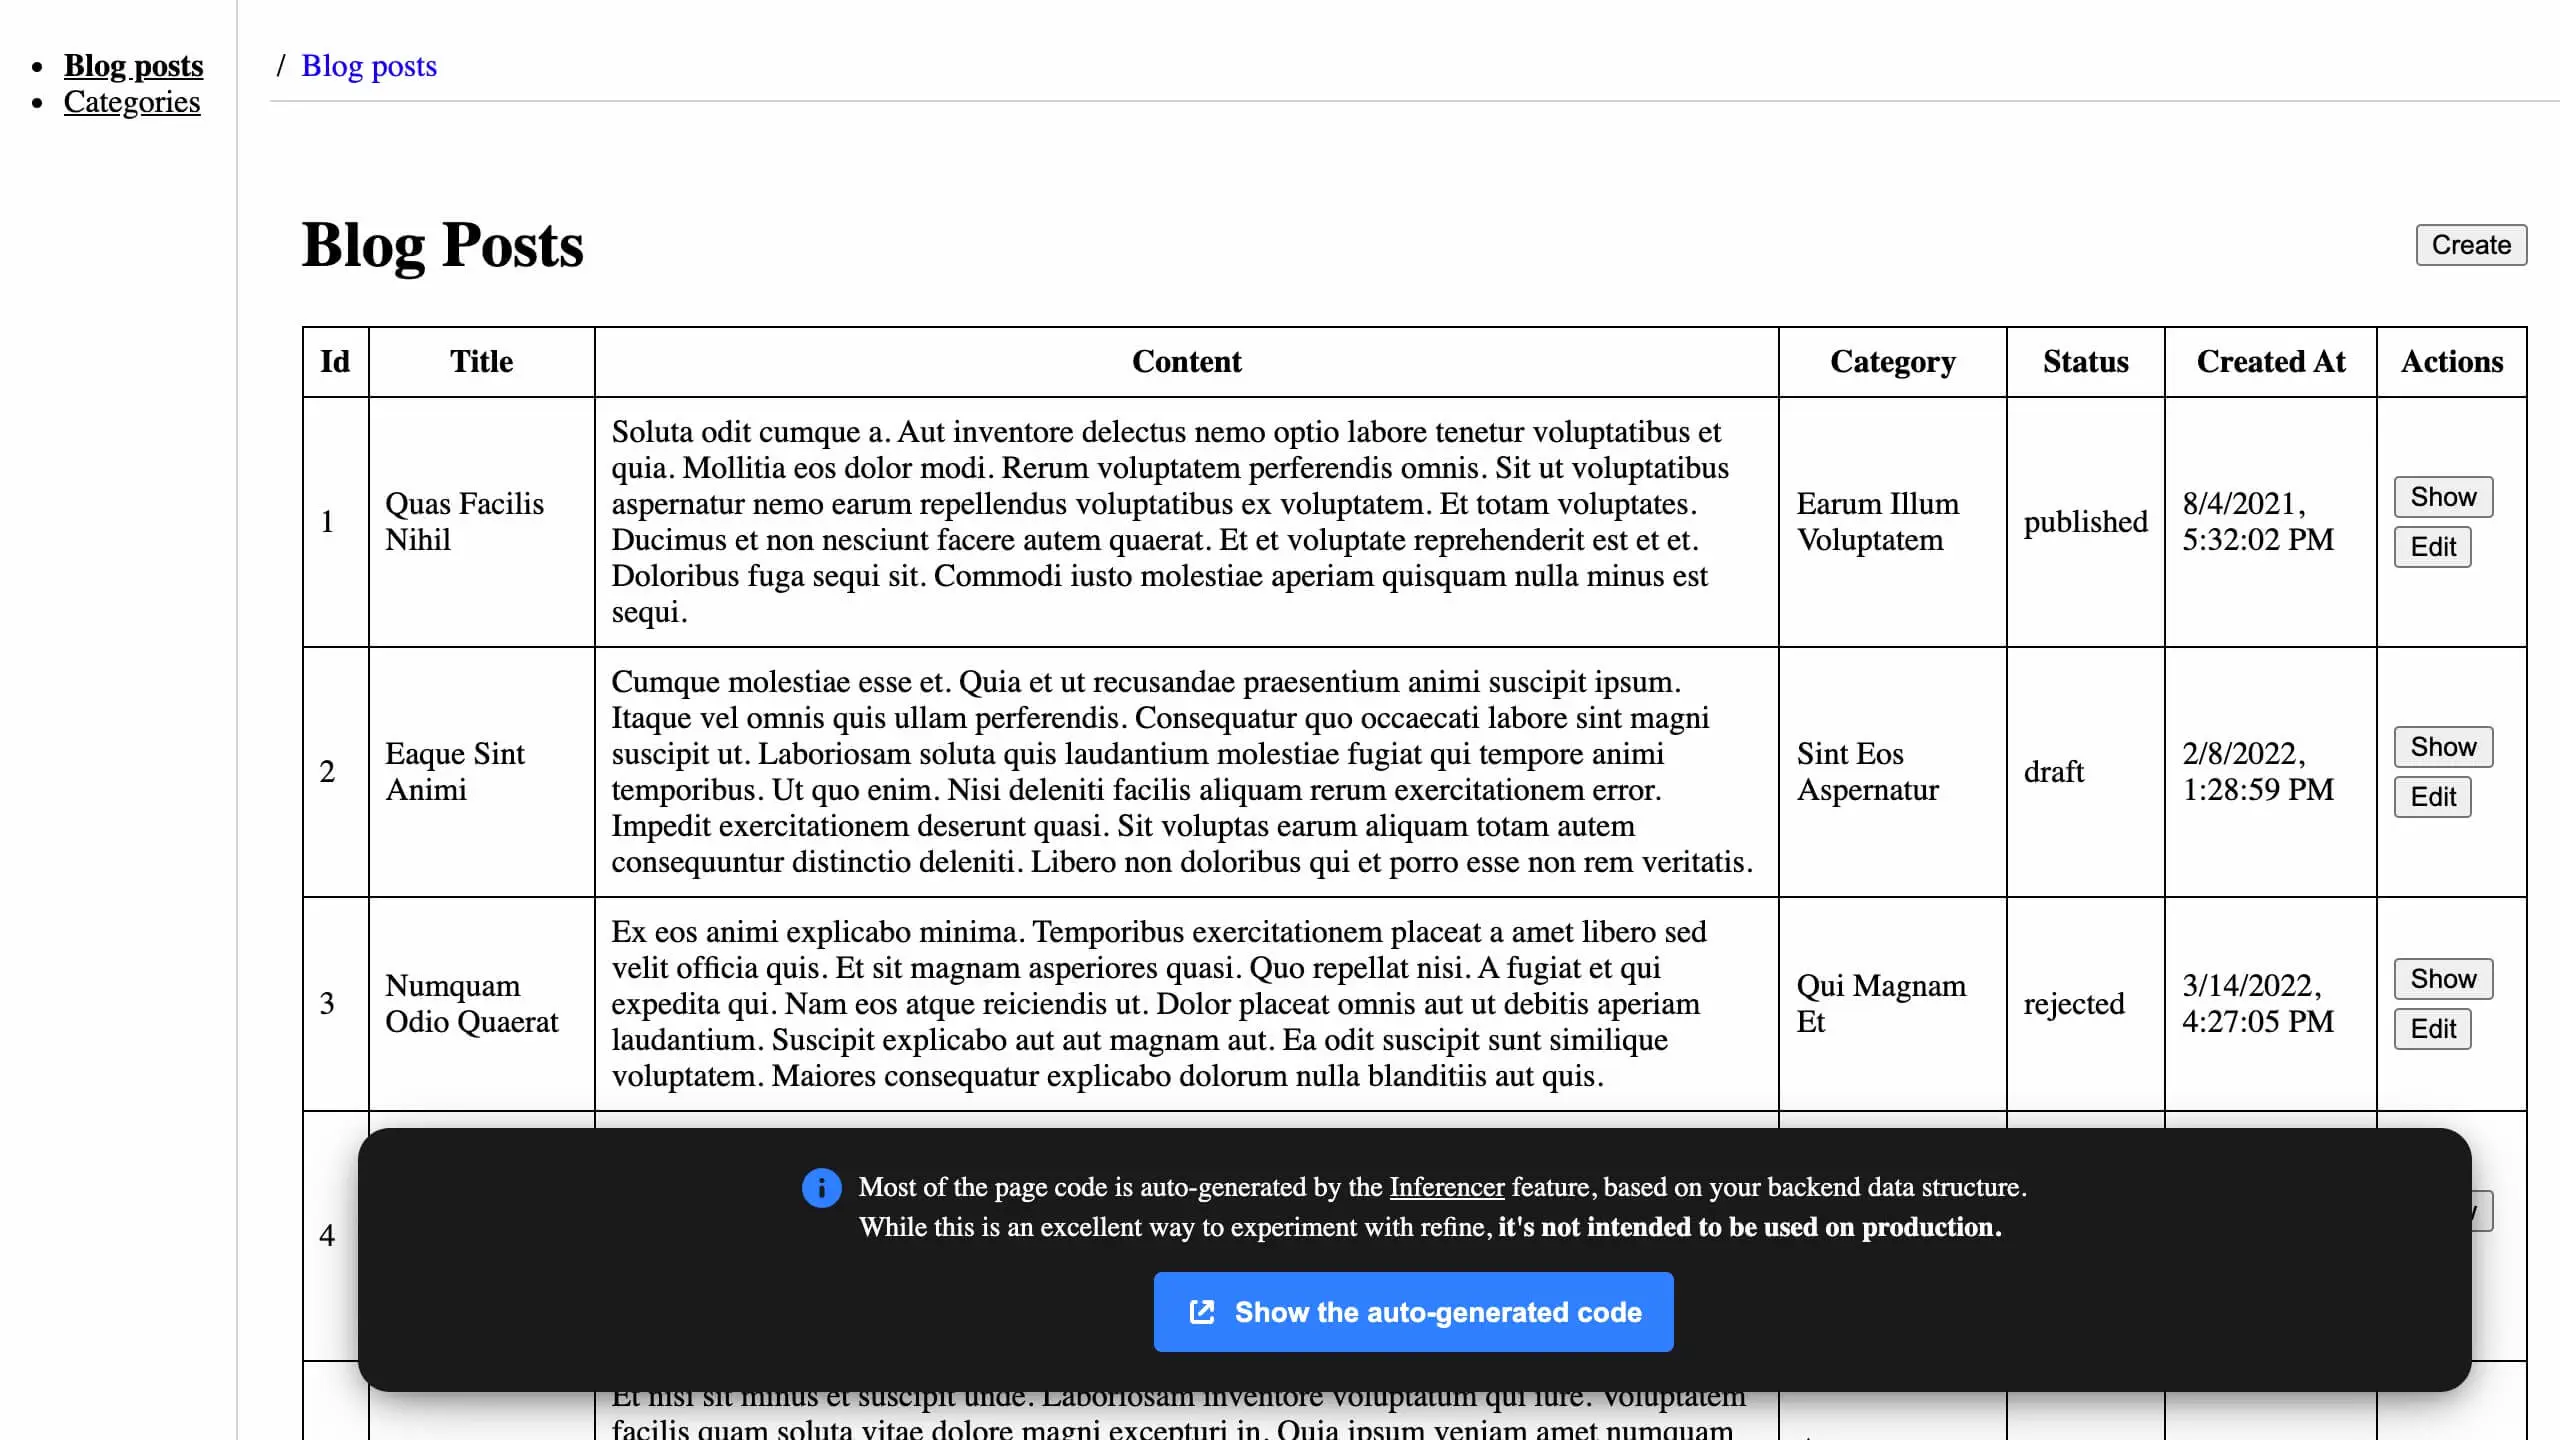
After these changes, when you navigate to the /products path, you should see the product list page as below:
 Products list page
Create Page
The product create page will display a form to create a new product. It will allow users to create a new product by filling the form. For this, we'll use the useForm hook from @refinedev/react-hook-form and the input components from PrimeReact.
Before continuing, let's install react-hook-form to use unexported components from @refinedev/react-hook-form.
npm i react-hook-form
After the installation is complete, let's create a <ProductCreate /> component in src/pages/products/create.tsx directory with the following code:
src/pages/products/create.tsx
import { HttpError, useBack, useSelect } from "@refinedev/core";
import { useForm } from "@refinedev/react-hook-form";
import { Controller } from "react-hook-form";
import { Button } from "primereact/button";
import { Card } from "primereact/card";
import { InputText } from "primereact/inputtext";
import { classNames } from "primereact/utils";
import { InputNumber } from "primereact/inputnumber";
import { Dropdown } from "primereact/dropdown";
import { InputTextarea } from "primereact/inputtextarea";
import { IProduct } from "../../interfaces";
export const ProductCreate = () => {
const goBack = useBack();
const {
refineCore: { onFinish, formLoading },
handleSubmit,
control,
formState: { errors },
} = useForm<IProduct, HttpError, IProduct>({
defaultValues: {
name: "",
description: "",
},
});
const { options: categoryOptions } = useSelect({
resource: "categories",
});
const getFormErrorMessage = (name: keyof IProduct) => {
return errors[name] ? (
<small className="p-error">{errors[name]?.message}</small>
) : (
<small className="p-error"> </small>
);
};
return (
<Card
className="shadow-1"
title={
<div className="align-items-center flex">
<Button
onClick={goBack}
icon="pi pi-arrow-left"
className="mr-1"
text
severity="secondary"
/>
<span>Create Product</span>
</div>
}
>
<form onSubmit={handleSubmit(onFinish)}>
<div className="p-fluid">
<Controller
name="name"
control={control}
rules={{ required: "Name is required." }}
render={({ field, fieldState }) => (
<div className="mb-1">
<label htmlFor={field.name}>Name</label>
<InputText
id={field.name}
value={field.value}
className={classNames("mb-1 mt-1", {
"p-invalid": fieldState.error,
})}
onChange={(e) => field.onChange(e.target.value)}
/>
{getFormErrorMessage(field.name)}
</div>
)}
/>
<Controller
name="price"
control={control}
rules={{
required: "Price is required.",
}}
render={({ field, fieldState }) => (
<div className="mb-1">
<label htmlFor={field.name}>Price</label>
<InputNumber
id={field.name}
inputRef={field.ref}
value={field.value}
onBlur={field.onBlur}
onChange={(e) => field.onChange(e.value ?? 0)}
useGrouping={false}
mode="currency"
currency="USD"
locale="en-US"
inputClassName={classNames({
"p-invalid": fieldState.error,
})}
className="mb-1 mt-1"
/>
{getFormErrorMessage(field.name)}
</div>
)}
/>
<Controller
name="category.id"
control={control}
rules={{ required: "Category is required." }}
render={({ field, fieldState }) => (
<div className="mb-1">
<label htmlFor={field.name}>Category</label>
<Dropdown
id={field.name}
value={field.value}
placeholder="Select a Category"
options={categoryOptions}
focusInputRef={field.ref}
onChange={(e) => field.onChange(e.value)}
className={classNames("mb-1 mt-1", {
"p-invalid": fieldState.error,
})}
/>
<small className="p-error"> </small>
<small className="p-error">
{errors.category?.id?.message}
</small>
</div>
)}
/>
<Controller
name="description"
control={control}
rules={{ required: "Description is required." }}
render={({ field, fieldState }) => (
<div className="mb-1">
<label htmlFor={field.name}>Description</label>
<InputTextarea
id={field.name}
{...field}
rows={4}
cols={30}
className={classNames("mb-1 mt-1", {
"p-invalid": fieldState.error,
})}
/>
{getFormErrorMessage(field.name)}
</div>
)}
/>
</div>
<div className="justify-content-end flex">
<Button label="Save" type="submit" loading={formLoading} />
</div>
</form>
</Card>
);
};
In the code above, we used the useForm hook to manage the form state. It also makes a request to the /products endpoint with the POST method when the form is submitted.
Additionally, we used the useSelect hook to fetch the categories for the dropdown. It makes a request to the /categories endpoint with the GET method to fetch the categories.
To render the form, we used the PrimeReact input components and we used the React Hook Form as recommended by the PrimeReact documentation.
First, let's export the product create page on src/pages/products/index.tsx file as follows:
export * from "./list";
export * from "./create";
Next, import the <ProductCreate /> to add a route for rendering it. For this, you can simply copy the highlighted code below and paste it into the src/App.tsx file.
src/App.tsx
//...
import { ProductList, ProductCreate } from "./pages/products";

function App() {
    return (
        <BrowserRouter>
            <RefineKbarProvider>
                <Refine
                    {/* ... */}
                >
                    <Routes>
                        <Route path="/">
                            <Route index element={<Dashboard />} />
                        </Route>

                        <Route path="/products">
                            <Route index element={<ProductList />} />
                            <Route path="create" element={<ProductCreate />} />
                        </Route>

                        <Route path="*" element={<ErrorComponent />} />
                    </Routes>
                    {/* ... */}
                </Refine>
            </RefineKbarProvider>
        </BrowserRouter>
    );
}

export default App;
After these changes, when we navigate to the /products/create path, you should see the product create page as below:
 Create product form
Edit Page
The product edit page will display a form to edit an existing product. It will allow users to edit an existing product by filling the form. For this, we'll use again the useForm hook from @refinedev/react-hook-form and the input components from PrimeReact.
Let's create a <ProductEdit /> component in src/pages/products/edit.tsx directory with the following code:
src/pages/products/edit.tsx
import { HttpError, useBack, useSelect } from "@refinedev/core";
import { useForm } from "@refinedev/react-hook-form";
import { Controller } from "react-hook-form";
import { Button } from "primereact/button";
import { Card } from "primereact/card";
import { InputText } from "primereact/inputtext";
import { classNames } from "primereact/utils";
import { InputNumber } from "primereact/inputnumber";
import { Dropdown } from "primereact/dropdown";
import { InputTextarea } from "primereact/inputtextarea";
import { IProduct } from "../../interfaces";
export const ProductEdit = () => {
const goBack = useBack();
const {
refineCore: { onFinish, formLoading, query },
handleSubmit,
control,
formState: { errors },
} = useForm<IProduct, HttpError, IProduct>({
defaultValues: {
name: "",
description: "",
},
});
const { options: categoryOptions } = useSelect({
resource: "categories",
});
const getFormErrorMessage = (name: keyof IProduct) => {
return errors[name] ? (
<small className="p-error">{errors[name]?.message}</small>
) : (
<small className="p-error"> </small>
);
};
return (
<Card
className="shadow-1"
title={
<div className="justify-content-between align-items-center flex">
<div className="align-items-center flex">
<Button
onClick={goBack}
icon="pi pi-arrow-left"
className="mr-1"
text
severity="secondary"
/>
<span>Edit Product</span>
</div>
<Button
label="Refresh"
icon="pi pi-refresh"
outlined
onClick={() => query?.refetch()}
/>
</div>
}
>
<form onSubmit={handleSubmit(onFinish)}>
<div className="p-fluid">
<Controller
name="name"
control={control}
rules={{ required: "Name is required." }}
render={({ field, fieldState }) => (
<div className="mb-1">
<label htmlFor={field.name}>Name</label>
<InputText
id={field.name}
value={field.value}
className={classNames("mb-1 mt-1", {
"p-invalid": fieldState.error,
})}
onChange={(e) => field.onChange(e.target.value)}
/>
{getFormErrorMessage(field.name)}
</div>
)}
/>
<Controller
name="price"
control={control}
rules={{
required: "Price is required.",
}}
render={({ field, fieldState }) => (
<div className="mb-1">
<label htmlFor={field.name}>Price</label>
<InputNumber
id={field.name}
inputRef={field.ref}
value={field.value}
onBlur={field.onBlur}
onChange={(e) => field.onChange(e.value ?? 0)}
useGrouping={false}
mode="currency"
currency="USD"
locale="en-US"
inputClassName={classNames({
"p-invalid": fieldState.error,
})}
className="mb-1 mt-1"
/>
{getFormErrorMessage(field.name)}
</div>
)}
/>
<Controller
name="category.id"
control={control}
rules={{ required: "Category is required." }}
render={({ field, fieldState }) => (
<div className="mb-1">
<label htmlFor={field.name}>Category</label>
<Dropdown
id={field.name}
value={field.value}
placeholder="Select a Category"
options={categoryOptions}
focusInputRef={field.ref}
onChange={(e) => field.onChange(e.value)}
className={classNames("mb-1 mt-1", {
"p-invalid": fieldState.error,
})}
/>
<small className="p-error"> </small>
<small className="p-error">
{errors.category?.id?.message}
</small>
</div>
)}
/>
<Controller
name="description"
control={control}
rules={{ required: "Description is required." }}
render={({ field, fieldState }) => (
<div className="mb-1">
<label htmlFor={field.name}>Description</label>
<InputTextarea
id={field.name}
{...field}
rows={4}
cols={30}
className={classNames("mb-1 mt-1", {
"p-invalid": fieldState.error,
})}
/>
{getFormErrorMessage(field.name)}
</div>
)}
/>
</div>
<div className="justify-content-end flex">
<Button label="Save" type="submit" loading={formLoading} />
</div>
</form>
</Card>
);
};
In the code above, we used the useForm hook to manage the form state. It also makes a request to the /products/:id endpoint with the GET method when the hook is mounted. It fetches the product with the given id and fills the form with the fetched data. When the form is submitted, it makes a request to the /products/:id endpoint with the PATCH method.
useForm hook can distinguish between the create and edit operations by checking the resource definition. If the resource definition has an edit path, it assumes that the form is used for editing an existing record. Otherwise, it assumes that the form is used for creating a new record.
First, let's export the product edit page on src/pages/products/index.tsx file as follows:
export * from "./list";
export * from "./create";
export * from "./edit";
Next, import the <ProductEdit /> to add a route for rendering it. For this, you can simply copy the highlighted code below and paste it into the src/App.tsx file.
src/App.tsx
//...

import { ProductList, ProductCreate, ProductEdit } from "./pages/products";

function App() {
    return (
        <BrowserRouter>
            <RefineKbarProvider>
                <Refine
                    {/* ... */}
                >
                    <Routes>
                        <Route path="/">
                            <Route index element={<Dashboard />} />
                        </Route>

                        <Route path="/products">
                            <Route index element={<ProductList />} />
                            <Route path="create" element={<ProductCreate />} />
                            <Route path="edit/:id" element={<ProductEdit />} />
                        </Route>

                        <Route path="*" element={<ErrorComponent />} />
                    </Routes>
                    {/* ... */}
                </Refine>
            </RefineKbarProvider>
        </BrowserRouter>
    );
}

export default App;
After these changes, when we navigate to the /products/edit/:id path, you should see the product edit page as below:
 Edit product form
Show Page
The product show page will display the details of an existing product. It will allow users to see the details of an existing product. For this, we'll use the useShow hook from Refine.
Let's create a <ProductShow /> component in src/pages/products/show.tsx directory with the following code:
src/pages/products/show.tsx
import { useBack, useOne, useShow } from "@refinedev/core";

import { Card } from "primereact/card";
import { Button } from "primereact/button";

import { ICategory, IProduct } from "../../interfaces";

export const ProductShow = () => {
  const goBack = useBack();

  const { result: product } = useShow<IProduct>();

  const { result: categoryData } = useOne<ICategory>({
    resource: "categories",
    id: product?.category.id,
    queryOptions: {
      enabled: !!product?.category.id,
    },
  });

  return (
    <Card
      className="shadow-1"
      title={
        <div className="align-items-center flex">
          <Button
            onClick={goBack}
            icon="pi pi-arrow-left"
            className="mr-1"
            text
            severity="secondary"
          />
          <span>Product Details</span>
        </div>
      }
    >
      <h3>Name</h3>
      <span>{product?.name}</span>
      <h3>Price</h3>
      <span>$ {product?.price}</span>
      <h3>Category</h3>
      <span>{categoryData?.data.title ?? "Loading..."}</span>
      <h3>Description</h3>
      <span>{product?.description}</span>
    </Card>
  );
};
In the code above, we used the useShow hook to fetch the product details. It makes a request to the /products/:id endpoint to fetch the product details. After fetching the data, we used the useOne hook to fetch the category details related to the product.
First, let's export the product show page on src/pages/products/index.tsx file as follows:
export * from "./list";
export * from "./create";
export * from "./edit";
export * from "./show";
Next, import the <ProductShow /> to add a route for rendering it. For this, you can simply copy the highlighted code below and paste it into the src/App.tsx file.
src/App.tsx
//...
import {
    ProductList,
    ProductCreate,
    ProductEdit,
    ProductShow,
} from "./pages/products";

function App() {
    return (
        <BrowserRouter>
            <RefineKbarProvider>
                <Refine
                    {/* ... */}
                >
                    <Routes>
                        <Route path="/">
                            <Route index element={<Dashboard />} />
                        </Route>

                        <Route path="/products">
                            <Route index element={<ProductList />} />
                            <Route path="create" element={<ProductCreate />} />
                            <Route path="edit/:id" element={<ProductEdit />} />
                            <Route path="show/:id" element={<ProductShow />} />
                        </Route>

                        <Route path="*" element={<ErrorComponent />} />
                    </Routes>
                    {/* ... */}
                </Refine>
            </RefineKbarProvider>
        </BrowserRouter>
    );
}

export default App;
After these changes, when we navigate to the /products/show/:id path, you should see the product show page as below:
 Product details page
Create Category CRUD Pages
In the previous sections, we learned how to build CRUD pages for the "product" resource. Now, we'll apply a similar approach to create CRUD pages for the "category" resource. The process will be very similar to what we did for products, so we won't repeat the explanations for the common parts. If you require more details, you can refer back to the previous sections for reference.
Let's start by defining the "category" resource in src/App.tsx file as follows:
src/App.tsx
import { ErrorComponent, Refine } from "@refinedev/core";
import { RefineKbar, RefineKbarProvider } from "@refinedev/kbar";
import routerProvider, {
  DocumentTitleHandler,
  UnsavedChangesNotifier,
} from "@refinedev/react-router";
import dataProvider from "@refinedev/simple-rest";
import { BrowserRouter, Route, Routes } from "react-router-dom";
import { ConfirmDialog } from "primereact/confirmdialog";

import { Dashboard } from "./pages/dashboard";
import {
  ProductList,
  ProductCreate,
  ProductEdit,
  ProductShow,
} from "./pages/products";

import "primereact/resources/themes/saga-blue/theme.css";
import "primereact/resources/primereact.css";
import "primeflex/primeflex.css";
import "primeicons/primeicons.css";

import "./App.css";

function App() {
  return (
    <BrowserRouter>
      <RefineKbarProvider>
        <Refine
          dataProvider={dataProvider("https://api.finefoods.refine.dev")}
          routerProvider={routerProvider}
          resources={[
            {
              name: "dashboard",
              list: "/",
            },
            {
              name: "products",
              list: "/products",
              create: "/products/create",
              edit: "/products/edit/:id",
              show: "/products/show/:id",
            },
            {
              name: "categories",
              list: "/categories",
              create: "/categories/create",
              edit: "/categories/edit/:id",
              show: "/categories/show/:id",
            },
          ]}
          options={{
            syncWithLocation: true,
            warnWhenUnsavedChanges: true,
          }}
        >
          <Routes>
            <Route path="/">
              <Route index element={<Dashboard />} />
            </Route>

            <Route path="/products">
              <Route index element={<ProductList />} />
              <Route path="create" element={<ProductCreate />} />
              <Route path="edit/:id" element={<ProductEdit />} />
              <Route path="show/:id" element={<ProductShow />} />
            </Route>

            <Route path="*" element={<ErrorComponent />} />
          </Routes>
          <RefineKbar />
          <UnsavedChangesNotifier />
          <DocumentTitleHandler />
          <ConfirmDialog />
        </Refine>
      </RefineKbarProvider>
    </BrowserRouter>
  );
}

export default App;
After defining the "category" resource, let's create the category CRUD pages in src/pages/categories directory step by step.
First, let's create a list.tsx file in src/pages/categories directory with the following code:
src/pages/categories/list.tsx
import {
  useTable,
  getDefaultFilter,
  useNavigation,
  useDelete,
} from "@refinedev/core";

import { DataTable } from "primereact/datatable";
import { Column } from "primereact/column";
import { Card } from "primereact/card";
import { Button } from "primereact/button";
import { InputText } from "primereact/inputtext";
import { confirmDialog } from "primereact/confirmdialog";

import { ICategory } from "../../interfaces";

export const CategoryList = () => {
  const {
    tableQuery,
    pageCount,
    currentPage,
    pageSize,
    sorters,
    filters,
    setCurrentPage,
    setPageSize,
    setSorters,
    setFilters,
  } = useTable({
    pagination: {
      pageSize: 5,
    },
  });
  const { edit, show, create } = useNavigation();
  const { mutate: deleteProduct } = useDelete();

  const categories = tableQuery?.data?.data;

  const confirmDeleteProduct = (id: number) => {
    confirmDialog({
      message: "Do you want to delete this record?",
      header: "Delete Confirmation",
      icon: "pi pi-exclamation-triangle",
      acceptClassName: "p-button-danger",
      accept: () => {
        deleteProduct({
          resource: "categories",
          id,
        });
      },
    });
  };

  const actionBodyTemplate = (rowData: ICategory) => {
    return (
      <>
        <Button
          icon="pi pi-pencil"
          rounded
          text
          severity="secondary"
          onClick={() => edit("categories", rowData.id)}
        />
        <Button
          icon="pi pi-eye"
          rounded
          text
          severity="secondary"
          onClick={() => show("categories", rowData.id)}
        />
        <Button
          icon="pi pi-trash"
          rounded
          text
          severity="danger"
          onClick={() => confirmDeleteProduct(rowData.id)}
        />
      </>
    );
  };

  const header = (
    <div className="justify-content-between flex">
      <Button
        type="button"
        icon="pi pi-filter-slash"
        label="Clear"
        outlined
        onClick={() => {
          setCurrentPage(1);
          setFilters([], "replace");
        }}
      />
      <span className="p-input-icon-left">
        <i className="pi pi-search" />
        <InputText
          value={getDefaultFilter("q", filters)}
          onChange={(e) => {
            setCurrentPage(1);
            setFilters([
              {
                field: "q",
                value: e.target.value,
                operator: "contains",
              },
            ]);
          }}
          placeholder="Keyword Search"
        />
      </span>
    </div>
  );

  return (
    <Card
      className="shadow-1"
      title={
        <div className="justify-content-between align-items-center flex">
          <span className="p-card-title">Categories</span>
          <Button
            icon="pi pi-plus"
            label="Create"
            onClick={() => create("categories")}
          />
        </div>
      }
    >
      <DataTable
        value={categories}
        dataKey="id"
        showGridlines
        lazy
        paginator
        rows={pageSize}
        rowsPerPageOptions={[5, 10, 25, 50]}
        first={currentPage * pageSize - pageSize}
        totalRecords={pageCount * pageSize}
        onPage={(event) => {
          setCurrentPage((event.page ?? 0) + 1);
          setPageSize(event.rows);
        }}
        onSort={(event) => {
          setSorters([
            {
              field: event.sortField,
              order: event.sortOrder === 1 ? "asc" : "desc",
            },
          ]);
        }}
        sortField={sorters[0]?.field}
        sortOrder={sorters[0]?.order === "asc" ? 1 : -1}
        loading={tableQuery?.isLoading}
        header={header}
      >
        <Column
          field="id"
          header="Id"
          sortable
          style={{ minWidth: "1rem", width: "10rem" }}
        />
        <Column
          field="title"
          header="Name"
          style={{ minWidth: "12rem" }}
          sortable
        />
        <Column
          body={actionBodyTemplate}
          header="Actions"
          align="center"
          style={{ minWidth: "10rem", width: "10rem" }}
        />
      </DataTable>
    </Card>
  );
};
Second, let's create a create.tsx file in src/pages/categories directory with the following code:
src/pages/categories/create.tsx
import { HttpError, useBack } from "@refinedev/core";
import { useForm } from "@refinedev/react-hook-form";
import { Controller } from "react-hook-form";
import { Button } from "primereact/button";
import { Card } from "primereact/card";
import { InputText } from "primereact/inputtext";
import { classNames } from "primereact/utils";
import { ICategory } from "../../interfaces";
export const CategoryCreate = () => {
const goBack = useBack();
const {
refineCore: { onFinish, formLoading },
handleSubmit,
control,
formState: { errors },
} = useForm<ICategory, HttpError, ICategory>({
defaultValues: {
title: "",
},
});
const getFormErrorMessage = (name: keyof ICategory) => {
return errors[name] ? (
<small className="p-error">{errors[name]?.message}</small>
) : (
<small className="p-error"> </small>
);
};
return (
<Card
className="shadow-1"
title={
<div className="align-items-center flex">
<Button
onClick={goBack}
icon="pi pi-arrow-left"
className="mr-1"
text
severity="secondary"
/>
<span>Create Category</span>
</div>
}
>
<form onSubmit={handleSubmit(onFinish)}>
<div className="p-fluid">
<Controller
name="title"
control={control}
rules={{ required: "Name is required." }}
render={({ field, fieldState }) => (
<div className="mb-1">
<label htmlFor={field.name}>Name</label>
<InputText
id={field.name}
value={field.value}
className={classNames("mb-1 mt-1", {
"p-invalid": fieldState.error,
})}
onChange={(e) => field.onChange(e.target.value)}
/>
{getFormErrorMessage(field.name)}
</div>
)}
/>
</div>
<div className="justify-content-end flex">
<Button label="Save" type="submit" loading={formLoading} />
</div>
</form>
</Card>
);
};
Third, let's create a edit.tsx file in src/pages/categories directory with the following code:
src/pages/categories/edit.tsx
import { HttpError, useBack } from "@refinedev/core";
import { useForm } from "@refinedev/react-hook-form";
import { Controller } from "react-hook-form";
import { Button } from "primereact/button";
import { Card } from "primereact/card";
import { InputText } from "primereact/inputtext";
import { classNames } from "primereact/utils";
import { ICategory } from "../../interfaces";
export const CategoryEdit = () => {
const goBack = useBack();
const {
refineCore: { onFinish, formLoading, query },
handleSubmit,
control,
formState: { errors },
} = useForm<ICategory, HttpError, ICategory>({
defaultValues: {
title: "",
},
});
const getFormErrorMessage = (name: keyof ICategory) => {
return errors[name] ? (
<small className="p-error">{errors[name]?.message}</small>
) : (
<small className="p-error"> </small>
);
};
return (
<Card
className="shadow-1"
title={
<div className="justify-content-between align-items-center flex">
<div className="align-items-center flex">
<Button
onClick={goBack}
icon="pi pi-arrow-left"
className="mr-1"
text
severity="secondary"
/>
<span>Edit Category</span>
</div>
<Button
label="Refresh"
icon="pi pi-refresh"
outlined
onClick={() => query?.refetch()}
/>
</div>
}
>
<form onSubmit={handleSubmit(onFinish)}>
<div className="p-fluid">
<Controller
name="title"
control={control}
rules={{ required: "Name is required." }}
render={({ field, fieldState }) => (
<div className="mb-1">
<label htmlFor={field.name}>Name</label>
<InputText
id={field.name}
value={field.value}
className={classNames("mb-1 mt-1", {
"p-invalid": fieldState.error,
})}
onChange={(e) => field.onChange(e.target.value)}
/>
{getFormErrorMessage(field.name)}
</div>
)}
/>
</div>
<div className="justify-content-end flex">
<Button label="Save" type="submit" loading={formLoading} />
</div>
</form>
</Card>
);
};
Lastly, let's create a show.tsx file in src/pages/categories directory with the following code:
src/pages/categories/show.tsx
import { useBack, useShow } from "@refinedev/core";

import { Card } from "primereact/card";
import { Button } from "primereact/button";

import { ICategory } from "../../interfaces";

export const CategoryShow = () => {
  const goBack = useBack();

  const { result: category } = useShow<ICategory>();

  return (
    <Card
      className="shadow-1"
      title={
        <div className="align-items-center flex">
          <Button
            onClick={goBack}
            icon="pi pi-arrow-left"
            className="mr-1"
            text
            severity="secondary"
          />
          <span>Category Details</span>
        </div>
      }
    >
      <h3>Id</h3>
      <span>{category?.id}</span>
      <h3>Title</h3>
      <span>{category?.title}</span>
    </Card>
  );
};
After creating the CRUD pages for the "category" resource, let's export them on src/pages/categories/index.ts file as follows:
export * from "./list";
export * from "./create";
export * from "./edit";
export * from "./show";
Next, import the category CRUD pages in src/App.tsx and add routes for rendering them.
src/App.tsx
import { ErrorComponent, Refine } from "@refinedev/core";
import { RefineKbar, RefineKbarProvider } from "@refinedev/kbar";
import routerProvider, {
  DocumentTitleHandler,
  UnsavedChangesNotifier,
} from "@refinedev/react-router";
import dataProvider from "@refinedev/simple-rest";
import { BrowserRouter, Route, Routes } from "react-router-dom";
import { ConfirmDialog } from "primereact/confirmdialog";

import { Dashboard } from "./pages/dashboard";
import {
  ProductList,
  ProductCreate,
  ProductEdit,
  ProductShow,
} from "./pages/products";
import {
  CategoryList,
  CategoryCreate,
  CategoryEdit,
  CategoryShow,
} from "./pages/categories";

import "primereact/resources/themes/saga-blue/theme.css";
import "primereact/resources/primereact.css";
import "primeflex/primeflex.css";
import "primeicons/primeicons.css";

import "./App.css";

function App() {
  return (
    <BrowserRouter>
      <RefineKbarProvider>
        <Refine
          dataProvider={dataProvider("https://api.finefoods.refine.dev")}
          routerProvider={routerProvider}
          resources={[
            {
              name: "dashboard",
              list: "/",
            },
            {
              name: "products",
              list: "/products",
              create: "/products/create",
              edit: "/products/edit/:id",
              show: "/products/show/:id",
            },
            {
              name: "categories",
              list: "/categories",
              create: "/categories/create",
              edit: "/categories/edit/:id",
              show: "/categories/show/:id",
            },
          ]}
          options={{
            syncWithLocation: true,
            warnWhenUnsavedChanges: true,
          }}
        >
          <Routes>
            <Route path="/">
              <Route index element={<Dashboard />} />
            </Route>

            <Route path="/products">
              <Route index element={<ProductList />} />
              <Route path="create" element={<ProductCreate />} />
              <Route path="edit/:id" element={<ProductEdit />} />
              <Route path="show/:id" element={<ProductShow />} />
            </Route>

            <Route path="/categories">
              <Route index element={<CategoryList />} />
              <Route path="create" element={<CategoryCreate />} />
              <Route path="edit/:id" element={<CategoryEdit />} />
              <Route path="show/:id" element={<CategoryShow />} />
            </Route>

            <Route path="*" element={<ErrorComponent />} />
          </Routes>
          <RefineKbar />
          <UnsavedChangesNotifier />
          <DocumentTitleHandler />
          <ConfirmDialog />
        </Refine>
      </RefineKbarProvider>
    </BrowserRouter>
  );
}

export default App;
After these changes, you should be able to navigate to the category CRUD pages as the below:
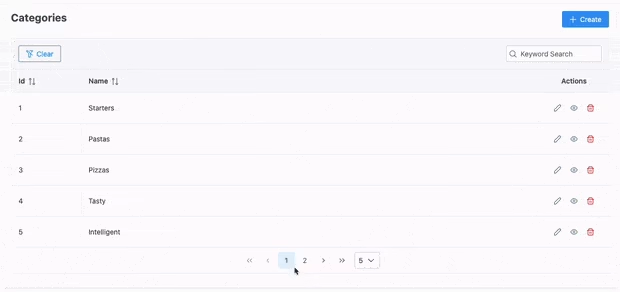 Category pages preview
Update the Layout
In this section, we'll update the <Layout /> component that is created by default when we created the project with Refine scaffold.
It renders the <Menu /> and <Breadcrumb /> components with simple HTML elements. We'll update them to use the components from the PrimeReact library.
Before updating the <Layout /> component, let's update the src/App.tsx file to render the default <Layout /> as wrapper for all the pages.
Additionally, we'll add meta property to the resources to render icons in the menu and breadcrumb components.
src/App.tsx
import { ErrorComponent, Refine } from "@refinedev/core";
import { RefineKbar, RefineKbarProvider } from "@refinedev/kbar";
import routerProvider, {
  DocumentTitleHandler,
  UnsavedChangesNotifier,
} from "@refinedev/react-router";
import dataProvider from "@refinedev/simple-rest";
import { BrowserRouter, Outlet, Route, Routes } from "react-router-dom";
import { ConfirmDialog } from "primereact/confirmdialog";

import { Dashboard } from "./pages/dashboard";
import {
  ProductList,
  ProductCreate,
  ProductEdit,
  ProductShow,
} from "./pages/products";
import {
  CategoryList,
  CategoryCreate,
  CategoryEdit,
  CategoryShow,
} from "./pages/categories";

import { Layout } from "./components/layout";

import "primereact/resources/themes/saga-blue/theme.css";
import "primereact/resources/primereact.css";
import "primeflex/primeflex.css";
import "primeicons/primeicons.css";

import "./App.css";

function App() {
  return (
    <BrowserRouter>
      <RefineKbarProvider>
        <Refine
          dataProvider={dataProvider("https://api.finefoods.refine.dev")}
          routerProvider={routerProvider}
          resources={[
            {
              name: "dashboard",
              list: "/",
              meta: {
                icon: <i className="pi pi-fw pi-home" />,
              },
            },
            {
              name: "products",
              list: "/products",
              create: "/products/create",
              edit: "/products/edit/:id",
              show: "/products/show/:id",
              meta: {
                icon: <i className="pi pi-fw pi-shopping-cart" />,
              },
            },
            {
              name: "categories",
              list: "/categories",
              create: "/categories/create",
              edit: "/categories/edit/:id",
              show: "/categories/show/:id",
              meta: {
                icon: <i className="pi pi-fw pi-tags" />,
              },
            },
          ]}
          options={{
            syncWithLocation: true,
            warnWhenUnsavedChanges: true,
          }}
        >
          <Routes>
            <Route
              element={
                <Layout>
                  <Outlet />
                </Layout>
              }
            >
              <Route path="/">
                <Route index element={<Dashboard />} />
              </Route>

              <Route path="/products">
                <Route index element={<ProductList />} />
                <Route path="create" element={<ProductCreate />} />
                <Route path="edit/:id" element={<ProductEdit />} />
                <Route path="show/:id" element={<ProductShow />} />
              </Route>

              <Route path="/categories">
                <Route index element={<CategoryList />} />
                <Route path="create" element={<CategoryCreate />} />
                <Route path="edit/:id" element={<CategoryEdit />} />
                <Route path="show/:id" element={<CategoryShow />} />
              </Route>

              <Route path="*" element={<ErrorComponent />} />
            </Route>
          </Routes>
          <RefineKbar />
          <UnsavedChangesNotifier />
          <DocumentTitleHandler />
          <ConfirmDialog />
        </Refine>
      </RefineKbarProvider>
    </BrowserRouter>
  );
}

export default App;
Let's update the <Layout /> component in src/components/layout/index.tsx file to render the <Menu /> and <Breadcrumb /> components which we'll create in the next sections.
import { PropsWithChildren } from "react";

import { Menu } from "../menu";
import { Breadcrumb } from "../breadcrumb";

export const Layout: React.FC<PropsWithChildren> = ({ children }) => {
  return (
    <div className="surface-ground min-h-screen">
      <Menu />
      <div className="p-3">
        <Breadcrumb />
        {children}
      </div>
    </div>
  );
};
Update the Menu
To provide navigation between the resources, we'll update the <Menu /> component to render the <TabMenu /> component from PrimeReact.
import { useMenu } from "@refinedev/core";
import { Link } from "react-router-dom";

import { TabMenu } from "primereact/tabmenu";
import { MenuItem } from "primereact/menuitem";
import { classNames } from "primereact/utils";

export const Menu = () => {
  const { menuItems } = useMenu();

  const items: MenuItem[] = menuItems.map((menuItem) => ({
    label: menuItem.label,
    icon: menuItem.icon,
    template: (item, options) => {
      return (
        <div onClick={options.onClick}>
          <Link to={menuItem.route ?? "/"} className={options.className}>
            {item.icon}
            <span className={classNames("ml-2", options.labelClassName)}>
              {item.label}
            </span>
          </Link>
        </div>
      );
    },
  }));

  return (
    <div className="z-5 sticky top-0">
      <TabMenu model={items} />
    </div>
  );
};
useMenu hook returns the menu items according to the resources defined in the <Refine /> component.
Update the Breadcrumb
Breadcrumb component is used to display the current page location within a navigational hierarchy. We'll update it to render the <Breadcrumb /> component from PrimeReact.
import { useBreadcrumb } from "@refinedev/core";
import { Link } from "react-router-dom";

import { BreadCrumb } from "primereact/breadcrumb";
import { MenuItem } from "primereact/menuitem";
import { classNames } from "primereact/utils";

export const Breadcrumb = () => {
  const { breadcrumbs } = useBreadcrumb();

  if (breadcrumbs.length === 1) {
    return null;
  }

  const items: MenuItem[] = breadcrumbs.map((breadcrumb) => ({
    label: breadcrumb.label,
    icon: breadcrumb.icon,
    template: (item, options) => {
      return breadcrumb.href ? (
        <Link
          to={breadcrumb.href}
          className={classNames("text-color", options.className)}
        >
          {item.icon}
          <span className={classNames("ml-2 ", options.labelClassName)}>
            {item.label}
          </span>
        </Link>
      ) : (
        <span className={options.className}>
          <span className={options.labelClassName}>{item.label}</span>
        </span>
      );
    },
  }));

  return (
    <BreadCrumb className="surface-ground border-none pl-0" model={items} />
  );
};
useBreadcrumb hook returns the breadcrumb items according to the resources defined in the <Refine /> component. If there is only one breadcrumb item, we won't render the <Breadcrumb /> component. Because there is no need to display the breadcrumb if there is only one item.
After these changes, you can see the final result as below. Also, you can interact with the admin panel on CodeSandbox.
 Final dashboard overview
Conclusion
In this blog post, we explored the powerful combination of Refine and PrimeReact to build a fully functional React admin panel. We started by understanding what Refine is and how it simplifies the process of creating admin panels.
Then, we created a new Refine app and installed PrimeReact to enhance our UI with a rich set of components. We built various features for our admin panel, including a dashboard with KPI cards, charts, and recent sales information.
Next, we created CRUD pages for managing products and categories, showcasing how easy it is to handle data with Refine. We also updated the layout, menu, and breadcrumb to improve the overall user experience.
Throughout the development process, we learned how Refine and PrimeReact work seamlessly together and we've seen how easy it is to adapt and customize the components to suit our specific needs.
By now, you should have a good understanding of how to create a React admin panel using Refine and PrimeReact. Feel free to experiment and customize further to suit your specific project requirements.
With this new knowledge in hand, you are well-equipped to build powerful and feature-rich admin panels for your web applications. Happy coding!
Live CodeSandbox Example
npm create refine-app@latest -- --example blog-refine-primereact