
CAUTION
This post was created using version 3.x.x of Refine. Although we plan to update it with the latest version of Refine as soon as possible, you can still benefit from the post in the meantime.
You should know that Refine version 4.x.x is backward compatible with version 3.x.x, so there is no need to worry. If you want to see the differences between the two versions, check out the migration guide.
Just be aware that the source code example in this post have been updated to version 4.x.x.
Invoice management can be a daunting task for any business. With so many different software programs and options, it's hard to know where you need start or what will work best with your company culture! You can solve this problem with Refine. With Refine, you can develop your own customizable invoice generator with ease.


Introduction
We are going to develop an invoice generator application for our business using Refine and Strapi. Let's see together how simple yet functional it can be!
This article will consist of two parts and we will try to explain each step in detail. In this section, we will create the basic parts of our application.
In this part, we will create a panel where our own company information is included, where we can create customers and create contacts with customer companies.
Setup Refine Project
Let's start by creating our Refine project. You can use the superplate to create a Refine project.
npm create refine-app@latest refine-invoice-generator -- -p refine-react -b v3
✔ What will be the name of your app ·refine-invoice-generator
✔ Package manager: · Npm
✔ Do you want to use a UI Framework? · Ant Design
✔ Do you want a customized theme?: Default theme
✔ Router Provider: · React Router v6
✔ Data Provider: Strapi
✔ Do you want a customized layout? No
✔ i18n - Internationalization: · No
superplate will quickly create our Refine project according to the features we choose. Let's continue by install the Refine Strapi-v4 Data Provider that we will use later.
npm i @refinedev/strapi-v4
Our Refine project and installations are now ready! Let's start using it.
Usage
Auth Provider
src/authProvider.ts
import { AuthProvider } from "@refinedev/core";
import { AuthHelper } from "@refinedev/strapi-v4";

import { TOKEN_KEY, API_URL } from "./constants";

import axios from "axios";

export const axiosInstance = axios.create();
const strapiAuthHelper = AuthHelper(API_URL + "/api");

export const authProvider: AuthProvider = {
  login: async ({ username, password }) => {
    const { data, status, statusText } = await strapiAuthHelper.login(
      username,
      password,
    );
    if (status === 200) {
      localStorage.setItem(TOKEN_KEY, data.jwt);

      // set header axios instance
      axiosInstance.defaults.headers.common[
        "Authorization"
      ] = `Bearer ${data.jwt}`;

      return {
        success: true,
        redirectTo: "/",
      };
    }

    return {
      success: false,
      error: {
        message: "Login failed",
        name: statusText,
      },
    };
  },
  logout: async () => {
    localStorage.removeItem(TOKEN_KEY);
    return {
      success: true,
      redirectTo: "/",
    };
  },
  onError: async (error) => {
    console.error(error);
    return { error };
  },
  check: async () => {
    const token = localStorage.getItem(TOKEN_KEY);
    if (token) {
      axiosInstance.defaults.headers.common[
        "Authorization"
      ] = `Bearer ${token}`;
      return {
        authenticated: true,
      };
    }

    return {
      authenticated: false,
      logout: true,
      error: {
        message: "Check failed",
        name: "Token not found",
      },
      redirectTo: "/",
    };
  },
  getPermissions: async () => ({}),
  getIdentity: async () => {
    const token = localStorage.getItem(TOKEN_KEY);
    if (!token) {
      return null;
    }

    const { data, status } = await strapiAuthHelper.me(token);
    if (status === 200) {
      const { id, username, email } = data;
      return {
        id,
        username,
        email,
      };
    }

    return null;
  },
};
Configure Refine for Strapi-v4
import { Refine } from "@refinedev/core";
import { useNotificationProvider, Layout, LoginPage } from "@refinedev/antd";
import routerProvider from "@refinedev/react-router-v6";
import { DataProvider } from "@refinedev/strapi-v4";
import { authProvider, axiosInstance } from "./authProvider";

import "@refinedev/antd/dist/reset.css";

function App() {
  const API_URL = "Your_Strapi_Url";
  const dataProvider = DataProvider(API_URL + "/api", axiosInstance);

  return (
    <Refine
      routerProvider={routerProvider}
      notificationProvider={useNotificationProvider}
      Layout={Layout}
      dataProvider={dataProvider}
      authProvider={authProvider}
      LoginPage={LoginPage}
    />
  );
}
Create Strapi Collections
We created three collections on Strapi as company, client and contact and added a relation between them. For detailed information on how to create a collection, you can check here.
Company:
- Logo: Media
- Name: Text
- Address: Text
- Country: Text
- City: Text
- email: Email
- Website: Text
 Strapi Company Collection
Client:
- Name: Text
- Contacts: Relation with Contact
 Strapi Client Collection
Contact:
- First_name: Text
- Last_name: Text
- Phone_number Text
- Email: email
- Job: Text
- Client: Relation with Client
 Strapi Contact Collection
We have created our collections by Strapi, now we can create Clients and their contacts with Refine.
Your Company Detail Page
As a first step, let's start to create the part where our own Company will be located. If there are other companies you need to manage you can create them on the Your Company page and view them here.
Company Card Component
Let's design a component that includes the details of our company. Then let's show it using refine-antd List. We will put the information such as name, logo and address from the Company collection we created on Strapi into Card component.
src/components/company/CompanyItem.tsx
import {
  Card,
  DeleteButton,
  UrlField,
  EmailField,
  EditButton,
  Typography,
} from "@refinedev/antd";

import { ICompany } from "interfaces";
import { API_URL } from "../../constants";

const { Title, Text } = Typography;

type CompanyItemProps = {
  item: ICompany;
};

export const CompanyItem: React.FC<CompanyItemProps> = ({ item }) => {
  const image = item.logo ? API_URL + item.logo.url : "./error.png";

  return (
    <Card
      style={{ width: "300px" }}
      cover={
        <div style={{ display: "flex", justifyContent: "center" }}>
          <img
            style={{
              width: 220,
              height: 100,
              padding: 24,
            }}
            src={image}
            alt="Company logo"
          />
        </div>
      }
      actions={[
        <EditButton key="edit" size="small" hideText />,
        <DeleteButton
          key="delete"
          size="small"
          hideText
          recordItemId={item.id}
        />,
      ]}
    >
      <Title level={5}>Company Name:</Title>
      <Text>{item.name}</Text>
      <Title level={5}>Company Address:</Title>
      <Text>{item.address}</Text>
      <Title level={5}>County:</Title>
      <Text>{item.country}</Text>
      <Title level={5}>City:</Title>
      <Text>{item.city}</Text>
      <Title level={5}>Email:</Title>
      <EmailField value={item.email} />
      <Title level={5}>Website:</Title>
      <UrlField value={item.website} />
    </Card>
  );
};
Company List Page
Let's place the CompanyItem component that we created above in the refine-antd List and display company information.
import { useSimpleList, AntdList, List } from "@refinedev/antd";

import { CompanyItem } from "components/company";

export const CompanyList = () => {
  const { listProps } = useSimpleList<ICompany>({
    meta: { populate: ["logo"] },
  });

  return (
    <List title={"Your Companies"}>
      <AntdList
        grid={{ gutter: 16 }}
        {...listProps}
        renderItem={(item) => (
          <AntdList.Item>
            <CompanyItem item={item} />
          </AntdList.Item>
        )}
      />
    </List>
  );
};
...

import { CompanyList } from "pages/company";

function App() {
    const API_URL = "Your_Strapi_Url";
    const dataProvider = DataProvider(API_URL + "/api", axiosInstance);

    return (
        <Refine
            routerProvider={routerProvider}
            notificationProvider={useNotificationProvider}
            Layout={Layout}
            dataProvider={dataProvider}
            authProvider={authProvider}
            LoginPage={LoginPage}
            resources={[
                {
                    name: "companies",
                    meta: { label: "Your Company" },
                    list: CompanyList,
                },
            ]}
        />
    );
}
 Refine Company List
We fetch the data of the Company collection that we created by Strapi, thanks to the Refine dataProvider, and put it into the card component we created.
Contact Page
Our Contact Page is a page related to Clients. Communication with client companies will be through the contacts we create here. The Contact Page will contain the information of the people we will contact. Let's create our list using Refine useTable hook.
import {
  List,
  Table,
  TagField,
  useTable,
  Space,
  EditButton,
  DeleteButton,
  useModalForm,
} from "@refinedev/antd";

import { IContact } from "interfaces";
import { CreateContact } from "components/contacts";

export const ContactsList: React.FC = () => {
  const { tableProps } = useTable<IContact>({
    meta: { populate: ["client"] },
  });

  const {
    formProps: createContactFormProps,
    modalProps,
    show,
  } = useModalForm({
    resource: "contacts",
    action: "create",
    redirect: false,
  });

  return (
    <>
      <List
        createButtonProps={{
          onClick: () => {
            show();
          },
        }}
      >
        <Table {...tableProps} rowKey="id">
          <Table.Column dataIndex="id" title="ID" />
          <Table.Column dataIndex="first_name" title="First Name" />
          <Table.Column dataIndex="last_name" title="Last Name" />
          <Table.Column dataIndex="phone_number" title="Phone Number" />
          <Table.Column dataIndex="email" title="Email" />
          <Table.Column
            dataIndex="job"
            title="Job"
            render={(value: string) => (
              <TagField color={"blue"} value={value} />
            )}
          />
          <Table.Column<{ id: string }>
            title="Actions"
            dataIndex="actions"
            render={(_, record) => (
              <Space>
                <EditButton hideText size="small" recordItemId={record.id} />
                <DeleteButton hideText size="small" recordItemId={record.id} />
              </Space>
            )}
          />
        </Table>
      </List>
      <CreateContact
        modalProps={modalProps}
        formProps={createContactFormProps}
      />
    </>
  );
};
 Refine Contacts List
Client List Page
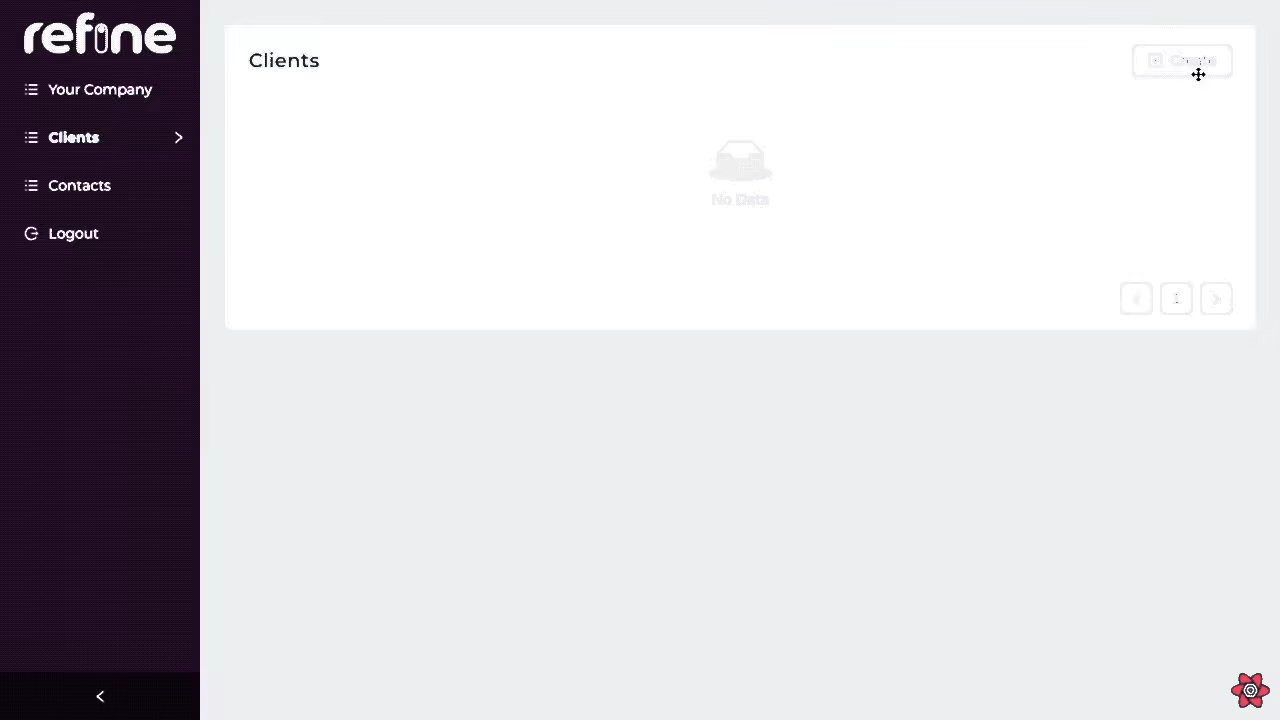
We have created example company and contacts above. Now let's create a Client List where we can view our clients.
Client Card Component
Let's design the cards that will appear in our Client List.
src/components/client/ClientItem.tsx
import { useDelete } from "@refinedev/core";
import {
  Card,
  TagField,
  Typography,
  Dropdown,
  Menu,
  Icons,
} from "@refinedev/antd";

import { IClient } from "interfaces";

const { FormOutlined, DeleteOutlined } = Icons;
const { Title, Text } = Typography;

type ClientItemProps = {
  item: IClient;
  editShow: (id?: string | undefined) => void;
};

export const ClientItem: React.FC<ClientItemProps> = ({ item, editShow }) => {
  const { mutate } = useDelete();

  return (
    <Card style={{ width: 300, height: 300, borderColor: "black" }}>
      <div style={{ position: "absolute", top: "10px", right: "5px" }}>
        <Dropdown
          overlay={
            <Menu mode="vertical">
              <Menu.Item
                key="1"
                style={{
                  fontWeight: 500,
                }}
                icon={
                  <FormOutlined
                    style={{
                      color: "green",
                    }}
                  />
                }
                onClick={() => editShow(item.id)}
              >
                Edit Client
              </Menu.Item>
              <Menu.Item
                key="2"
                style={{
                  fontWeight: 500,
                }}
                icon={
                  <DeleteOutlined
                    style={{
                      color: "red",
                    }}
                  />
                }
                onClick={() =>
                  mutate({
                    resource: "clients",
                    id: item.id,
                    mutationMode: "undoable",
                    undoableTimeout: 5000,
                  })
                }
              >
                Delete Client
              </Menu.Item>
            </Menu>
          }
          trigger={["click"]}
        >
          <Icons.MoreOutlined
            style={{
              fontSize: 24,
            }}
          />
        </Dropdown>
      </div>

      <Title level={4}>{item.name}</Title>
      <Title level={5}>Client Id:</Title>
      <Text>{item.id}</Text>
      <Title level={5}>Contacts:</Title>

      {item.contacts.map((item) => {
        return (
          <TagField
            color={"#d1c4e9"}
            value={`${item.first_name} ${item.last_name}`}
          />
        );
      })}
    </Card>
  );
};
Client Create and Edit Page
The client page is a place where you can update your client info and add new clients. Let's create the Create and Edit pages to create new customers and update existing customers.
- Create Client
src/components/client/CreateClient.tsx
import {
  Create,
  Drawer,
  DrawerProps,
  Form,
  FormProps,
  Input,
  ButtonProps,
  Grid,
  Select,
  useSelect,
  useModalForm,
  Button,
} from "@refinedev/antd";

import { IContact } from "interfaces";
import { CreateContact } from "components/contacts";

type CreateClientProps = {
  drawerProps: DrawerProps;
  formProps: FormProps;
  saveButtonProps: ButtonProps;
};

export const CreateClient: React.FC<CreateClientProps> = ({
  drawerProps,
  formProps,
  saveButtonProps,
}) => {
  const breakpoint = Grid.useBreakpoint();

  const { selectProps } = useSelect<IContact>({
    resource: "contacts",
    optionLabel: "first_name",
  });

  const {
    formProps: createContactFormProps,
    modalProps,
    show,
  } = useModalForm({
    resource: "contacts",
    action: "create",
    redirect: false,
  });

  return (
    <>
      <Drawer
        {...drawerProps}
        width={breakpoint.sm ? "500px" : "100%"}
        bodyStyle={{ padding: 0 }}
      >
        <Create saveButtonProps={saveButtonProps}>
          <Form
            {...formProps}
            layout="vertical"
            initialValues={{
              isActive: true,
            }}
          >
            <Form.Item
              label="Client Company Name"
              name="name"
              rules={[
                {
                  required: true,
                },
              ]}
            >
              <Input />
            </Form.Item>
            <Form.Item label="Select Contact">
              <div style={{ display: "flex" }}>
                <Form.Item name={"contacts"} noStyle>
                  <Select {...selectProps} mode="multiple" />
                </Form.Item>
                <Button type="link" onClick={() => show()}>
                  Create Contact
                </Button>
              </div>
            </Form.Item>
          </Form>
        </Create>
      </Drawer>

      <CreateContact
        modalProps={modalProps}
        formProps={createContactFormProps}
      />
    </>
  );
};
- Edit Client
src/components/client/EditClient.tsx
import {
  Edit,
  Drawer,
  DrawerProps,
  Form,
  FormProps,
  Input,
  ButtonProps,
  Grid,
  Select,
  useSelect,
} from "@refinedev/antd";

type EditClientProps = {
  drawerProps: DrawerProps;
  formProps: FormProps;
  saveButtonProps: ButtonProps;
};

export const EditClient: React.FC<EditClientProps> = ({
  drawerProps,
  formProps,
  saveButtonProps,
}) => {
  const breakpoint = Grid.useBreakpoint();

  const { selectProps } = useSelect({
    resource: "contacts",
    optionLabel: "first_name",
  });

  return (
    <Drawer
      {...drawerProps}
      width={breakpoint.sm ? "500px" : "100%"}
      bodyStyle={{ padding: 0 }}
    >
      <Edit saveButtonProps={saveButtonProps}>
        <Form
          {...formProps}
          layout="vertical"
          initialValues={{
            isActive: true,
          }}
        >
          <Form.Item
            label="Client Company Name"
            name="name"
            rules={[
              {
                required: true,
              },
            ]}
          >
            <Input />
          </Form.Item>
          <Form.Item label="Select Contact" name="contacts">
            <Select {...selectProps} mode="multiple" />
          </Form.Item>
        </Form>
      </Edit>
    </Drawer>
  );
};
Client List Page
Above, we created Card, Create and Edit components. Let's define and use these components we have created in our ClientList.
import { HttpError } from "@refinedev/core";

import {
  useSimpleList,
  AntdList,
  List,
  useDrawerForm,
  CreateButton,
} from "@refinedev/antd";

import { IClient } from "interfaces";
import { ClientItem, CreateClient, EditClient } from "components/client";

export const ClientList = () => {
  const { listProps } = useSimpleList<IClient>({
    meta: { populate: ["contacts"] },
  });

  const {
    drawerProps: createDrawerProps,
    formProps: createFormProps,
    saveButtonProps: createSaveButtonProps,
    show: createShow,
  } = useDrawerForm<IClient, HttpError, IClient>({
    action: "create",
    resource: "clients",
    redirect: false,
  });

  const {
    drawerProps: editDrawerProps,
    formProps: editFormProps,
    saveButtonProps: editSaveButtonProps,
    show: editShow,
  } = useDrawerForm<IClient, HttpError, IClient>({
    action: "edit",
    resource: "clients",
    redirect: false,
  });

  return (
    <>
      <List
        pageHeaderProps={{
          extra: <CreateButton onClick={() => createShow()} />,
        }}
      >
        <AntdList
          grid={{ gutter: 24, xs: 1 }}
          {...listProps}
          renderItem={(item) => (
            <AntdList.Item>
              <ClientItem item={item} editShow={editShow} />
            </AntdList.Item>
          )}
        />
      </List>
      <CreateClient
        drawerProps={createDrawerProps}
        formProps={createFormProps}
        saveButtonProps={createSaveButtonProps}
      />
      <EditClient
        drawerProps={editDrawerProps}
        formProps={editFormProps}
        saveButtonProps={editSaveButtonProps}
      />
    </>
  );
};
We created our Client and Contact pages. Now, let's create a Client with Refine and define contacts for our clients.
 Refine Clients Overview
Example
Demo Credentials
Username: demo
Password: demodemo
npm create refine-app@latest -- --example blog-invoice-generator
Conclusion
We have completed the first step of our project, creating a basic platform for users to create their company and clients. In the next section, we will add more functionality to this program by allowing users to generate invoices and track payments. Stay tuned as we continue working on Refine Invoice Generator!
You can find the Refine Invoice Generator Part II article here →