If you’ve ever wanted to create a backend quickly — with a real database, authentication, storage, and auto-generated APIs — Supabase is a practical place to start. It’s open source, runs on top of PostgreSQL, and helps you move from idea to data in minutues.
In this guide, we’ll focus entirely on setting up your Supabase database — creating tables, understanding relationships, and preparing your project so that tools like Refine can generate a working admin panel from it.
No frontend, no API calls — just a clear, simple walkthrough of setting up a real, production-grade database the easy way.
Table of contents
- Step 1: Create a Supabase Project
- Step 2: Understanding the Table Editor
- Step 3: Create Your First Table
- Step 4: Add a Related Table
- Step 5: Insert Sample Data
- Step 6: Explore the SQL Editor
- Step 7: Enable APIs and Policies
- Why This Matters
- What to do after
- Helpful Links
Step 1: Create a Supabase Project
Start at supabase.com and click Start your project. You can sign in using GitHub or any email address.
Once you’re in the dashboard, click New project and fill in the details:
- Name – anything you like, e.g.,
team-admin - Password – this is your database password (keep it safe!)
- Region – choose one close to you or your users
Then click Create new project. Within about 30 seconds, you’ll have a live PostgreSQL database running in the cloud — complete with authentication, storage, and instant APIs.
You’ll land on the project dashboard, where you’ll see the core sections:
- Table Editor – visually manage your database schema
- Authentication – add users and permissions
- Storage – upload and manage files
- Edge Functions – run custom backend logic
For now, we’ll stay inside the Table Editor.
Step 2: Understanding the Table Editor
The Table Editor is where you design your data model. You don’t have to write SQL — though you can, if you want to — Supabase gives you a clean UI for defining everything visually.
Each table is like a spreadsheet, but with types, constraints, and relationships.
When you create a new table, you’ll define:
- Table name
- Columns (fields)
- Data types (text, integer, timestamp, etc.)
- Default values and constraints
- Relationships (foreign keys) Supabase automatically handles the SQL under the hood, and everything you build here instantly becomes accessible through a REST API and GraphQL.
Row Level Security (RLS) & Policies (Quick Primer)
When you create a table using the Table Editor, Row Level Security (RLS) is enabled by default. With RLS enabled and no policies, any request through the REST or GraphQL APIs (using the public anon key) returns no rows. Policies are Postgres rules that act like implicit WHERE clauses for each operation (SELECT, INSERT, UPDATE, DELETE). You’ll add policies later to selectively open access.
Role mapping:
anon: requests without a user JWT (public key only)authenticated: requests with a valid user JWT (including “anonymous sessions” created via Supabase Auth; those still assume theauthenticatedrole)
You can always inspect or change RLS via the table’s Policies tab (see the RLS guide for details). We’ll keep schema focus first, then add policies once structure exists.
Step 3: Create Your First Table
Let’s create a simple employees table — a common resource you might manage later in Refine.
- In the Table Editor, click New Table.
- Name it
employees. - Add the following columns:
| Column | Type | Default | Notes |
|---|---|---|---|
id | uuid | gen_random_uuid() | Primary key |
name | text | — | Employee name |
role | text | — | Job title or position |
salary | numeric(12,2) | — | Optional salary field (consider storing minor units as integer if you need strict money arithmetic) |
created_at | timestamptz | now() | Record creation time |
TIP
The “Enable Row Level Security” toggle is ON by default in the Table Editor. Leave it enabled—your table is protected until you add explicit policies.
Click Save. Your table is created instantly and available via REST (once policies allow it).
Step 4: Add a Related Table
Let’s make another table called departments so you can see how relationships work.
- Click New Table, name it
departments. - Add:
| Column | Type | Default |
|---|---|---|
id | uuid | gen_random_uuid() |
name | text | — |

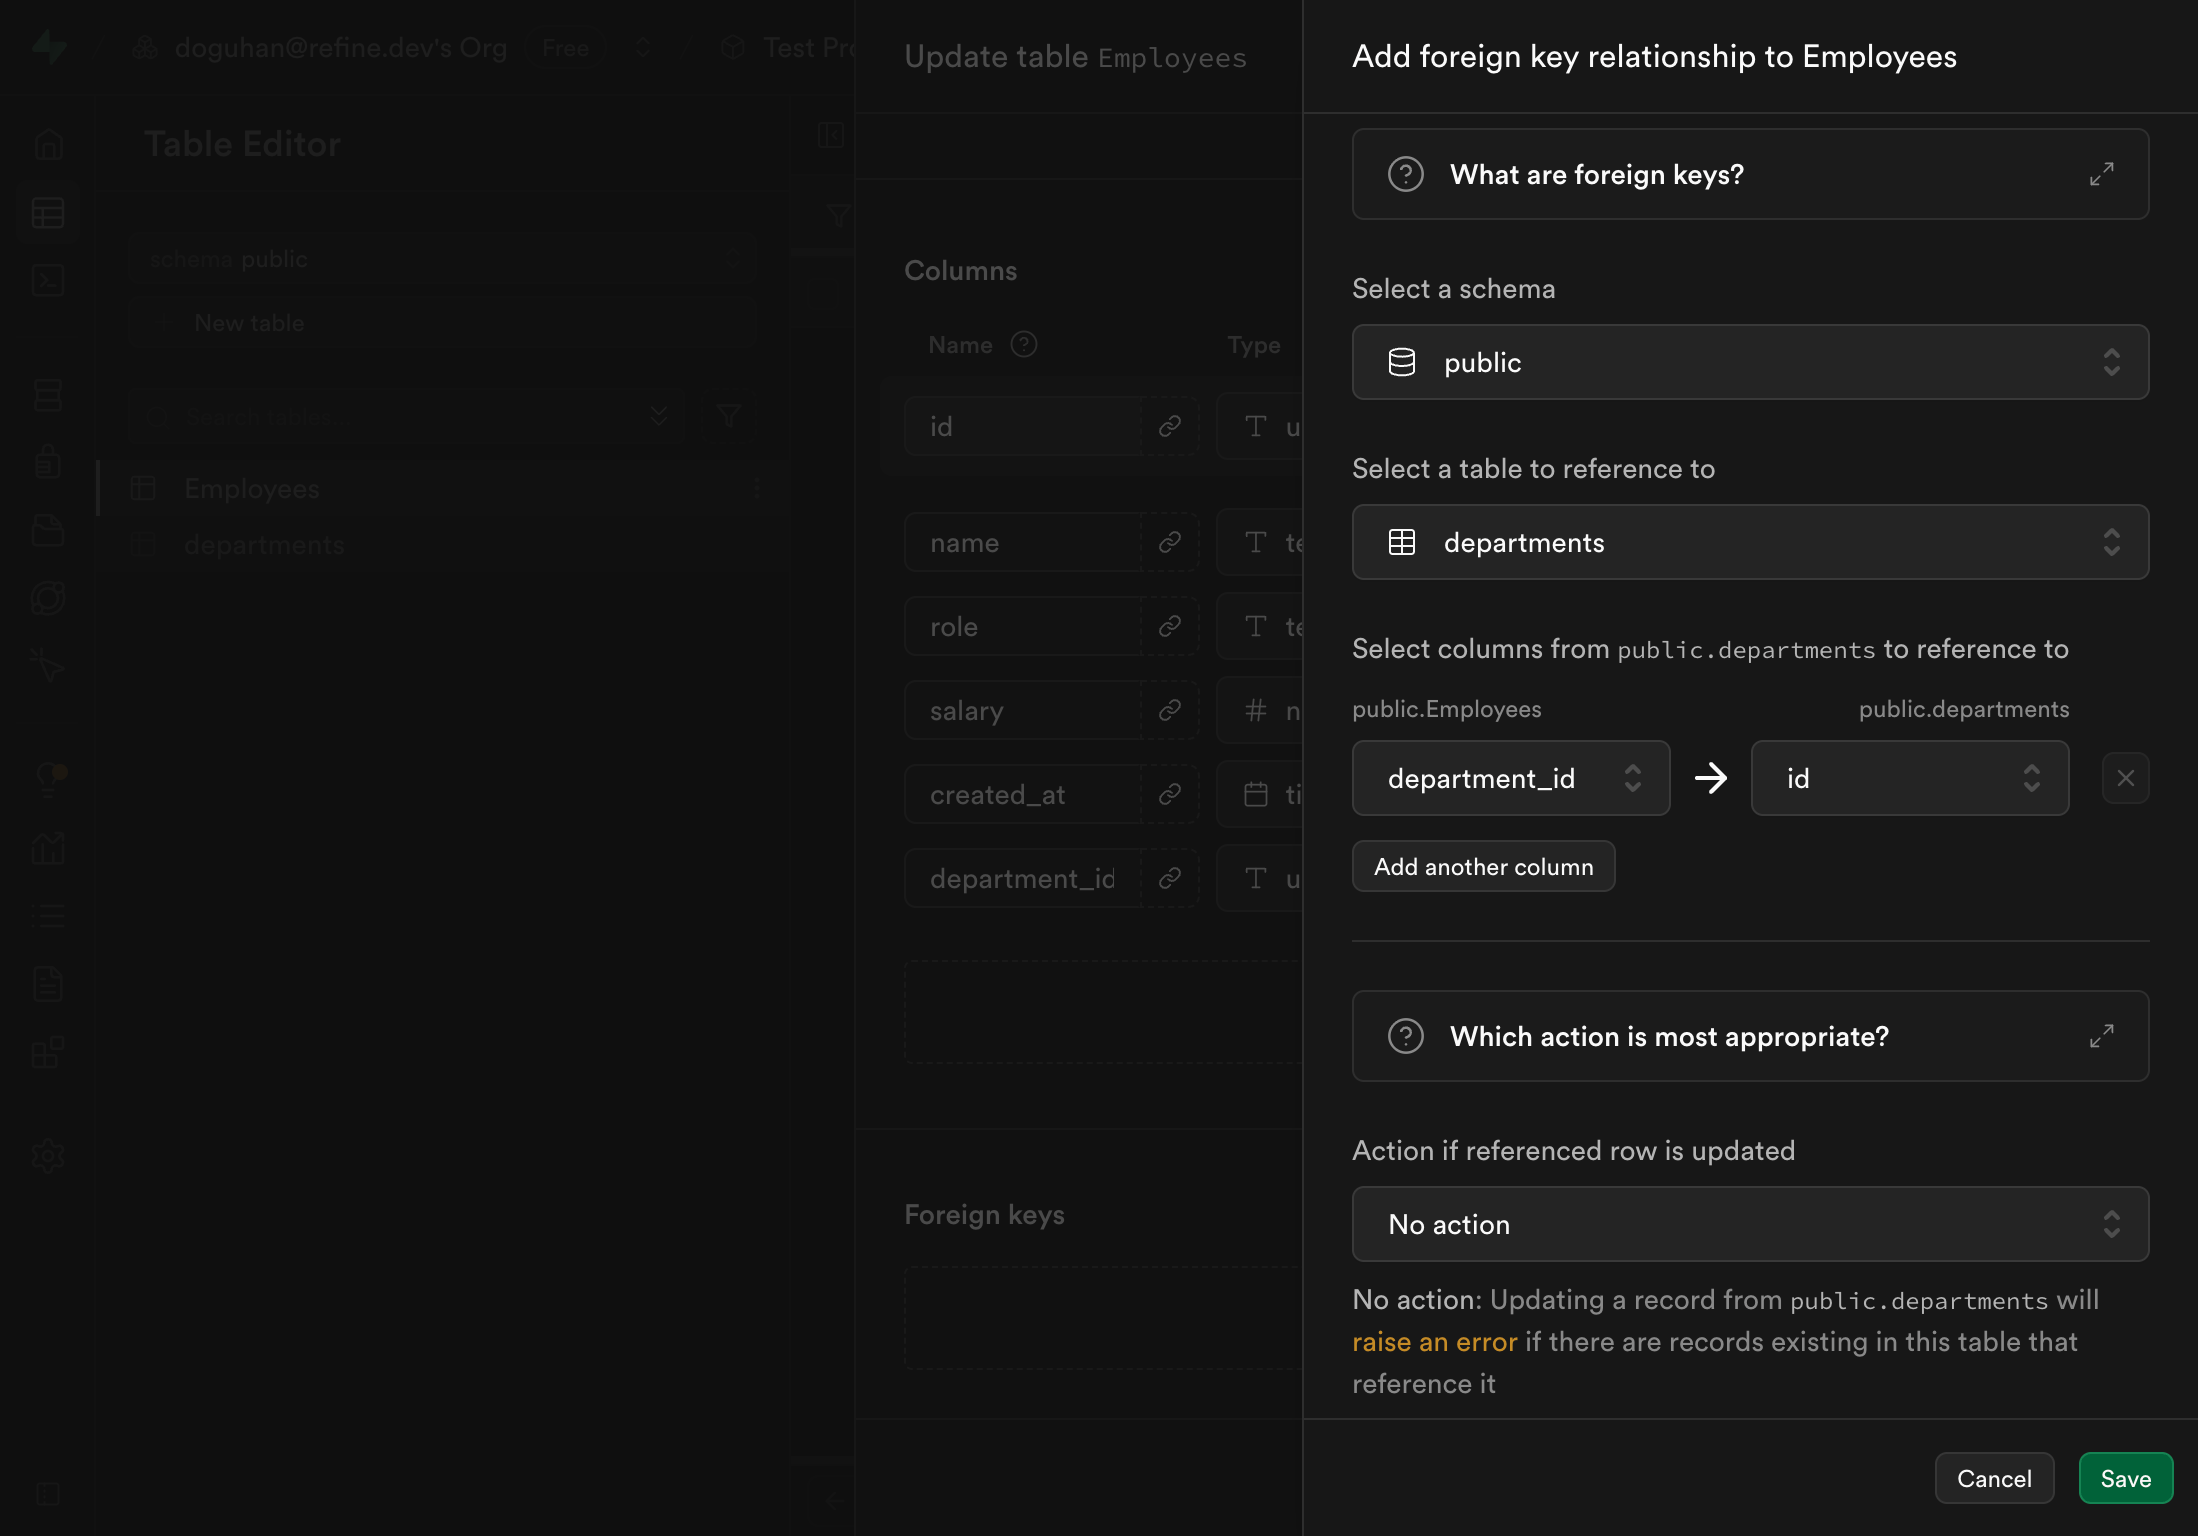
Now go back to your employees table and click Add Column → name it department_id.
Set its type to uuid, and under Foreign Key, select departments → id. For safer deletes, set the FK behavior to ON DELETE SET NULL.
Click Save again.
You’ve just created your first relational link — every employee belongs to a department. Supabase automatically handles referential integrity and updates your schema.
This structure is now ready for Refine to analyze later and generate fully functional list, create, and edit pages for you.
Step 5: Insert Sample Data
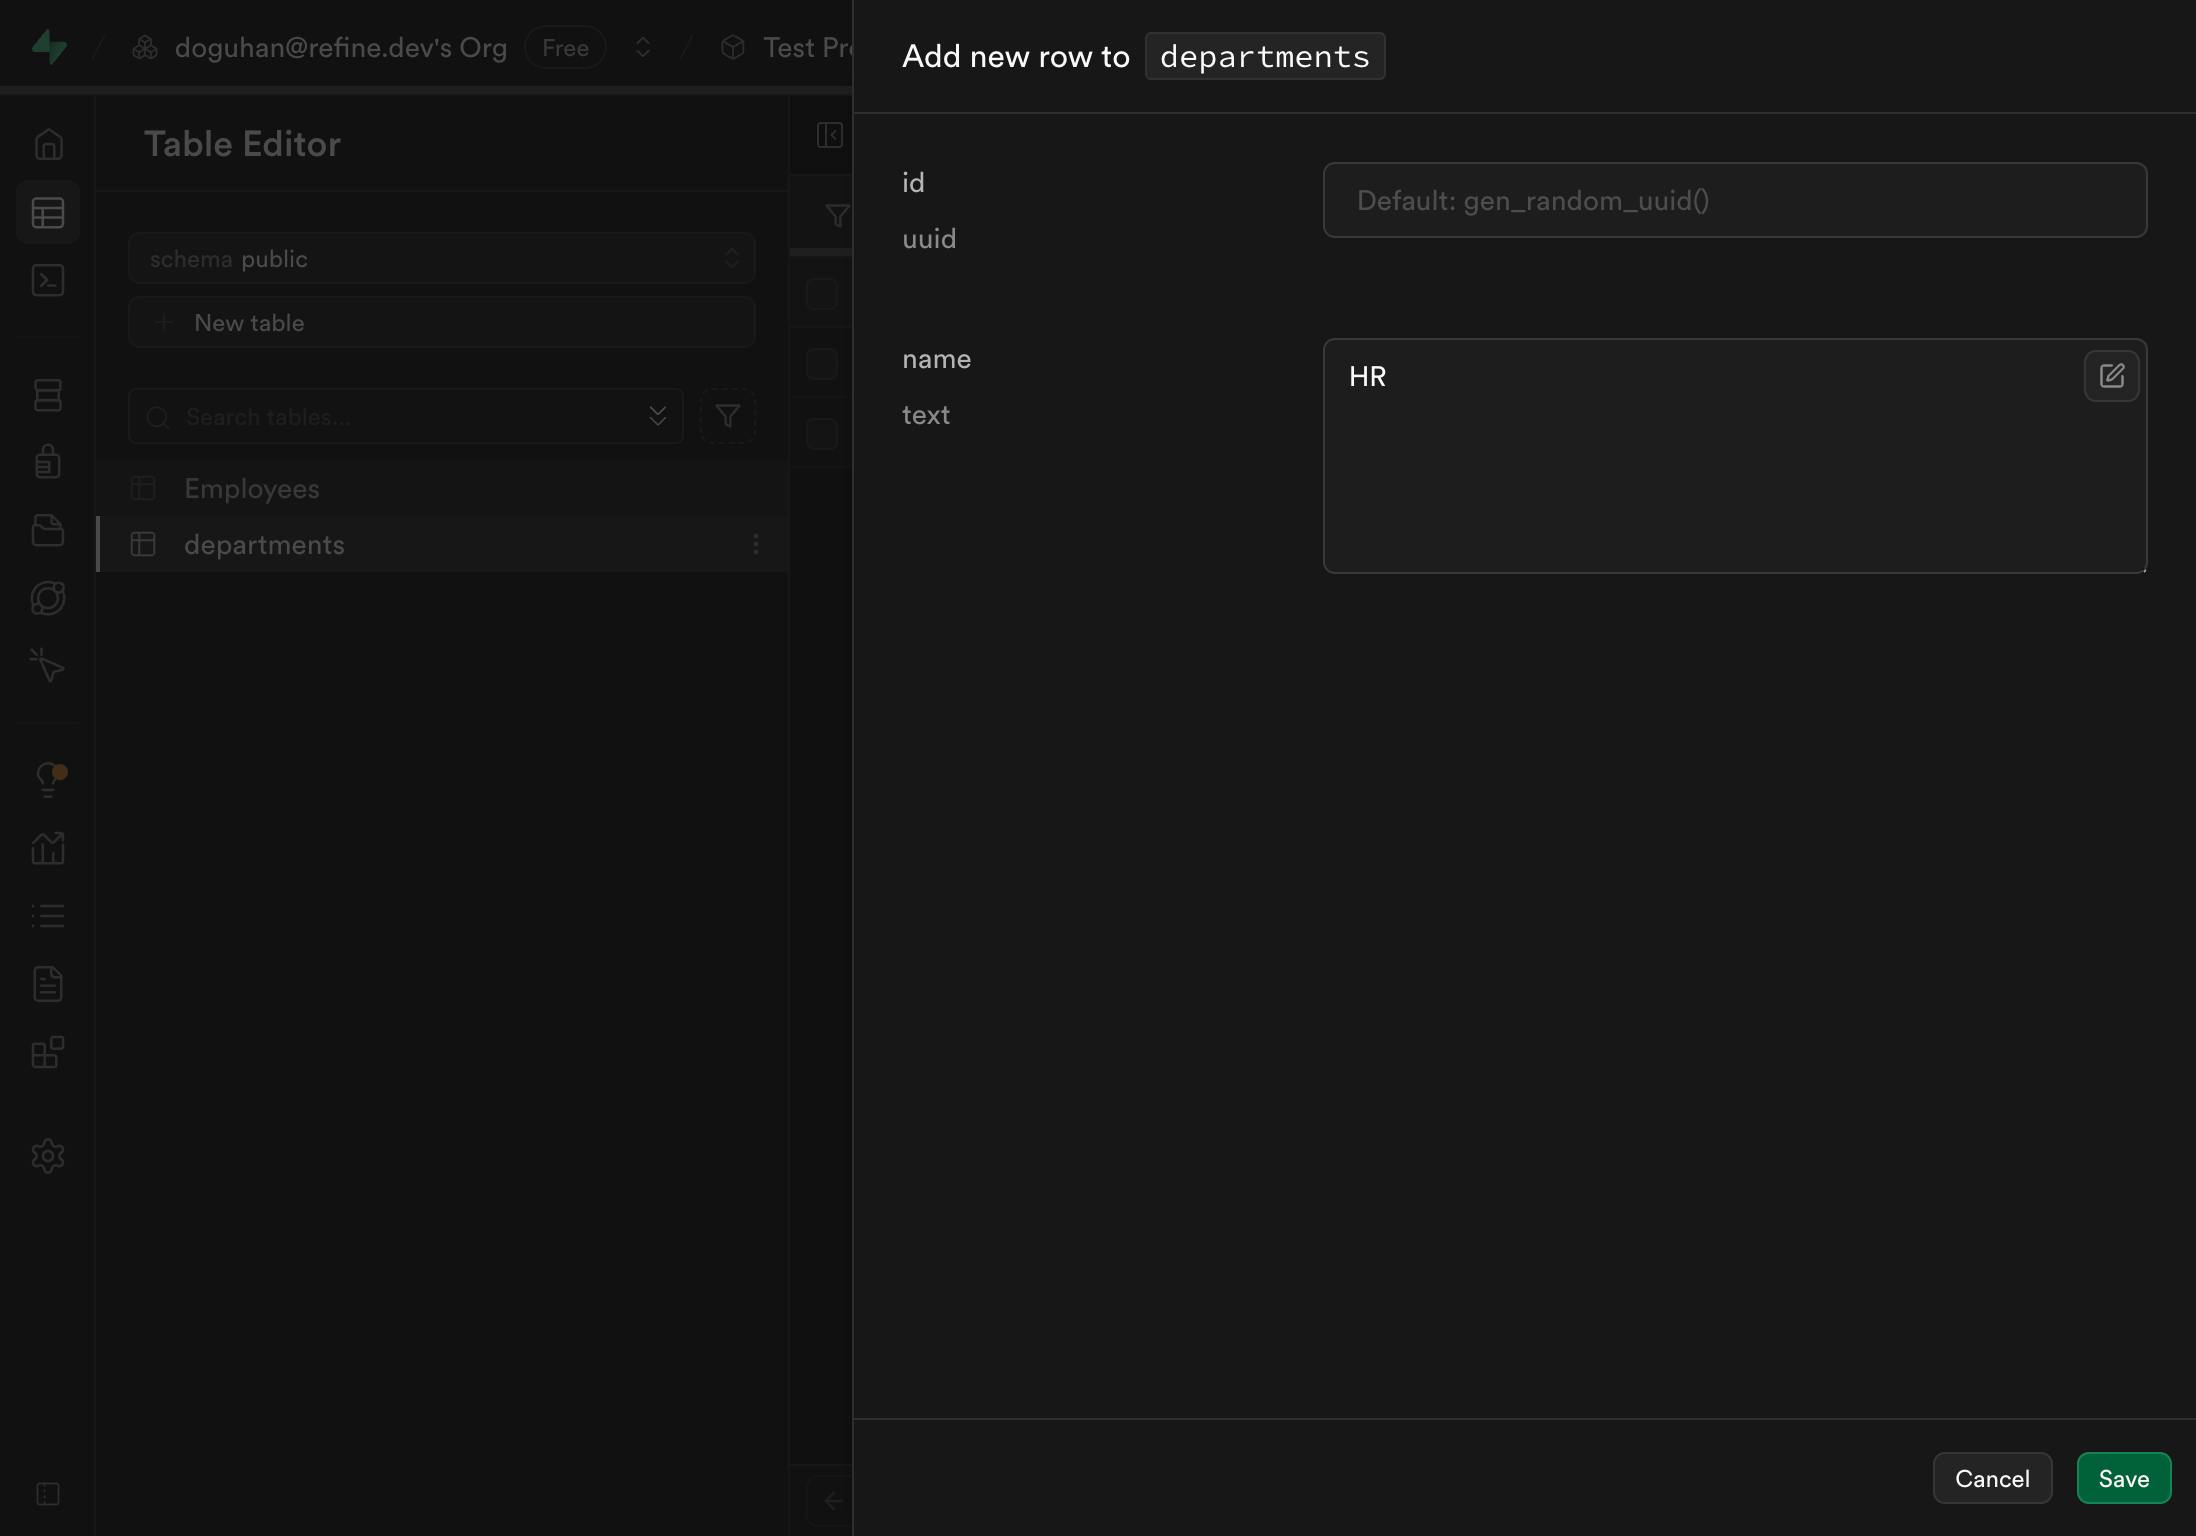
In the Table Editor, click on your departments table and choose Insert Row.
Add a few examples:
| id | name |
|---|---|
| (auto) | Engineering |
| (auto) | Marketing |
| (auto) | HR |
Then go to your employees table and insert:
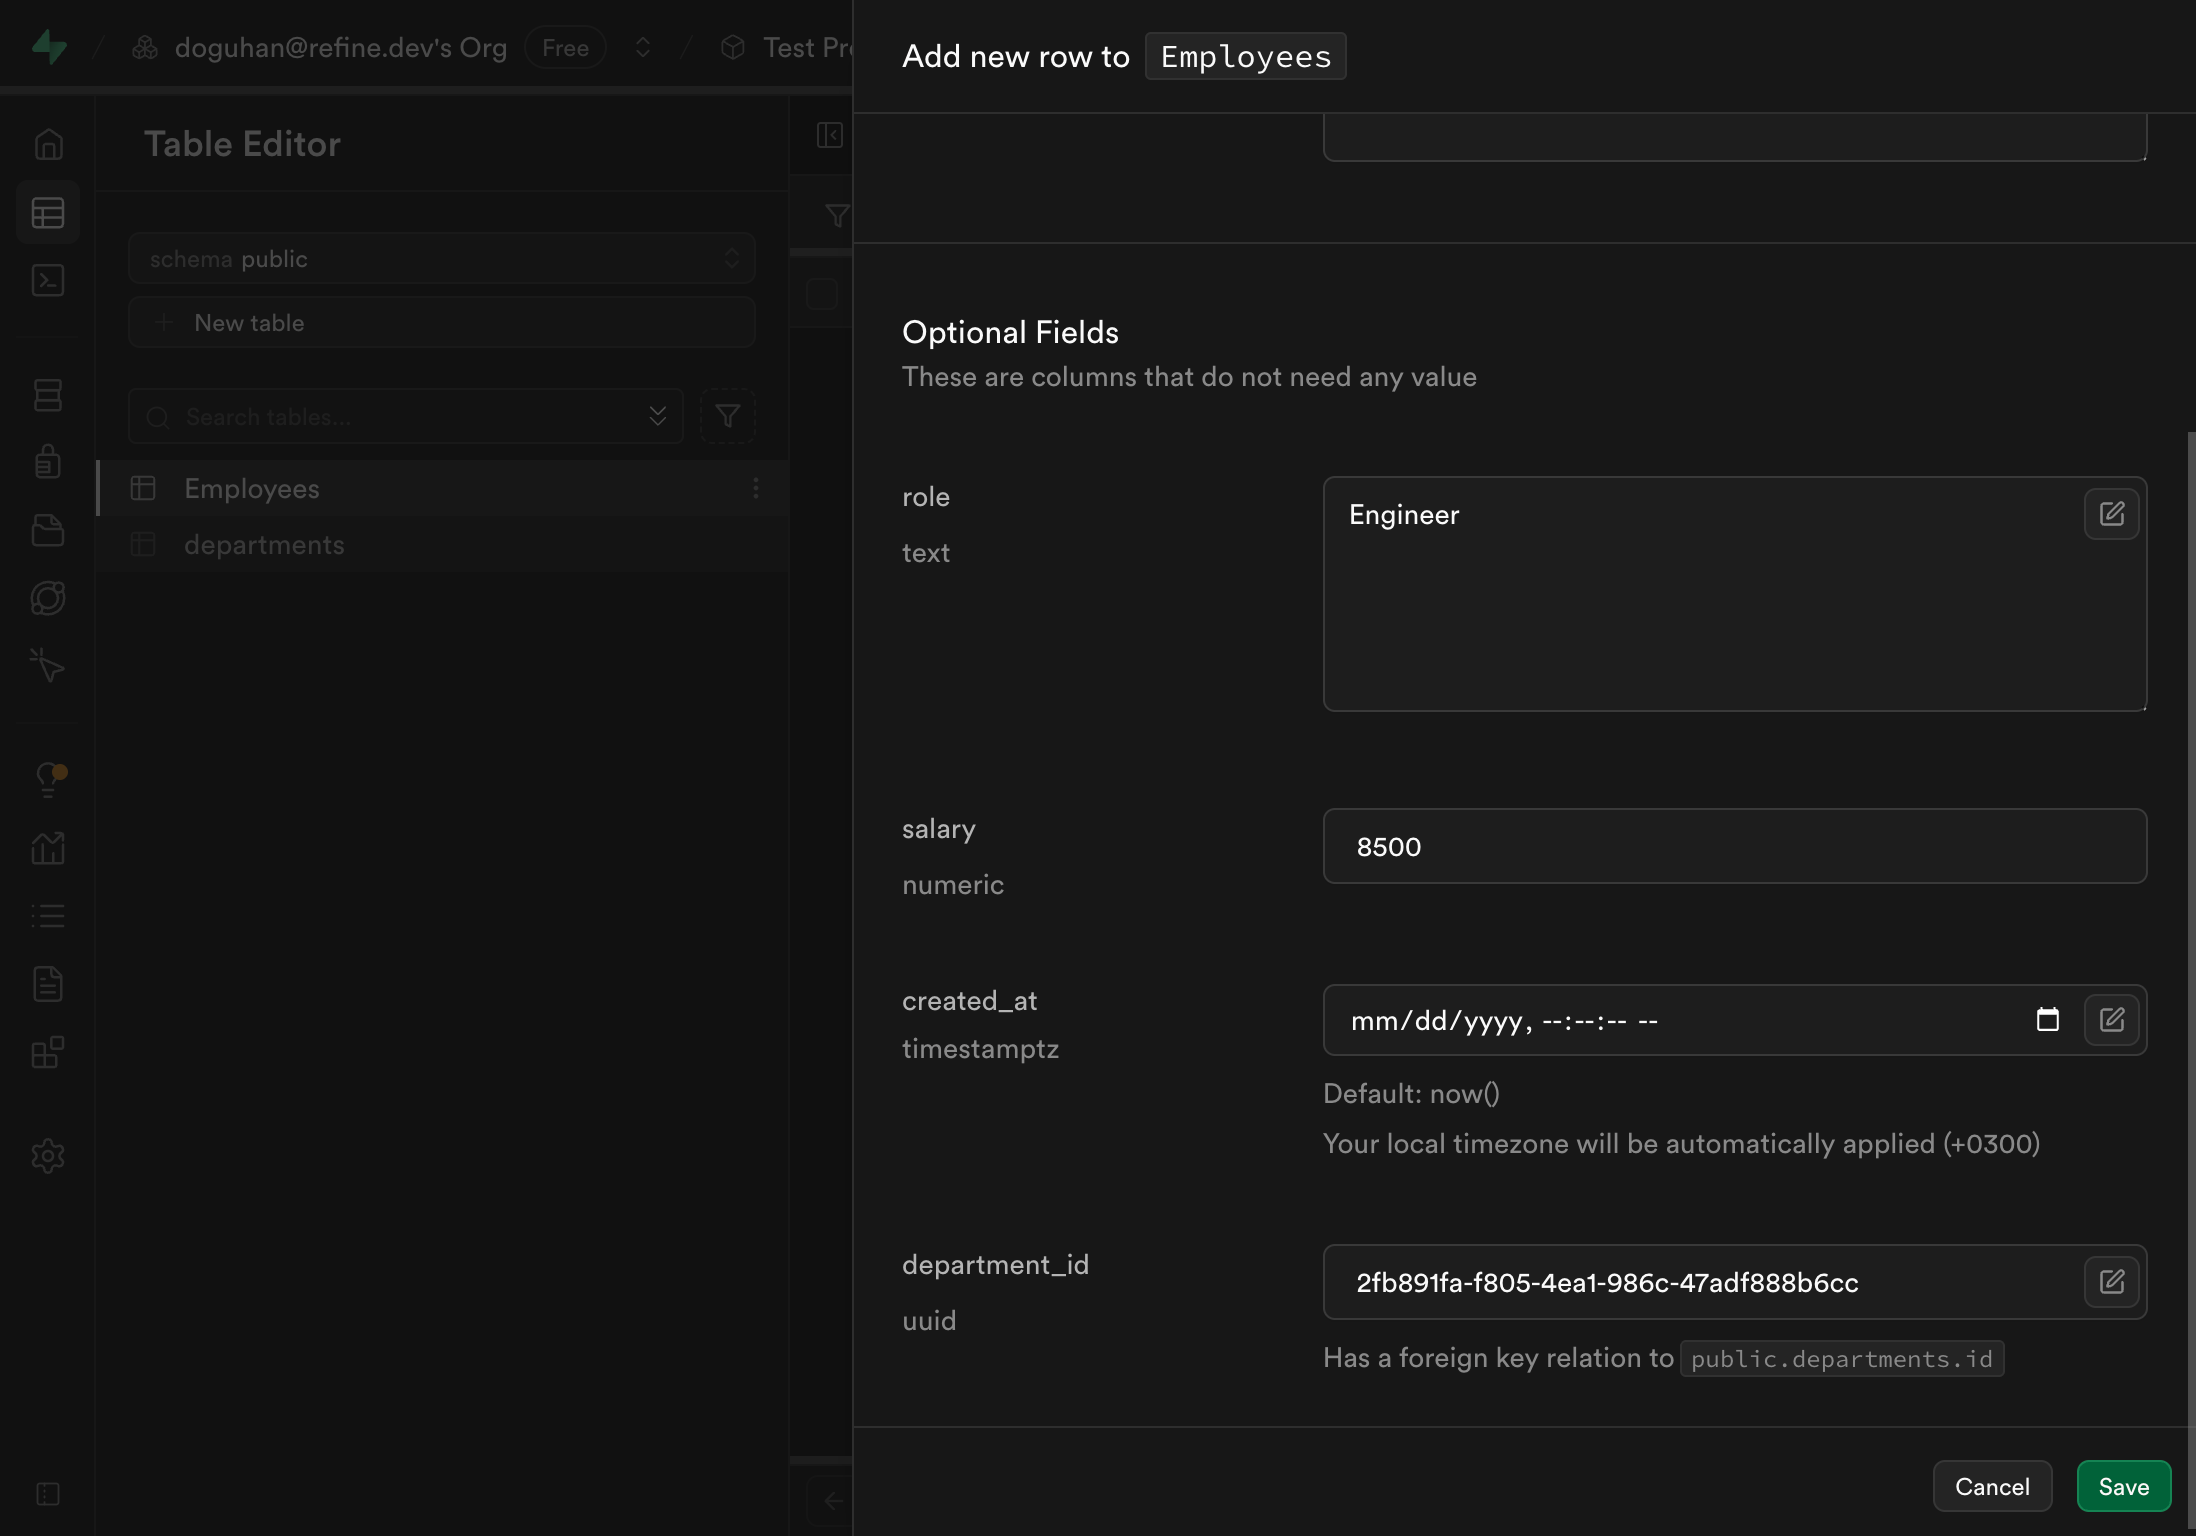
| id | name | role | salary | department_id |
|---|---|---|---|---|
| (auto) | Alice | Engineer | 85000 | (Engineering id) |
| (auto) | Bob | HR Specialist | 60000 | (HR id) |
Your data is now live. You can view, edit, and filter it right in the dashboard — or query it using SQL in the SQL Editor tab.
Step 6: Explore the SQL Editor
Even though the Table Editor is visual, Supabase lets you use full PostgreSQL SQL if you prefer. Click the SQL Editor tab in the sidebar.
Here you can:
- Run queries like
SELECT * FROM employees; - Create views, triggers, and functions
- Save and version your SQL scripts
For example, once you’ve inserted departments and linked employees with a real department_id, try:
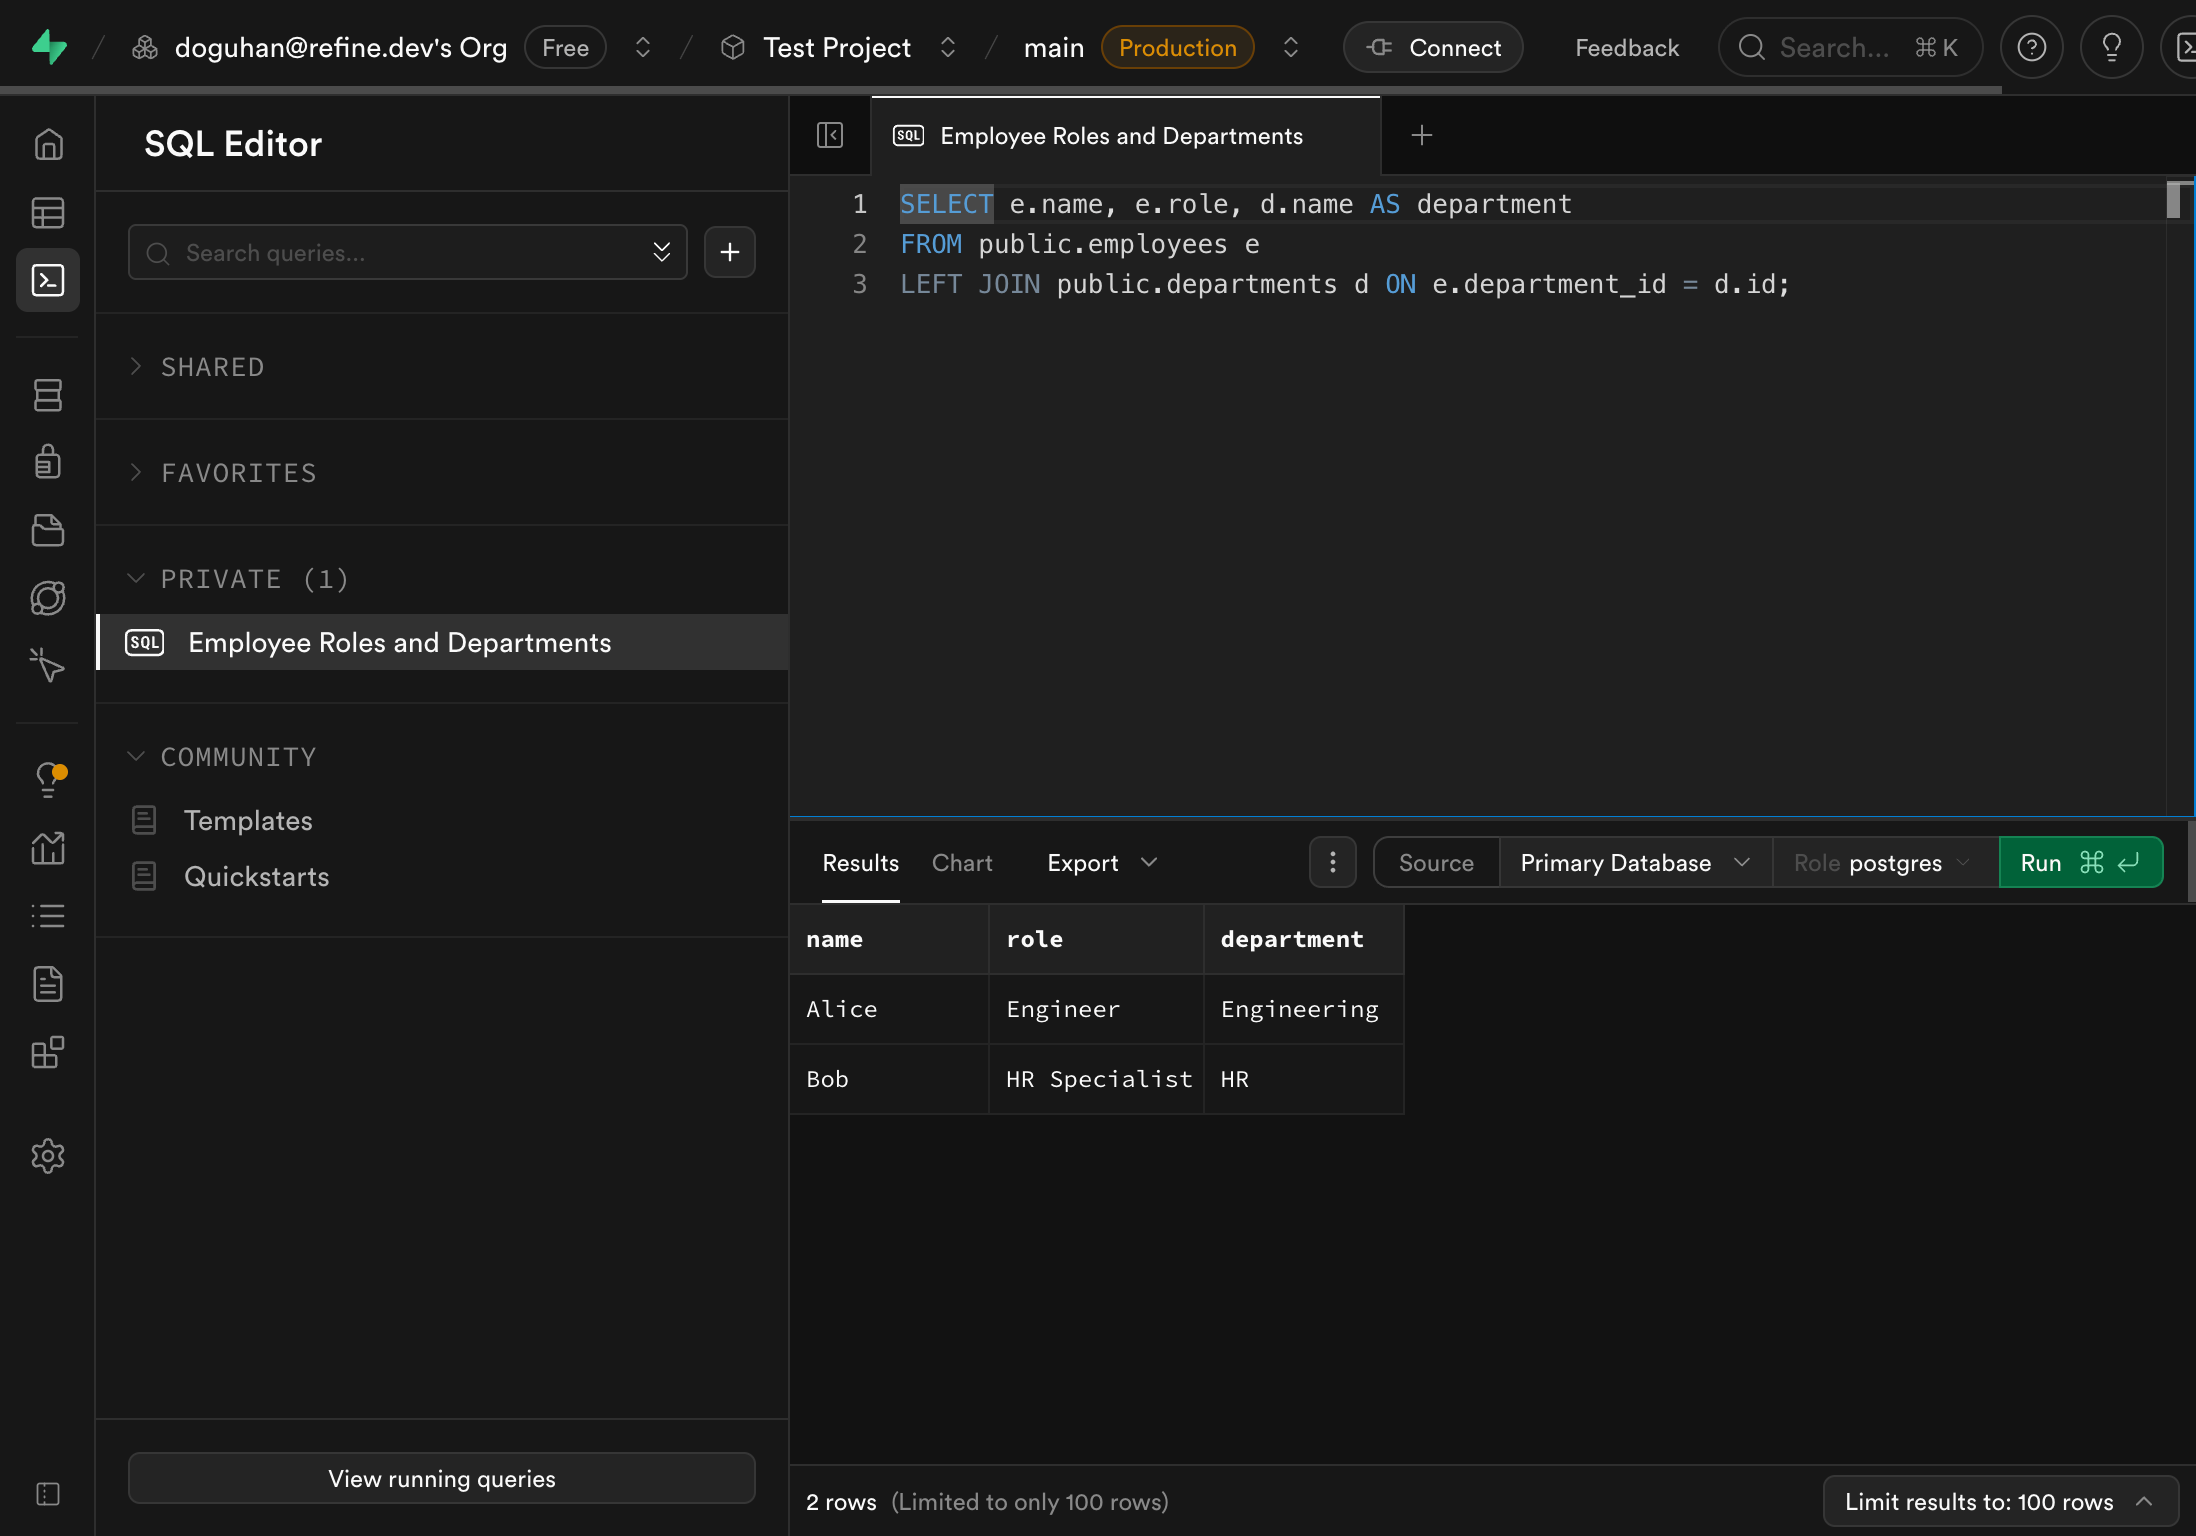
SELECT e.name, e.role, d.name AS department
FROM public.employees e
LEFT JOIN public.departments d ON e.department_id = d.id;
Relation not found (42P01)
If you see ERROR: 42P01: relation "public.employees" does not exist:
- Ensure you clicked Save when creating the table.
- Confirm the schema is
public(default) and the table name is lowercaseemployees. - Refresh the browser tab—occasionally the SQL Editor metadata lags.
- Verify you’re in the same project where the table was created. :::
LEFT JOIN will keep employees visible even when department_id isn’t set yet. To see department names, edit the employee and paste the UUID of the
correct department into department_id.
:::
This flexibility means you can build relational structures that Refine (or any frontend) can use directly.
Step 7: Enable APIs and Policies
Every table you create in an exposed schema automatically has a REST endpoint, e.g.:
https://<project-ref>.supabase.co/rest/v1/employees
View API examples and keys under Project Settings → API Docs (see the API overview).
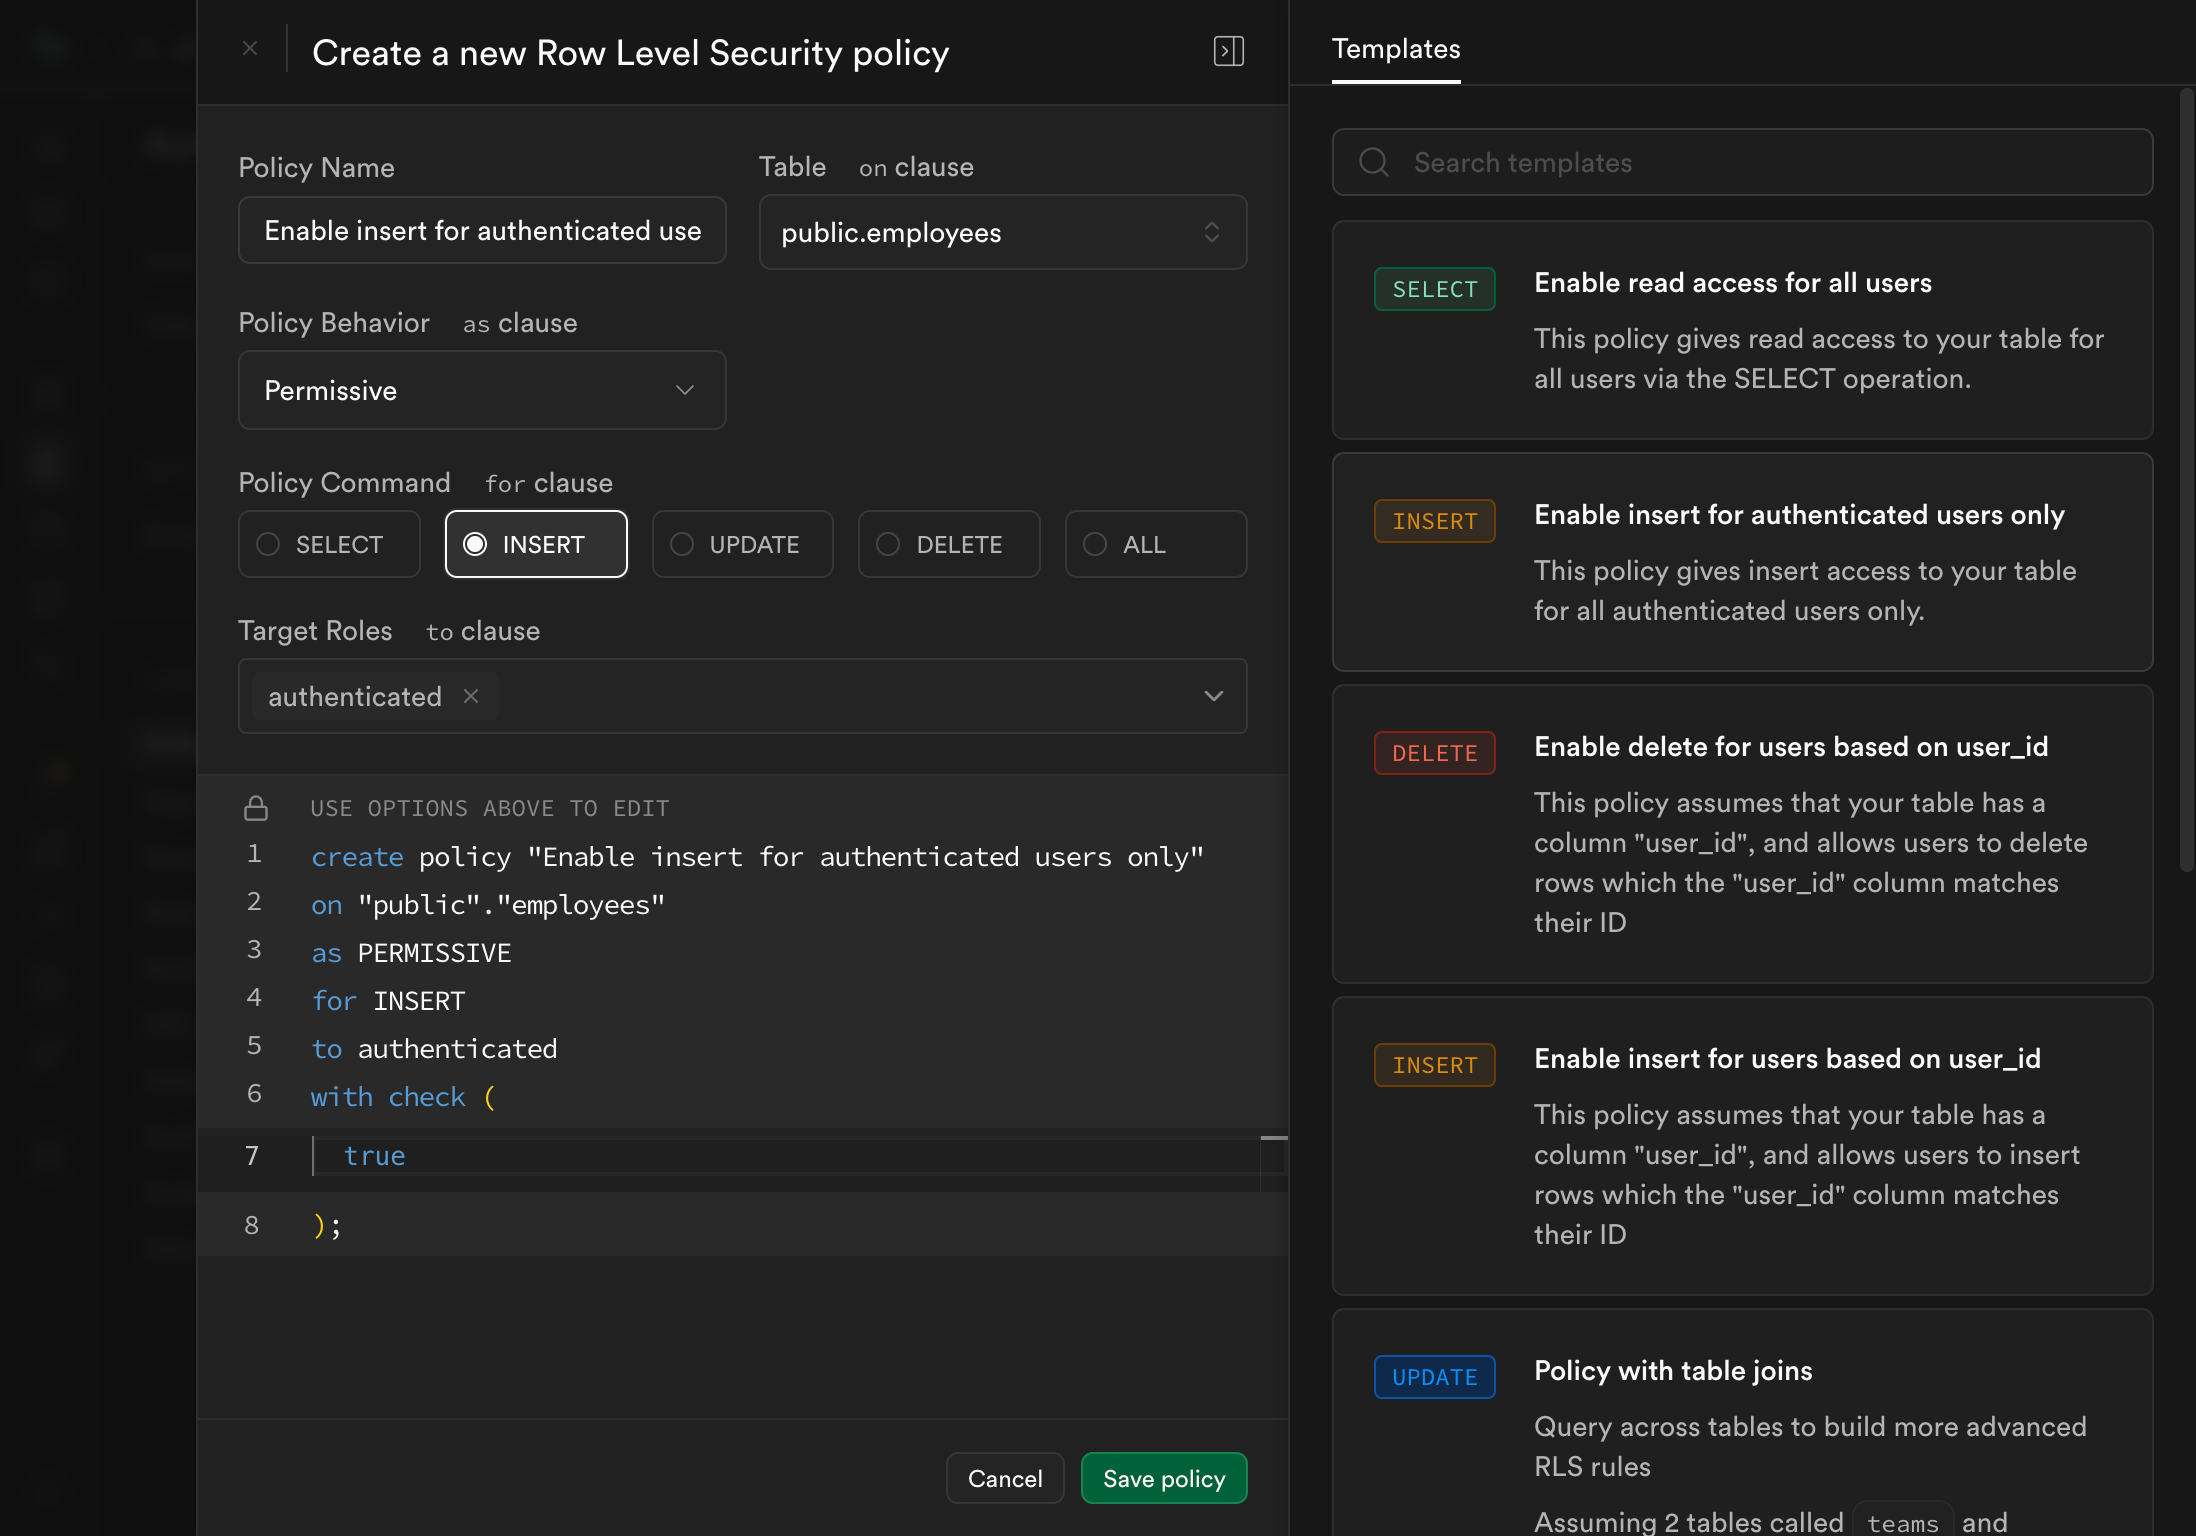
Because RLS is enabled, you must add policies before data is visible. Using the Policies tab in a table:
- Open
employees→ Policies → New Policy. - Choose operation: SELECT.
- Template: “Allow authenticated users” (or create custom).
- Save. The UI shows the SQL for reference.
Resulting read policy:
create policy "Authenticated can read employees"
on public.employees
for select
to authenticated
using (true);
Insert policy (allow authenticated users to add rows):
create policy "Enable insert for authenticated users only"
on public.employees
for insert
to authenticated
with check (true);
Optional (dev only) broader read access:
create policy "Dev read employees (anon + authenticated)"
on public.employees
for select
to anon, authenticated
using (true);
Remove permissive policies before production.
Role nuance:
- Requests without a JWT use the
anonrole. - Authenticated user sessions (including Supabase’s anonymous auth sessions) map to
authenticated. auth.uid()isNULLfor unauthenticated requests—combine with checks likeauth.uid() IS NOT NULLfor clarity.
REST example (after policies):
curl -H "apikey: $SUPABASE_ANON_KEY" \
         -H "Authorization: Bearer $USER_JWT" \
         "https://<project-ref>.supabase.co/rest/v1/employees?select=*"
You can layer more granular policies later (row ownership, role-based filters, etc.).
Why This Matters
The old way of setting up databases meant provisioning servers, installing PostgreSQL, managing connections, and writing migration scripts. Supabase makes the setup much simpler.
Within minutes, you can have:
- A structured PostgreSQL database
- Relationships and constraints
- Realtime APIs
- Secure authentication
Supabase also works well with Refine — once your schema is ready, Refine can generate an admin UI around it: tables, forms, relationships, and filters.
What to do after
The quickest win now is to connect your Supabase database to Refine and generate working internal tools (admin panel, CRUD, filters, relations) from your schema in minutes. See the walkthrough:
- Build internal tools from your Supabase schema → https://refine.dev/blog/supabase-refine-ai/
Helpful Links
- Supabase Docs – explore all features
- Supabase SQL Editor – learn to write queries
- Supabase Auth – configure access and security policies
- Local Development & CLI – run Supabase locally with migrations
- Row Level Security – how to enable and write policies
- Refine + Supabase Guide – connect your schema to Refine
- Supabase Discord – join the community
