
<Refine>
<Refine> component is the entry point of a refine app. It is where the highest level of configuration of the app occurs.
dataProvider and routerProvider are required to bootstrap the app. After adding them, resources can be added as property.
import { Refine } from "@pankod/refine-core";
import dataProvider from "@pankod/refine-simple-rest";

import { PostList } from "pages/posts";

const API_URL = "https://api.fake-rest.refine.dev";

const App: React.FC = () => {
  return (
    <Refine
      dataProvider={dataProvider(API_URL)}
      resources={[
        {
          name: "posts",
          list: PostList,
        },
      ]}
    />
  );
};

export default App;
dataProvider
A dataProvider is the place where a refine app communicates with an API.
Data providers also act as adapters for refine, making it possible for it to consume different API's and data services.
A dataProvider makes HTTP requests and returns response data back using predefined methods.
Refer to the Data Provider documentation for detailed information. →
To activate multiple data provider in refine, we have to pass the default key with dataProvider for the default data provider and we can pass other data providers with any key to the <Refine /> component.
import { Refine } from "@pankod/refine-core";

import defaultDataProvider from "./dataProvider";
import exampleDataProvider from "./dataProvider";

const App: React.FC = () => {
  return (
    <Refine
      dataProvider={{
        default: defaultDataProvider,
        example: exampleDataProvider,
      }}
    />
  );
};
routerProvider
refine needs some router functions to create resource pages, handle navigation, etc. This provider allows you to use the router library you want.
Refer to the Router Provider documentation for detailed information. →
resources
resources is the main building block of a refine app. A resource represents an entity in an endpoint in the API (e.g. https://api.fake-rest.refine.dev/posts). It serves as a bridge between the data from the API and the pages in the app, allowing pages to interact with the data from the API.
Here's an app that consumes the https://api.fake-rest.refine.dev/posts endpoint as a resource to list multiple items, edit or create an item and show a single item.
Page components that are for interacting with the CRUD API operations are passed as a resource element to resources.
import { Refine } from "@pankod/refine-core";
import dataProvider from "@pankod/refine-json-server";

import { PostList, PostCreate, PostEdit, PostShow } from "pages/posts";

const API_URL = "https://api.fake-rest.refine.dev";

const App: React.FC = () => {
  return (
    <Refine
      dataProvider={dataProvider(API_URL)}
      resources={[
        {
          name: "posts",
          list: PostList,
          create: PostCreate,
          edit: PostEdit,
          show: PostShow,
        },
      ]}
    />
  );
};

export default App;
These components will receive some properties.
type OptionsProps<TExtends = { [key: string]: any }> = TExtends & {
    label?: string;
    route?: string;
    dataProviderName?: string;
    hide?: boolean;
}

interface IResourceComponentsProps<TCrudData = any, TOptionsPropsExtends = { [key: string]: any }> {
    canCreate?: boolean;
    canEdit?: boolean;
    canDelete?: boolean;
    canShow?: boolean;
    name?: string;
    initialData?: TCrudData;
    options?: OptionsProps<TOptionsPropsExtends>;
}

const PostList: React.FC<IResourceComponentsProps> = (props) => {
    ...
}
The values of canCreate, canEdit, and canShow are determined by whether the associated component is passed as an element to resources or not.
name and canDelete are the values passed to the resources.
This props can be get by using the useResource hook.
name
A string value that identifies a resource in the API. Interacting with the data in a resource will be done using an endpoint determined by the name:
https://api.fake-rest.refine.dev/posts
https://api.fake-rest.refine.dev/posts/1
name also determines the routes of the pages of a resource:
- List page ->
/posts - Create page ->
/posts/create - Edit page ->
/posts/edit/:id - Show page ->
/posts/show/:id - Clone page ->
/posts/clone/:id
list
The component passed to the list prop will be rendered on the /posts route.
create
The component passed to create will be rendered on the /posts/create route by default.
It will also be rendered on
/posts/clone/:id. This represents namely a clone page.idrepresent a record and it will be available as a route parameter.
For exampleuseFormuses this parameter to create a clone form
clonefromuseNavigationcan be used to navigate to a clone page.
edit
The component passed to edit will be rendered on the /posts/edit/:id route.
show
The component passed to show will be rendered on the /posts/show/:id route.
canDelete
This value will be passed to all CRUD pages defined as the resources element.
refine's <Edit> component uses canDelete value to whether show delete button in the edit form or not.
icon
An icon element can be passed as properties for the icon in the menu.
<Refine
    ...
    resources={[
        {
            ...
            icon: <CustomIcon />
        },
    ]}
/>
options
Menu item name and route on clicking can be customized.
<Refine
    ...
    resources={[
        {
            ...
            options: { label: "custom", route: "/custom" }
        },
    ]}
/>
label
Name to show in the menu. The plural form of the resource name is shown by default.
route
Custom route name
dataProviderName
Default data provider name to use for the resource. If not specified, the default data provider will be used.
hide
Can be used to hide a resource in Sider. This resource is also filtered in the useMenu hook.
You can also pass any type of property into the options object. This property you pass can be received from the useResource and useResourceWithRoute hooks as well as the components rendered in the list, create, edit and show pages.
type DataType = {
    id: number;
    title: string;
};

type OptionType = {
    yourCustomOption: string;
};

const PostList: React.FC<IResourceComponentsProps<DataType, OptionType>> = (props) => {
    ...
}
authProvider
authProvider handles authentication logic like login, logout flow, and checking user credentials. It is an object with methods that refine uses when necessary.
Refer to the Auth Provider documentation for detailed information. →
i18nProvider
The i18nProvider property lets you add i18n support to your app. Making you able to use any i18n framework.
Refer to i18n documentation for detailed information. →
accessControlProvider
accessControlProvider is the entry point for implementing access control for refine apps.
Refer to access control documentation for detailed information. →
liveProvider
refine lets you add Realtime support to your app via liveProvider. It can be used to update and show data in Realtime throughout your app.
Refer to live provider documentation for detailed information. →
notificationProvider
notificationProvider handles notification logic. It is an object with methods that refine uses when necessary.
Refer to the Notification Provider documentation for detailed information. →
options
options is used to configure the app.
breadcrumb
Customize or disable the breadcrumb. By default it uses the Breadcrumb component from respective package.
The value set in individual CRUD components (ANTD, Mantine, Material UI) will override the value set with breadcrumb.
Refer to the Breadcrumb docs for further information. →
import { Breadcrumb } from "@pankod/refine-antd";
OR
import { Breadcrumb } from "@pankod/refine-mantine";
OR
import { Breadcrumb } from "@pankod/refine-mui";
OR
import { Breadcrumb } from "my-custom-breadcrumb";

const App: React.FC = () => {
    return (
        <Refine
            ...
            options={{
                breadcrumb: (
                    <div
                        style={{
                            padding: "3px 6px",
                            border: "2px dashed cornflowerblue",
                        }}
                    >
                        <Breadcrumb />
                    </div>
                ),
            }}
        />
    );
};
To disable the breadcrumb
const App: React.FC = () => {
    return (
        <Refine
            ...
            options={{
                breadcrumb: false,
            }}
        />
    );
};
mutationMode
mutationMode determines which mode the mutations run with. (e.g. useUpdate, useDelete).
const App: React.FC = () => {
    return (
        <Refine
            ...
            options={{ mutationMode: "optimistic" }}
        />
    );
};
pessimistic: The mutation runs immediately. Redirection and UI updates are executed after the mutation returns successfully. This is the default setting.
optimistic: The mutation is applied locally, and redirection and UI updates are executed immediately as if the mutation is successful. If the mutation returns with an error, UI updates accordingly.
undoable: The mutation is applied locally, and redirection and UI updates are executed immediately as if the mutation is successful. Waits for a customizable amount of timeout before mutation is applied. During the timeout, mutation can be canceled from the notification with the ?undo? button. UI will revert accordingly.
undoableTimeout
The duration of the timeout period in undoable mode is shown in milliseconds. Mutations can be canceled during this period. This period can also be set on the supported data hooks.
The value set in hooks will override the value set with undoableTimeout.
undoableTimeout has a default value of 5000.
const App: React.FC = () => {
    return (
        <Refine
            ...
            options={{ mutationMode: "undoable", undoableTimeout: 3500 }}
        />
    );
};
syncWithLocation
List query parameter values can be edited manually by typing directly in the URL. To activate this feature syncWithLocation needs to be set to true.
When syncWithLocation is active, the URL on the listing page shows query parameters like those shown below:
/posts?current=1&pageSize=8&sort[]=createdAt&order[]=desc
Users can change the current page, items count per page, and sort and filter parameters.
The default value is false.
warnWhenUnsavedChanges
When you have unsaved changes and try to leave the current page, refine shows a confirmation modal box.
To activate this feature, set the warnWhenUnsavedChanges to true.
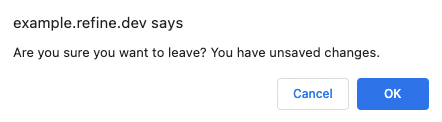
The default value is false.
liveMode
Whether to update data automatically (auto) or not (manual) if a related live event is received. The off value is used to avoid creating a subscription.
Refer to live provider documentation for detailed information. →
disableTelemetry
refine implements a simple and transparent telemetry module for collecting usage statistics defined in a very limited scope. This telemetry module is used to improve the refine experience. You can disable this by setting disableTelemetry to true.
Refer to refine telemetry documentation for detailed information. →
redirect
By default, refine redirects to the list page of the resource after a successful form mutation. To change this behaviour based on the form action, set redirect as follows:
const App: React.FC = () => {
    return (
        <Refine
            ...
            options={{
                redirect: {
                    afterCreate: "show",
                    afterClone: "edit",
                    afterEdit: false,
                },
            }}
        />
    );
};
When the redirect option is set to false, no redirect is performed after a successful form mutation.
If you don't have a show page and you redirect to the show page, the user will be redirected to the list page. Also, in the undoable and optimistic mutation modes, redirect happens before the mutation succeeds. Therefore, if there is no data in the query cache, the user will be redirected to the list page.
reactQuery
clientConfig
Config for React Query client that refine uses.
refine uses some defaults that apply to all queries:
{
    refetchOnWindowFocus: false,
    keepPreviousData: true,
}
Refer to the QueryClient documentation for detailed information. →
const App: React.FC = () => (
    <Refine
        ...
        options={{
            reactQuery: {
                clientConfig: {
                    defaultOptions: {
                        queries: {
                            staleTime: Infinity,
                        },
                    },
                },
            },
        }}
    />
);
Also, you can implement your own QueryClient.
import { QueryClient } from "@tanstack/react-query";

const queryClient = new QueryClient();

const App: React.FC = () => (
    <Refine
        ...
        options={{
            reactQuery: {
                clientConfig: queryClient
            },
        }}
    />
);
devtoolConfig
Config for customizing React Query Devtools. If you want to disable the Devtools, set devtoolConfig to false.
refine uses some defaults that apply to react-query devtool:
{
    initialIsOpen: false,
    position: "bottom-right"
}
Refer to the Devtools documentation for detailed information. →
const App: React.FC = () => (
    <Refine
        ...
        // highlight-start
        options={{
            reactQuery: {
                devtoolConfig: {
                    initialIsOpen: true,
                    position: "bottom-left",
                },
            },
        }}
        // highlight-end
    />
);
onLiveEvent
Callback to handle all live events.
Refer to live provider documentation for detailed information. →
catchAll
When the app is navigated to a non-existent route, refine shows a default error page. A custom error component can be used for this error page by passing the customized component to the catchAll property:
const CustomErrorPage = <div>Page not found</div>;

const App: React.FC = () => {
    return (
        <Refine
            ...
            catchAll={CustomErrorPage}
        />
    );
};
LoginPage
refine has a default login page form which is served on the /login route when the authProvider configuration is provided.
Custom login component can be passed to the LoginPage property.
const CustomLoginPage = () => <div> Custom Login Page </div>;

const App: React.FC = () => (
    <Refine
        ...
        LoginPage={CustomLoginPage}
    />
);
DashboardPage
A custom dashboard page can be passed to the DashboardPage prop which is accessible on the root route.
The dashboard item will appear at the top of the sider menu. If DashboardPage is not given, the first resource of resources will be shown.
const CustomDashboardPage = () => <div> Custom Dashboard Page </div>;

const App: React.FC = () => (
    <Refine
        ...
        DashboardPage={CustomDashboardPage}
    />
);
ReadyPage
refine shows a default ready page on the root route when no resources is passed to the <Refine>.
Custom ready page component can be set by passing to the ReadyPage property?.
const CustomReadyPage = () => <div> Custom Ready Page </div>;

const App: React.FC = () => (
    <Refine
        ...
        ReadyPage={CustomReadyPage}
    />
);
Sider
The default sidebar can be customized by using refine hooks and passing custom components to the Sider property.
refine uses Ant Design Sider component by default.
Refer to the useMenu hook documentation for detailed sidebar customization. →
Footer
The default app footer can be customized by passing the Footer property.
const CustomFooter = () => <div>Custom Footer</div>;

const App: React.FC = () => (
    <Refine
        ...
        Footer={CustomFooter}
    />
);
Header
The default app header can be customized by passing the Header property.
const CustomHeader = () => <div>Custom Header</div>;

const App: React.FC = () => (
    <Refine
        ...
        Header={CustomHeader}
    />
);
Layout
The default layout can be customized by passing the Layout property.
refine uses Ant Design Layout components by default.
Layout property will receive individual layout components as property.
const App: React.FC = () => (
    <Refine
        ...
        Layout={({ children, Sider, Footer, Header, OffLayoutArea }) => (
            <AntdLayout style={{ minHeight: "100vh", flexDirection: "row" }}>
                {Sider && <Sider />}
                <AntdLayout>
                    {Header && <Header />}
                    <AntdLayout.Content>
                        <div style={{ padding: 24, minHeight: 360 }}>
                            {children}
                        </div>
                    </AntdLayout.Content>
                    {Footer && <Footer />}
                </AntdLayout>
                {OffLayoutArea && <OffLayoutArea />}
            </AntdLayout>
        )}
    />
);
A completely custom layout can also be implemented instead of the refine's default Ant Design based layout like below.
const App: React.FC = () => (
    <Refine
        ...
        Layout={({ children }) => (
            <div style={{ display: "flex", flexDirection: "column" }}>
                <div>Custom Layout</div>
                <div>{children}</div>
            </div>
        )}
    />
);
Refer to the Custom Layout documentation for detailed information. →
childrenwill be what is passed as a component for the route in a resource(list, edit..) or a custom route.
OffLayoutArea
The component wanted to be placed out of the app layout structure can be set by passing to the OffLayoutArea prop.
import { Refine } from "@pankod/refine-core";
import { BackTop } from "@pankod/refine-antd";

const App: React.FC = () => (
    <Refine
        ...
        OffLayoutArea={() => <BackTop />}
    />
);
Title
The app title can be set by passing the Title property.
const CustomTitle = ({ collapsed }) => (
    <div>{collapsed ? "Collapsed Title" : "Full Title"}</div>
);

const App: React.FC = () => (
    <Refine
        ...
        Title={CustomTitle}
    />
);
API Reference
Properties
dataProviderrouterProviderresourcesnamelistcreateeditshowcanDeleteiconoptionslabelroutedataProviderNamehideauthProvideri18nProvideraccessControlProviderliveProvidernotificationProvideroptionsbreadcrumbmutationModeundoableTimeoutsyncWithLocationwarnWhenUnsavedChangesliveModedisableTelemetryredirectreactQueryclientConfigdevtoolConfigonLiveEventcatchAllLoginPageDashboardPageReadyPageSiderFooterHeaderLayoutOffLayoutAreaTitle- API Reference
- Properties